
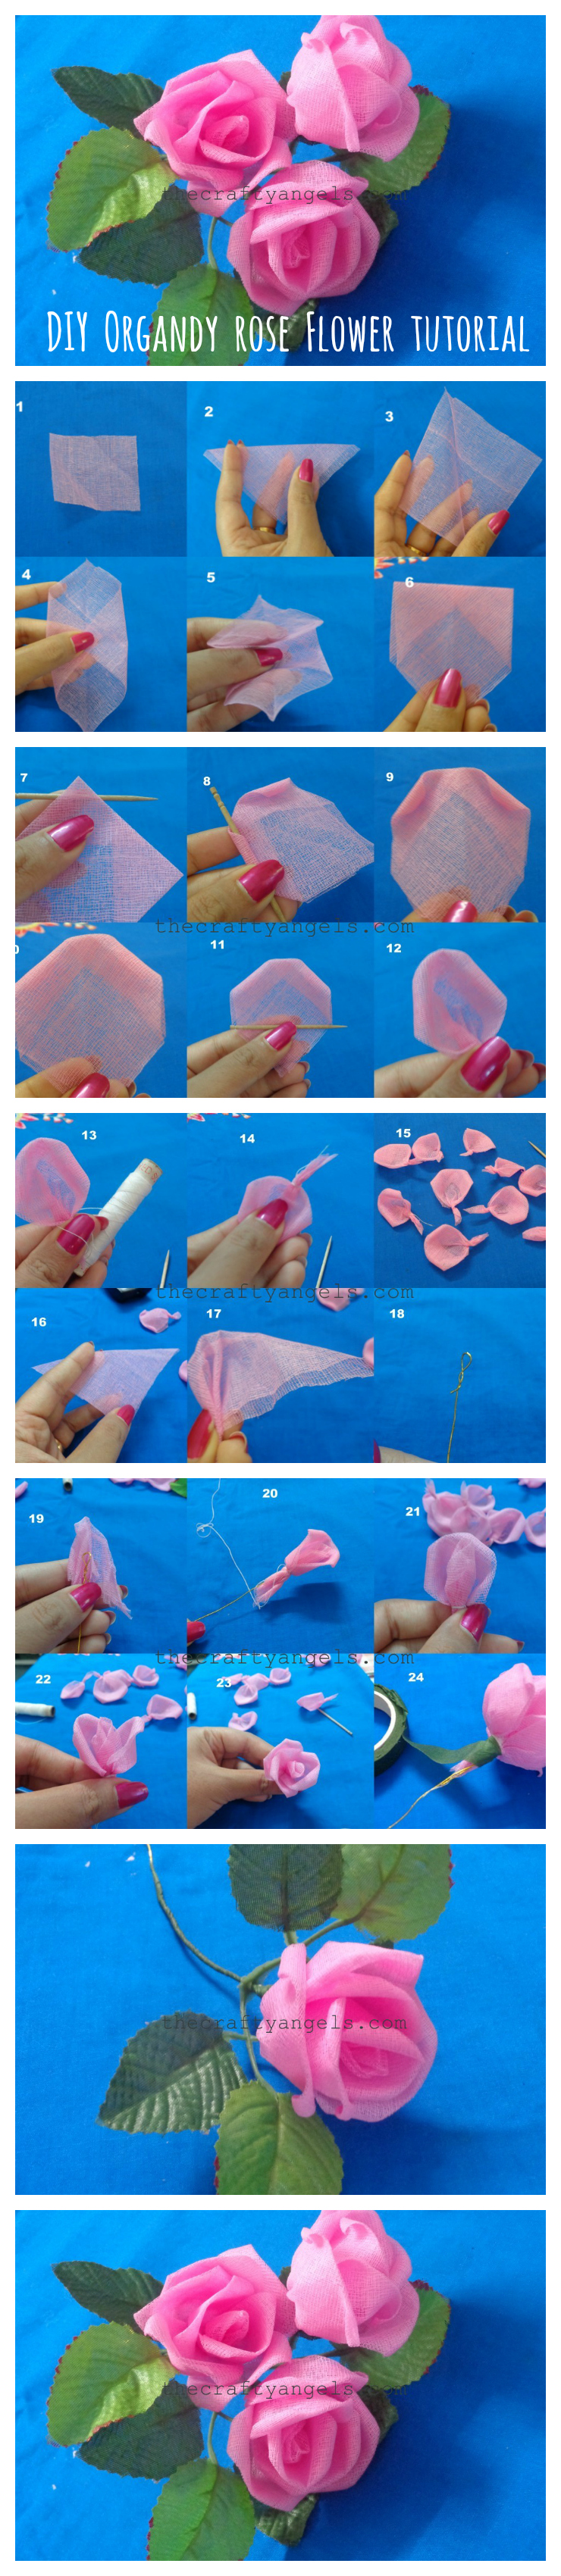
Organdy Rose Flower making DIY Tutorial #1
DIY step by step organdy rose flower making tutorial. You can use them for flower vase or a wall hanging or wedding flower bouquet or even a hair accessory
I’m so excited to write my first post for the crafty angels 🙂 and when I thought about the perfect start to this blog, I couldn’t think of anyone more perfect than my mum from whom I have been inspired all my life. So here is a mommy special elegant but easy step-by-step DIY organdy rose flower making tutorial. My mum has been making these organdy roses from when I was a kid and our house is filled with them in vases n over photo frames but I cant get enough of it. Feel like wanting more and more of these rose flowers around 🙂
[irp posts=”4919″ name=”No Sew Burlap Rosette flower tutorial”]
So lets get started..
Things you will need for organdy rose flower making :
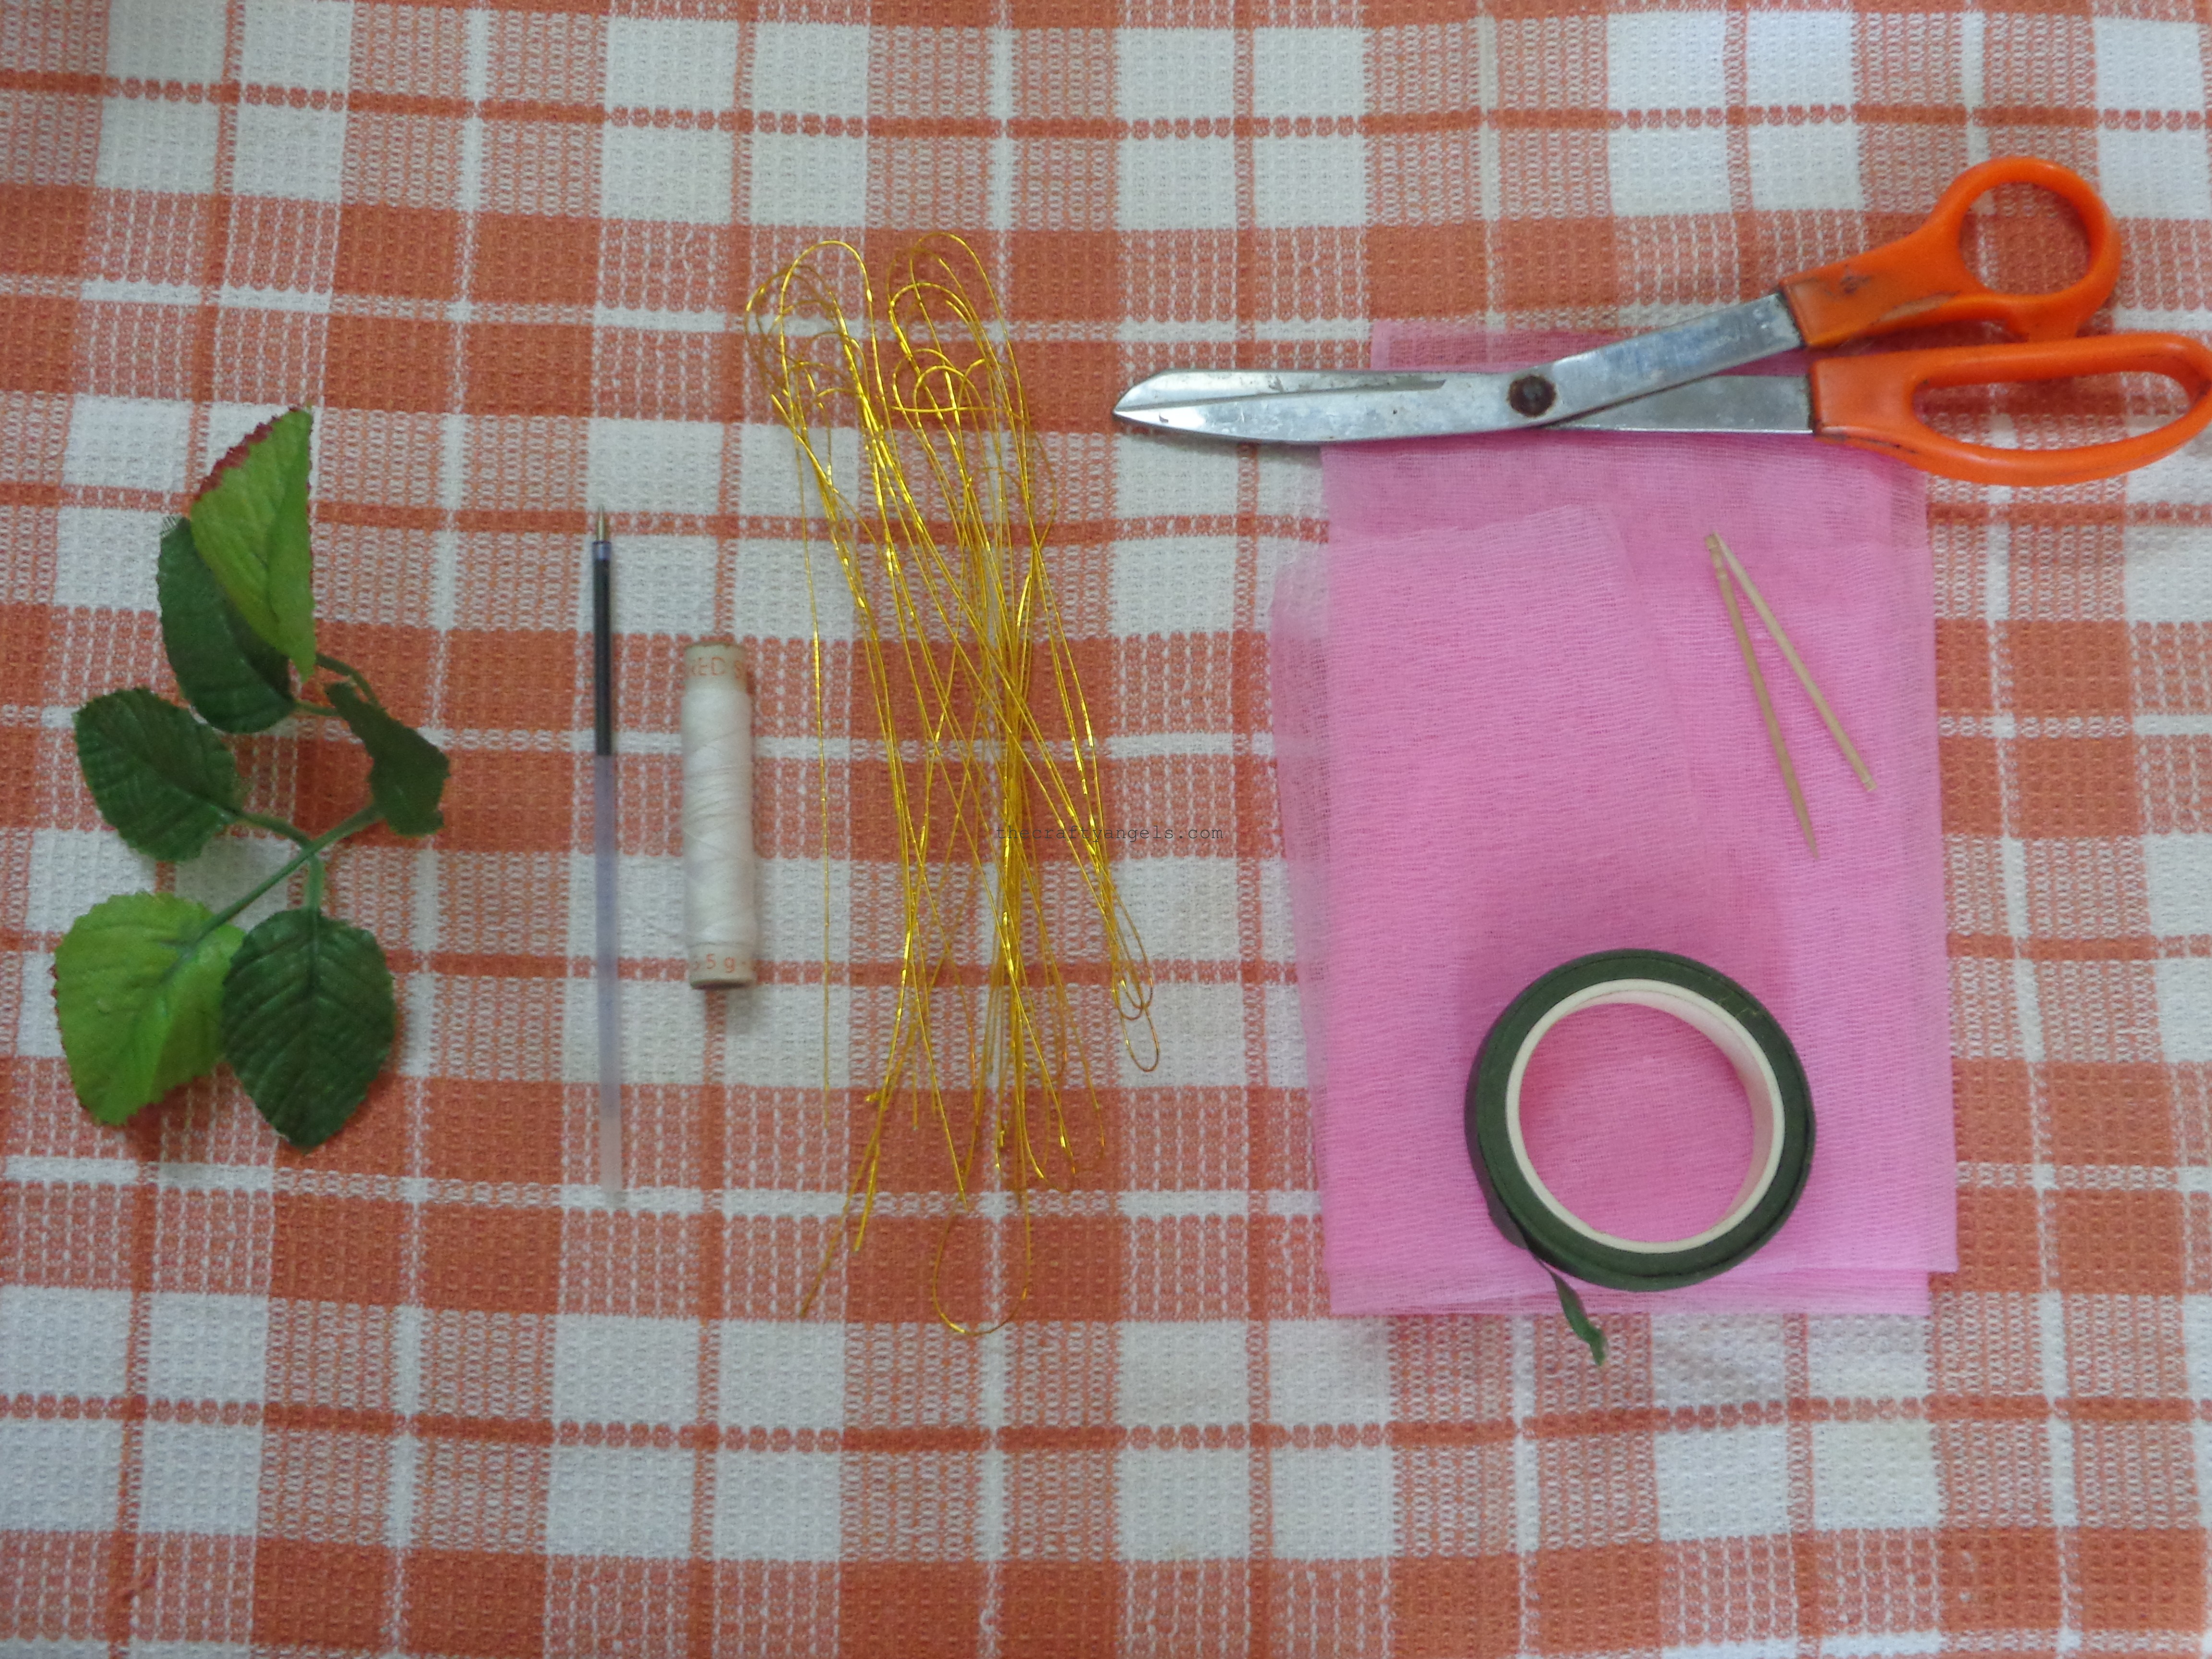
- organdy cloth
- scissors
- flower tape
- artificial leaves
- thread
- wire
- toothpick/pen refill
[irp posts=”1399″ name=”Easy Stocking Flower tutorial”]
Step-wise tutorial for making organdy rose flower making :
-
-
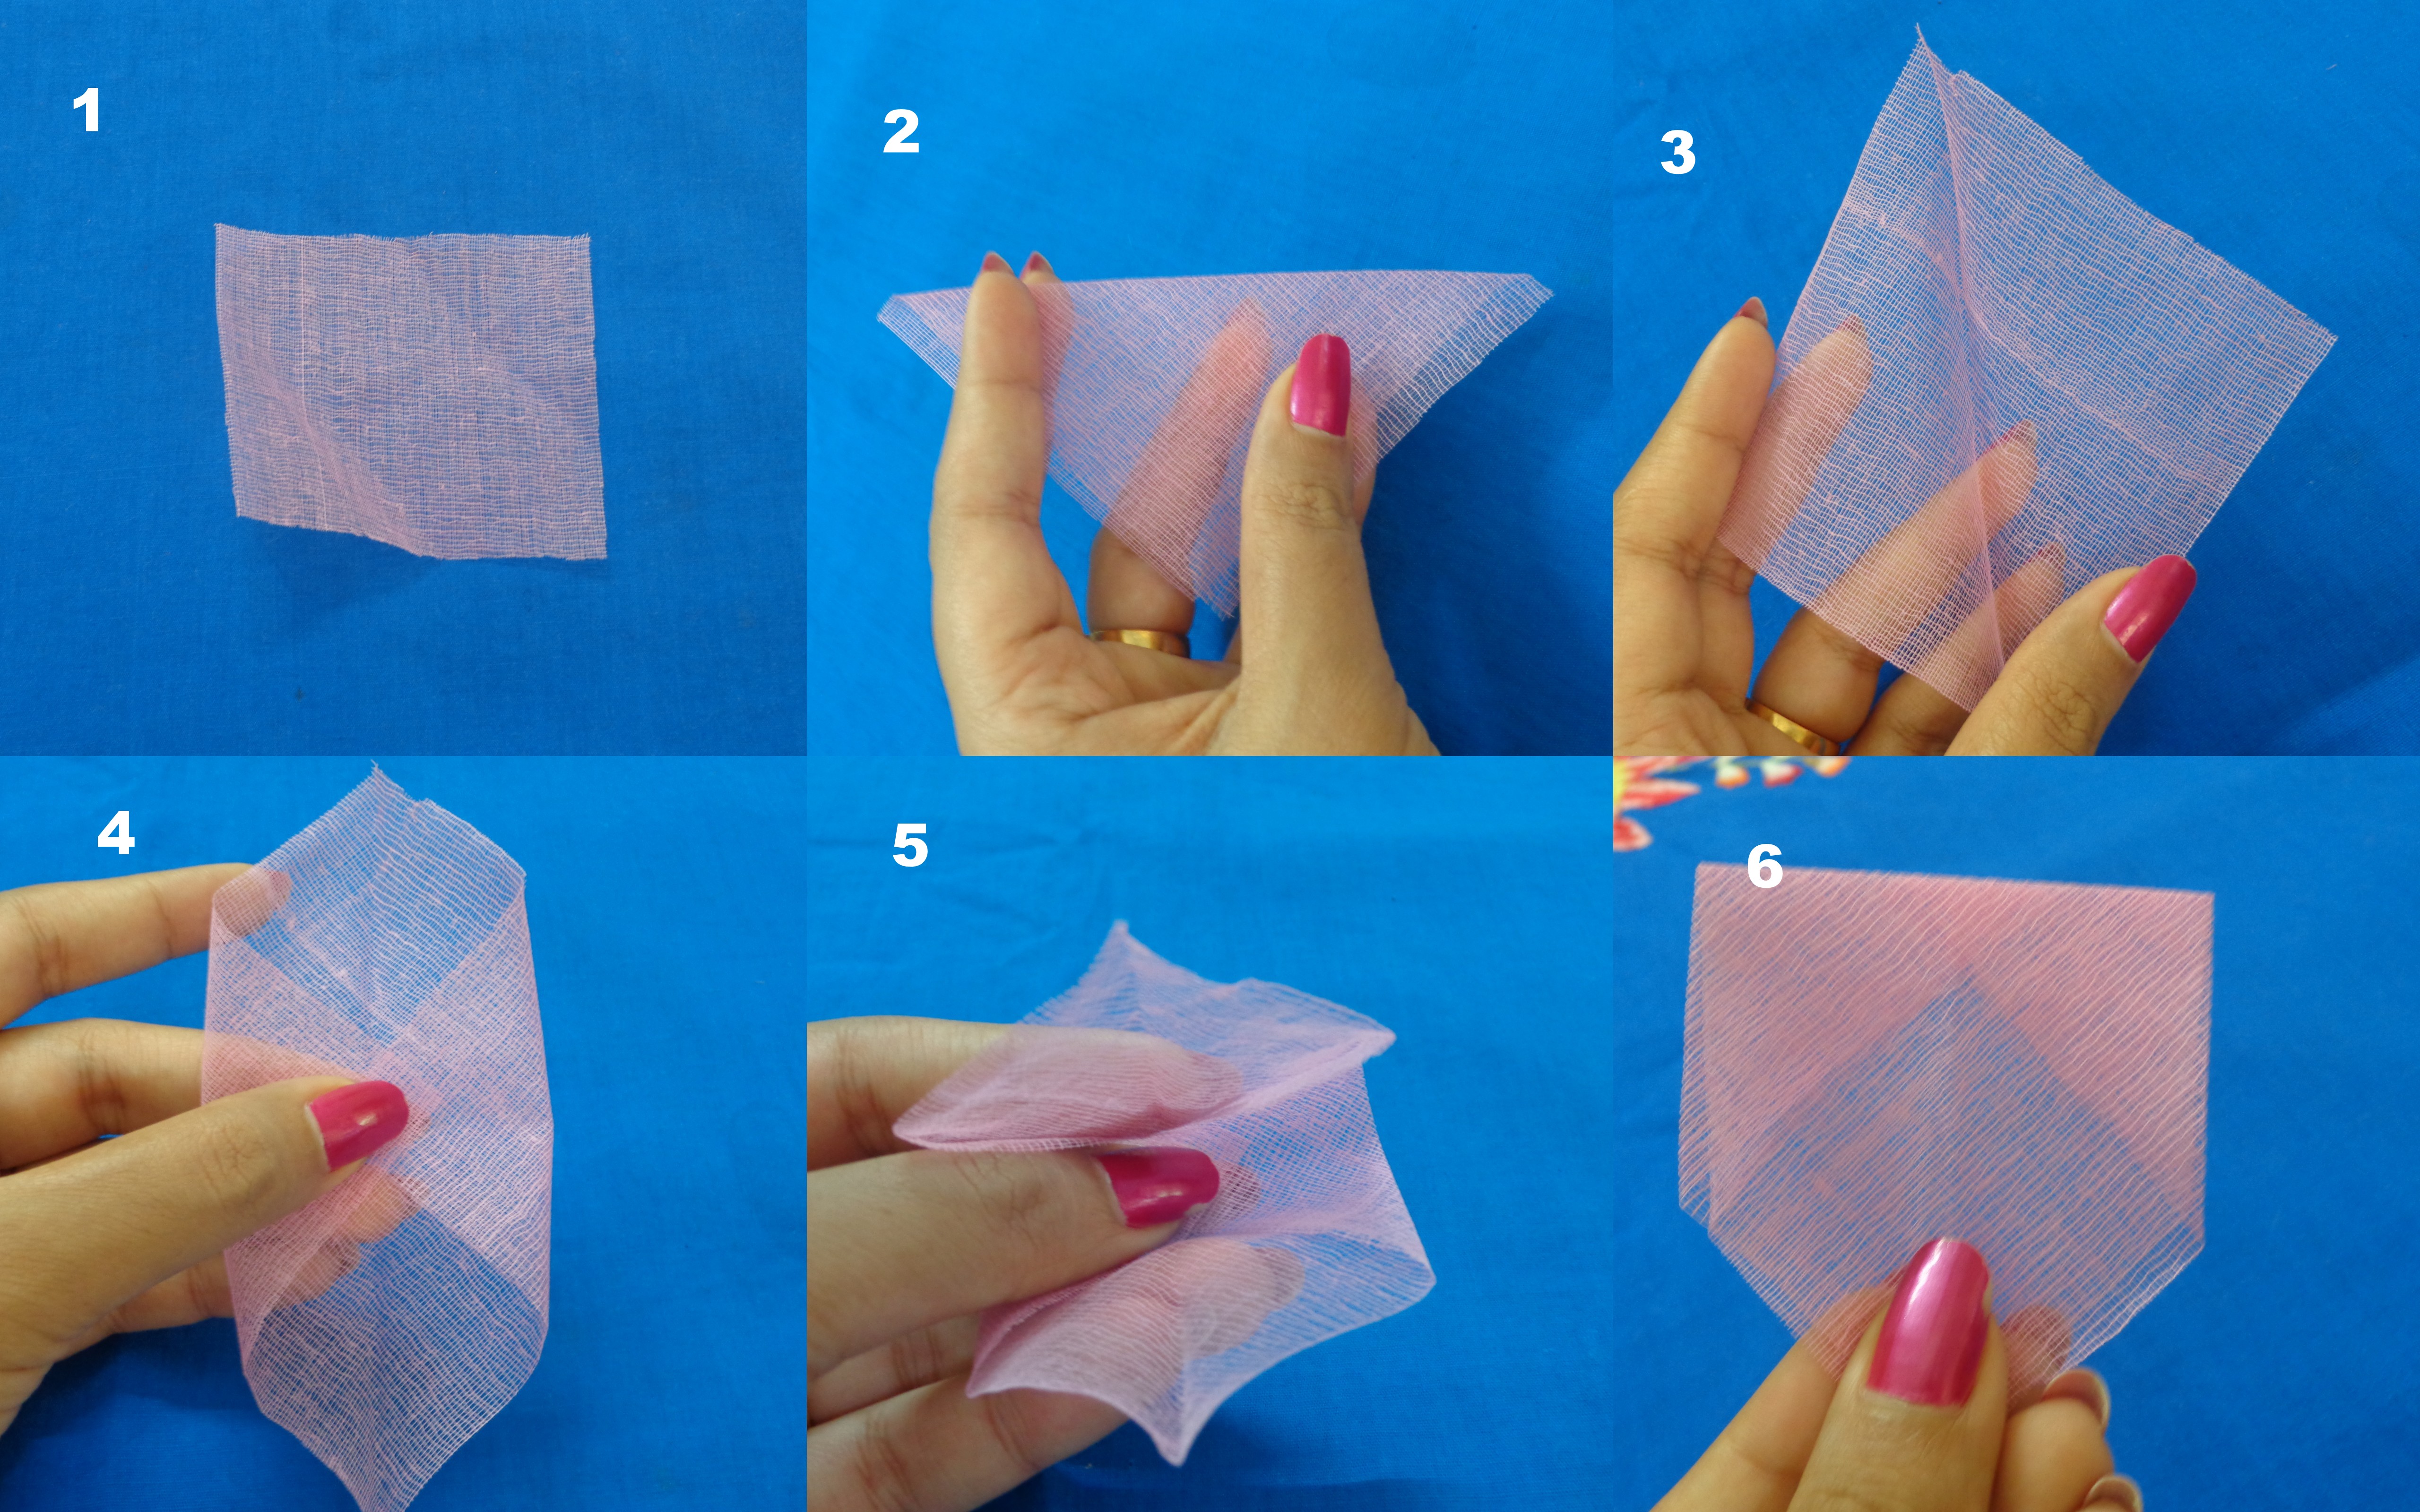
- Cut the organdy cloth into small square pieces approx. 3.5″ as in image 1. Your organdy rose flower size will depend upon the size of the pieces you cut and also on number of petals you add.
- Fold the piece diagonally to make a triangle and press along the crease to mark it as in image 2 & 3,
- Fold it again, but this time, the other two corners to the marked crease as in image 4.
- Fold this piece along the center line to create a shape as in image 6
-
-
-
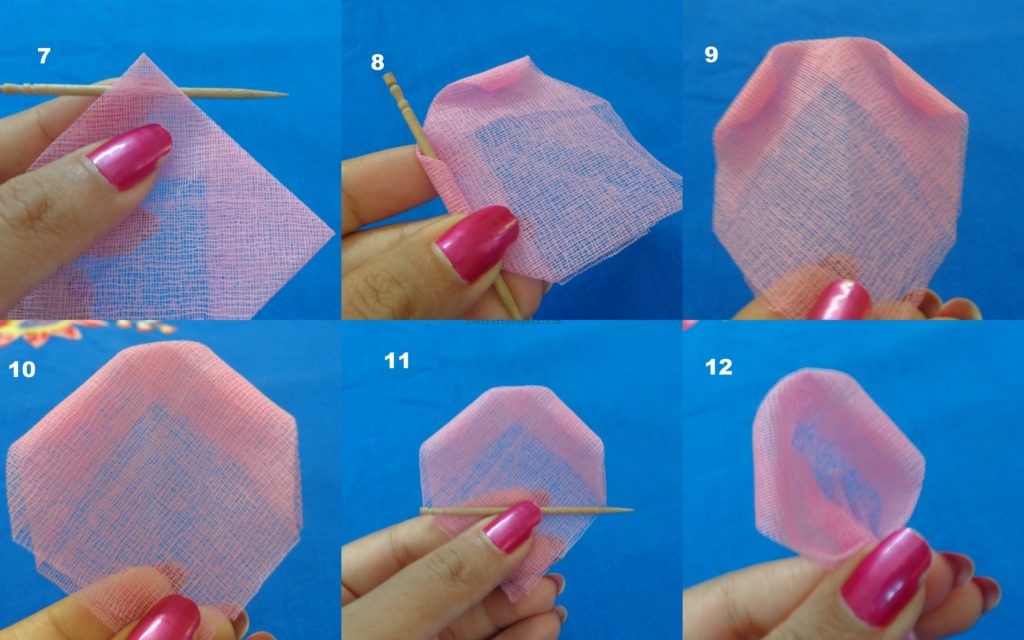
- Now to make a petal shape for the organdy rose flower out of it, make use of any thin stick/pen refill/toothpick to curl the two edges as shown in image 7 (I’ve used a toothpick here.)
- Your organdy rose flower petal will look like image 9 & 10 once you have finished curling.
- Next, simply gather the triangle end of your organdy rose flower petal as in image 12. Keep in mind that the area of petal below the toothpick marking in image 11 has to go in the gathers so that the cut edges aren’t visible in the petals.
- Use a thread to tie them up else you can simply twist around to keep them tight
-
-
-
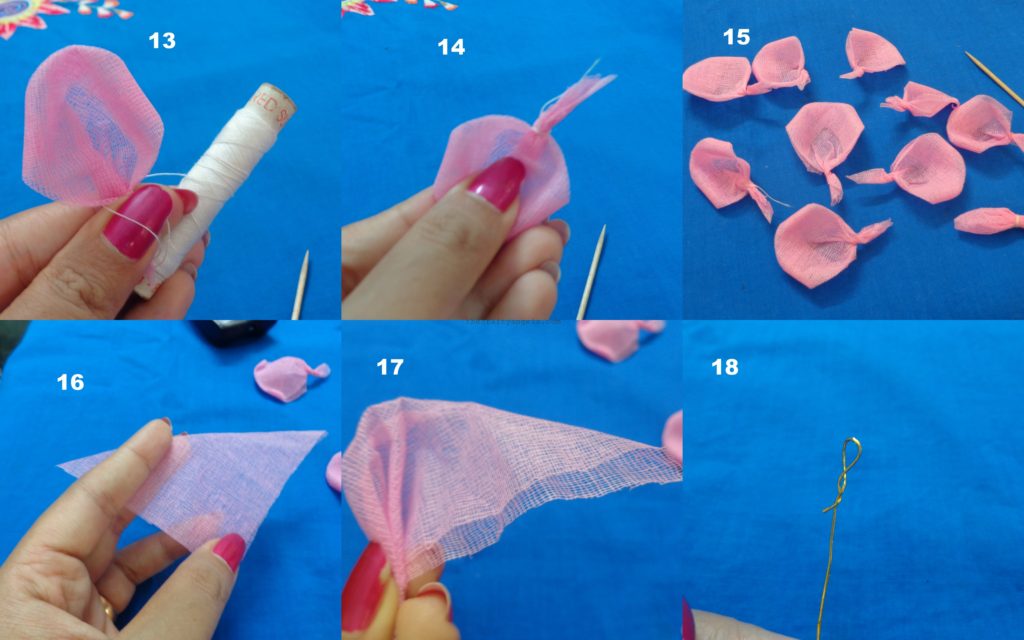
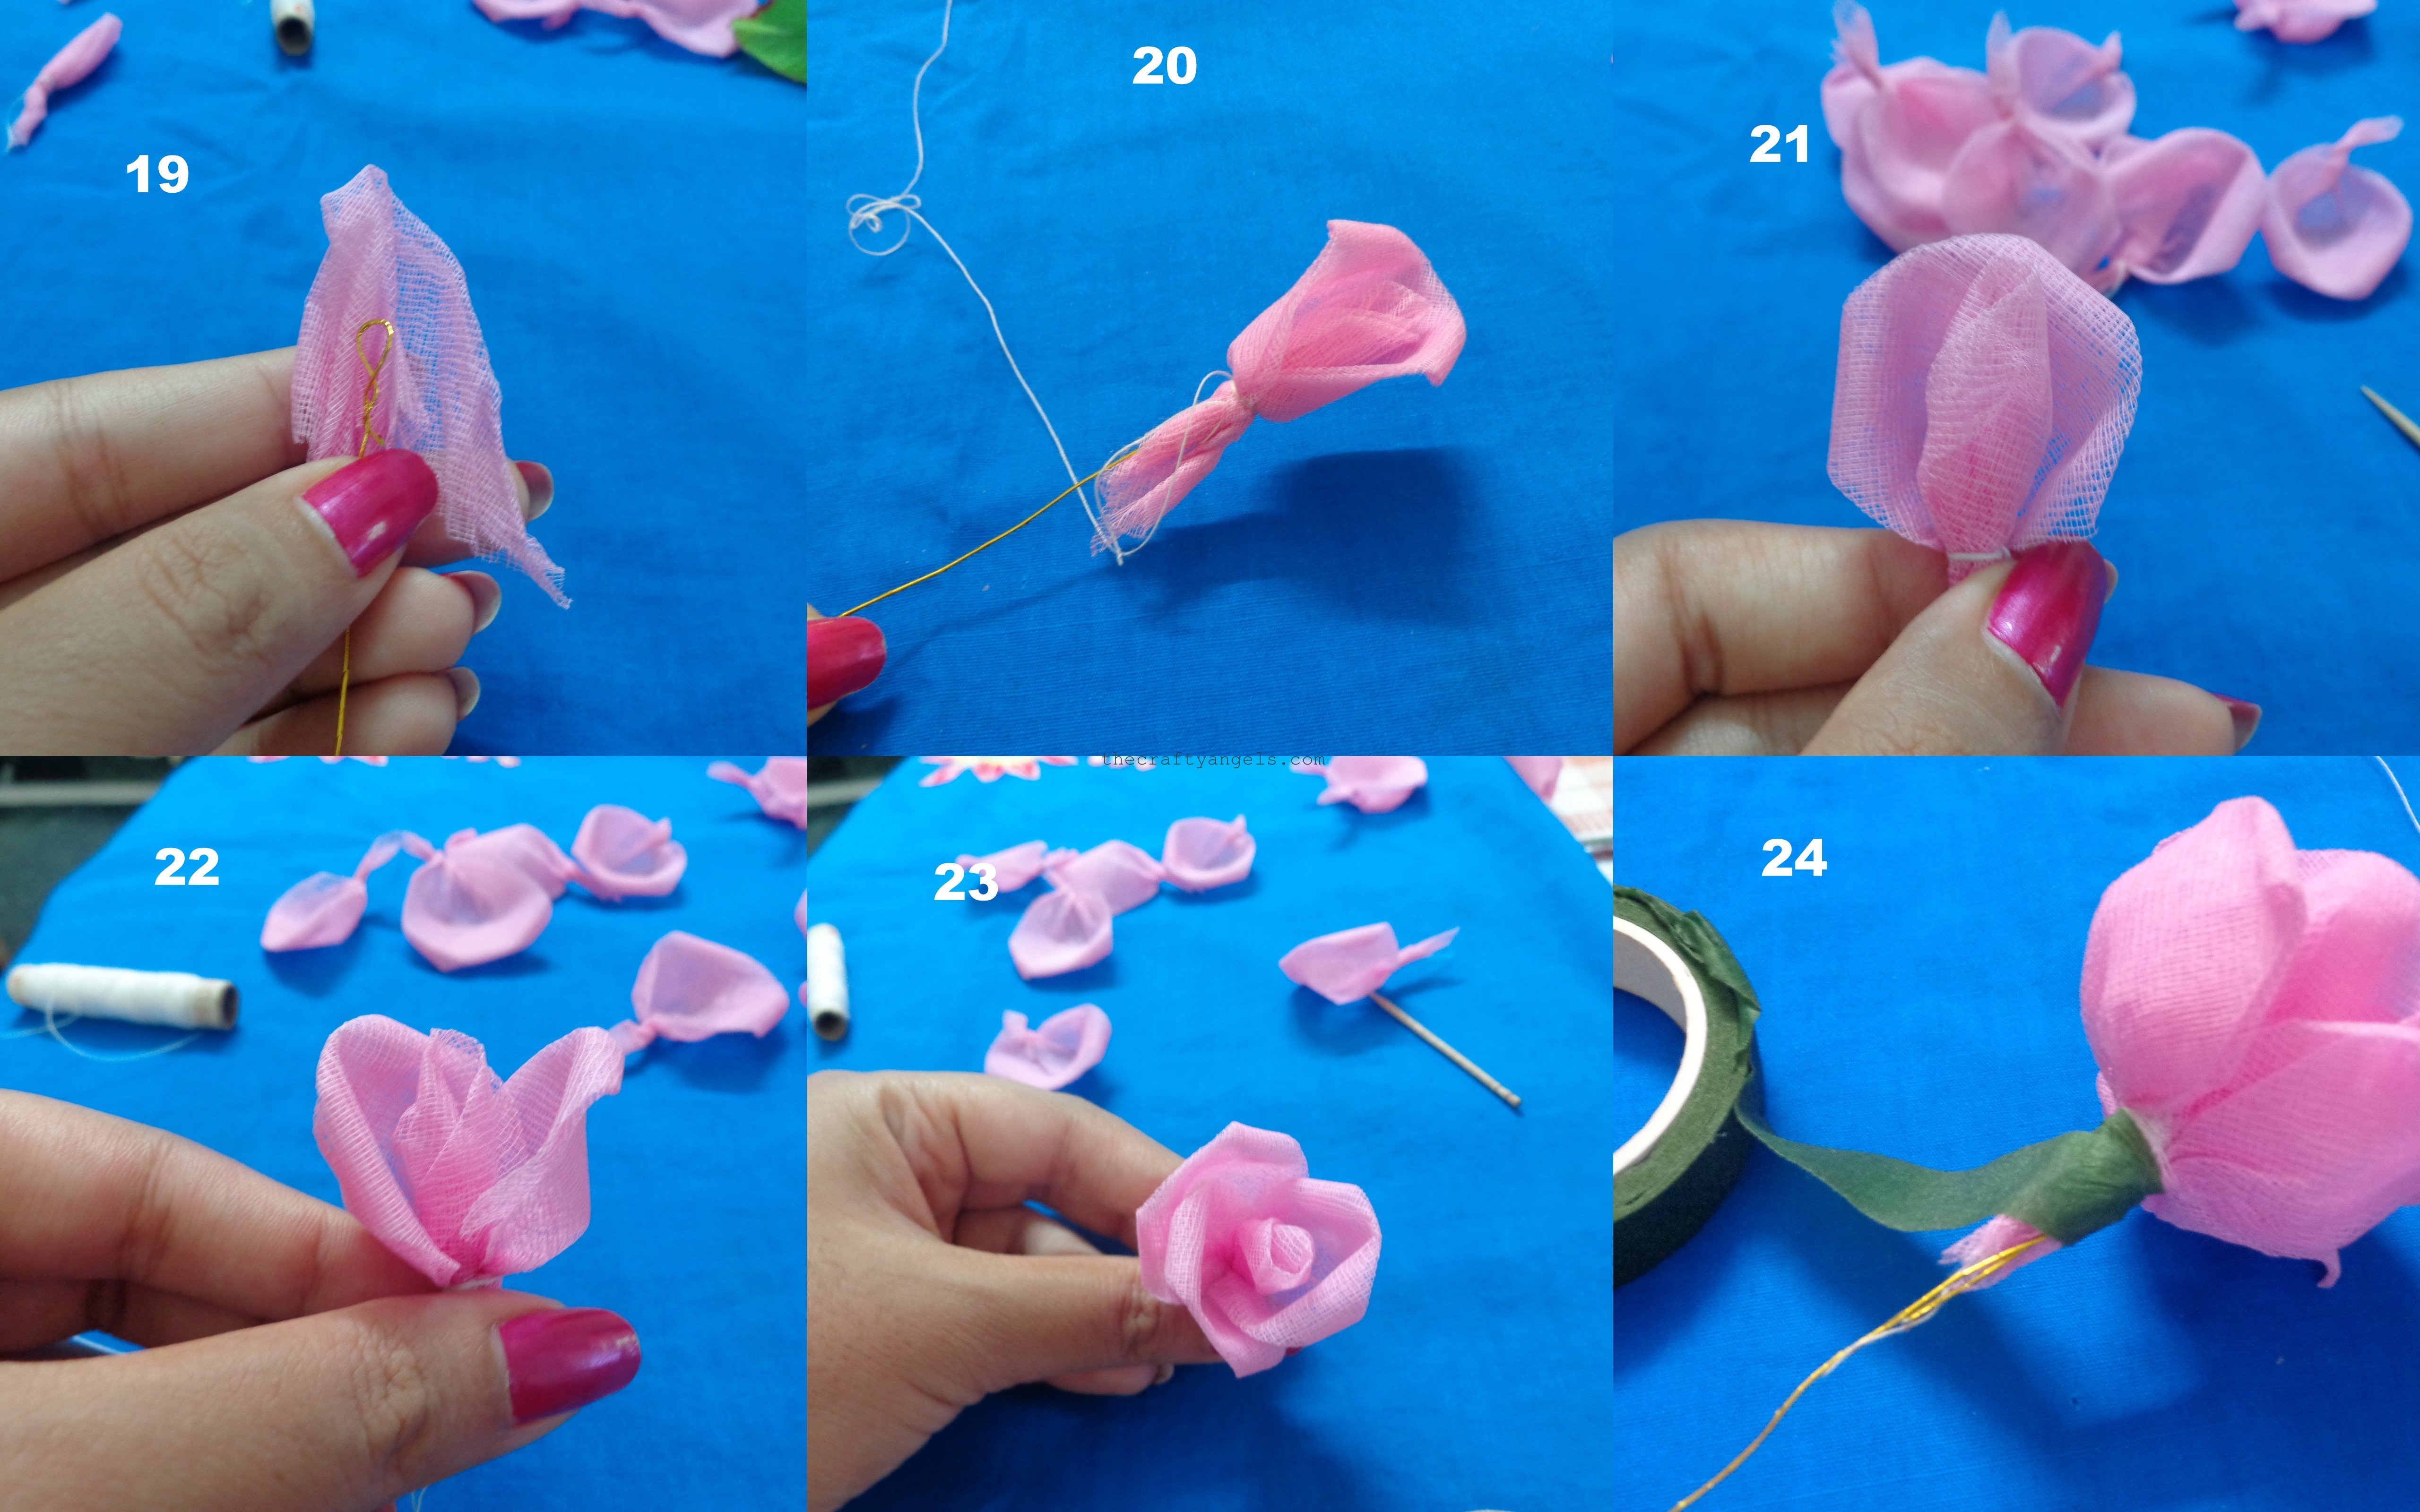
- As shown in image 14, with the help of your thumbs on the petal side opposite to the curls, try to bring a curvy shape to the petal.
- Now for the center bud of the organdy rose flower, use a flower making wire to make a small hook shape like in image 18
- Take your square piece, fold into a triangle, and simply gather the raw sides as in image 17.
-
-
-
- Place your hook within this piece and tie it up in such a way that the hook is tightly secured within the center bud of organdy rose flower.
- Now you can start arranging your petals around the bud, one over the other in a way such as to give it a flowery look 🙂
-
[irp posts=”355″ name=”How to make Tissue Paper Rose Flowers #8″]
-
-
- Make sure you put a knot after placing every petal and a tighter knot once all petals are done. Your organdy rose flower will look like as in image 23 when you keep adding
petals around.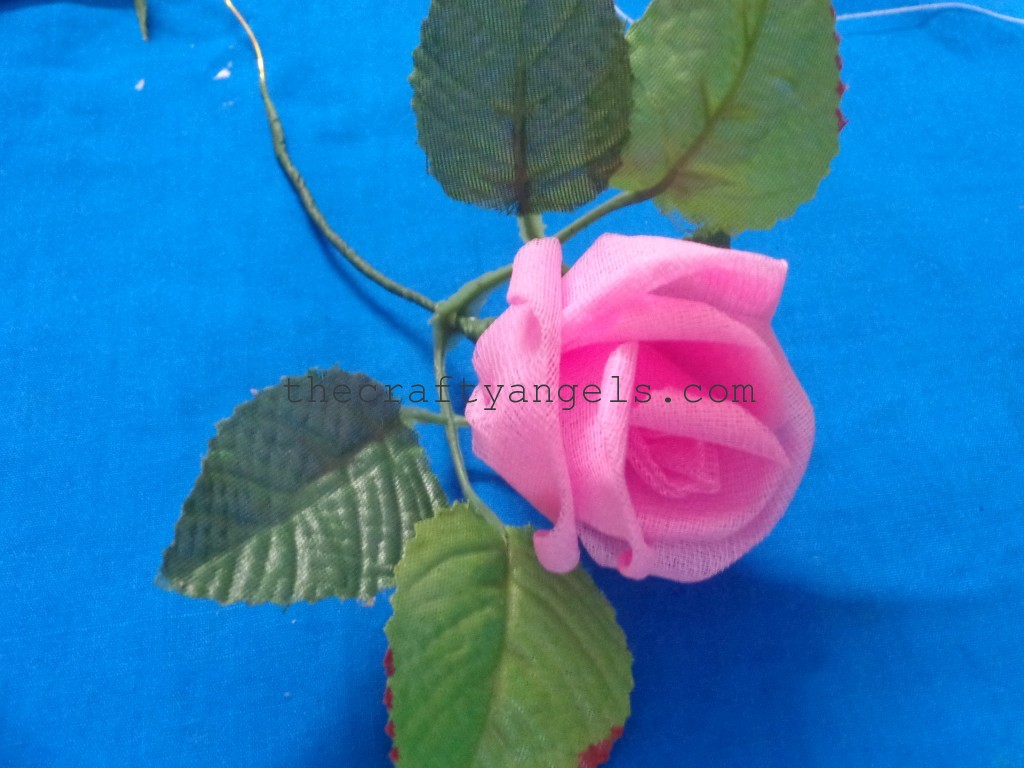
- Make sure you put a knot after placing every petal and a tighter knot once all petals are done. Your organdy rose flower will look like as in image 23 when you keep adding
-
-
-
- Once the organdy rose flower part is over, start covering our stem area with the flower tape as in image 24. ( the flower tape has glue on itself so no need of applying any adhesive)
- and tada!!! your organdy rose flower is ready :). Here I have used ready-made artificial leaves for the rose.

-
Other flower making tutorials on this blog :
-
-
- Organdy rose flower making tutorial
- Rolled tissue paper rose flower tutorial
- Washi tape handmade flower tutorial
- Quilling comb quilled flower tutorial
- Tight quilled flower tutorial
- Gerbera flower tutorial
- Beehive quilled flower tutorial
- Stocking flower tutorial
- Quilling comb quilled flower2
- Easy crepe paper flower tutorial
- Kanzhasi ribbon flower tutorial
- Crepe paper rolled flower tutorial
-
How to use organdy rose flower – IDEAS!
Well my mummy made them for this beautiful Holy Family picture at our home 🙂 ( flower pips have been used in the center for few of these flowers)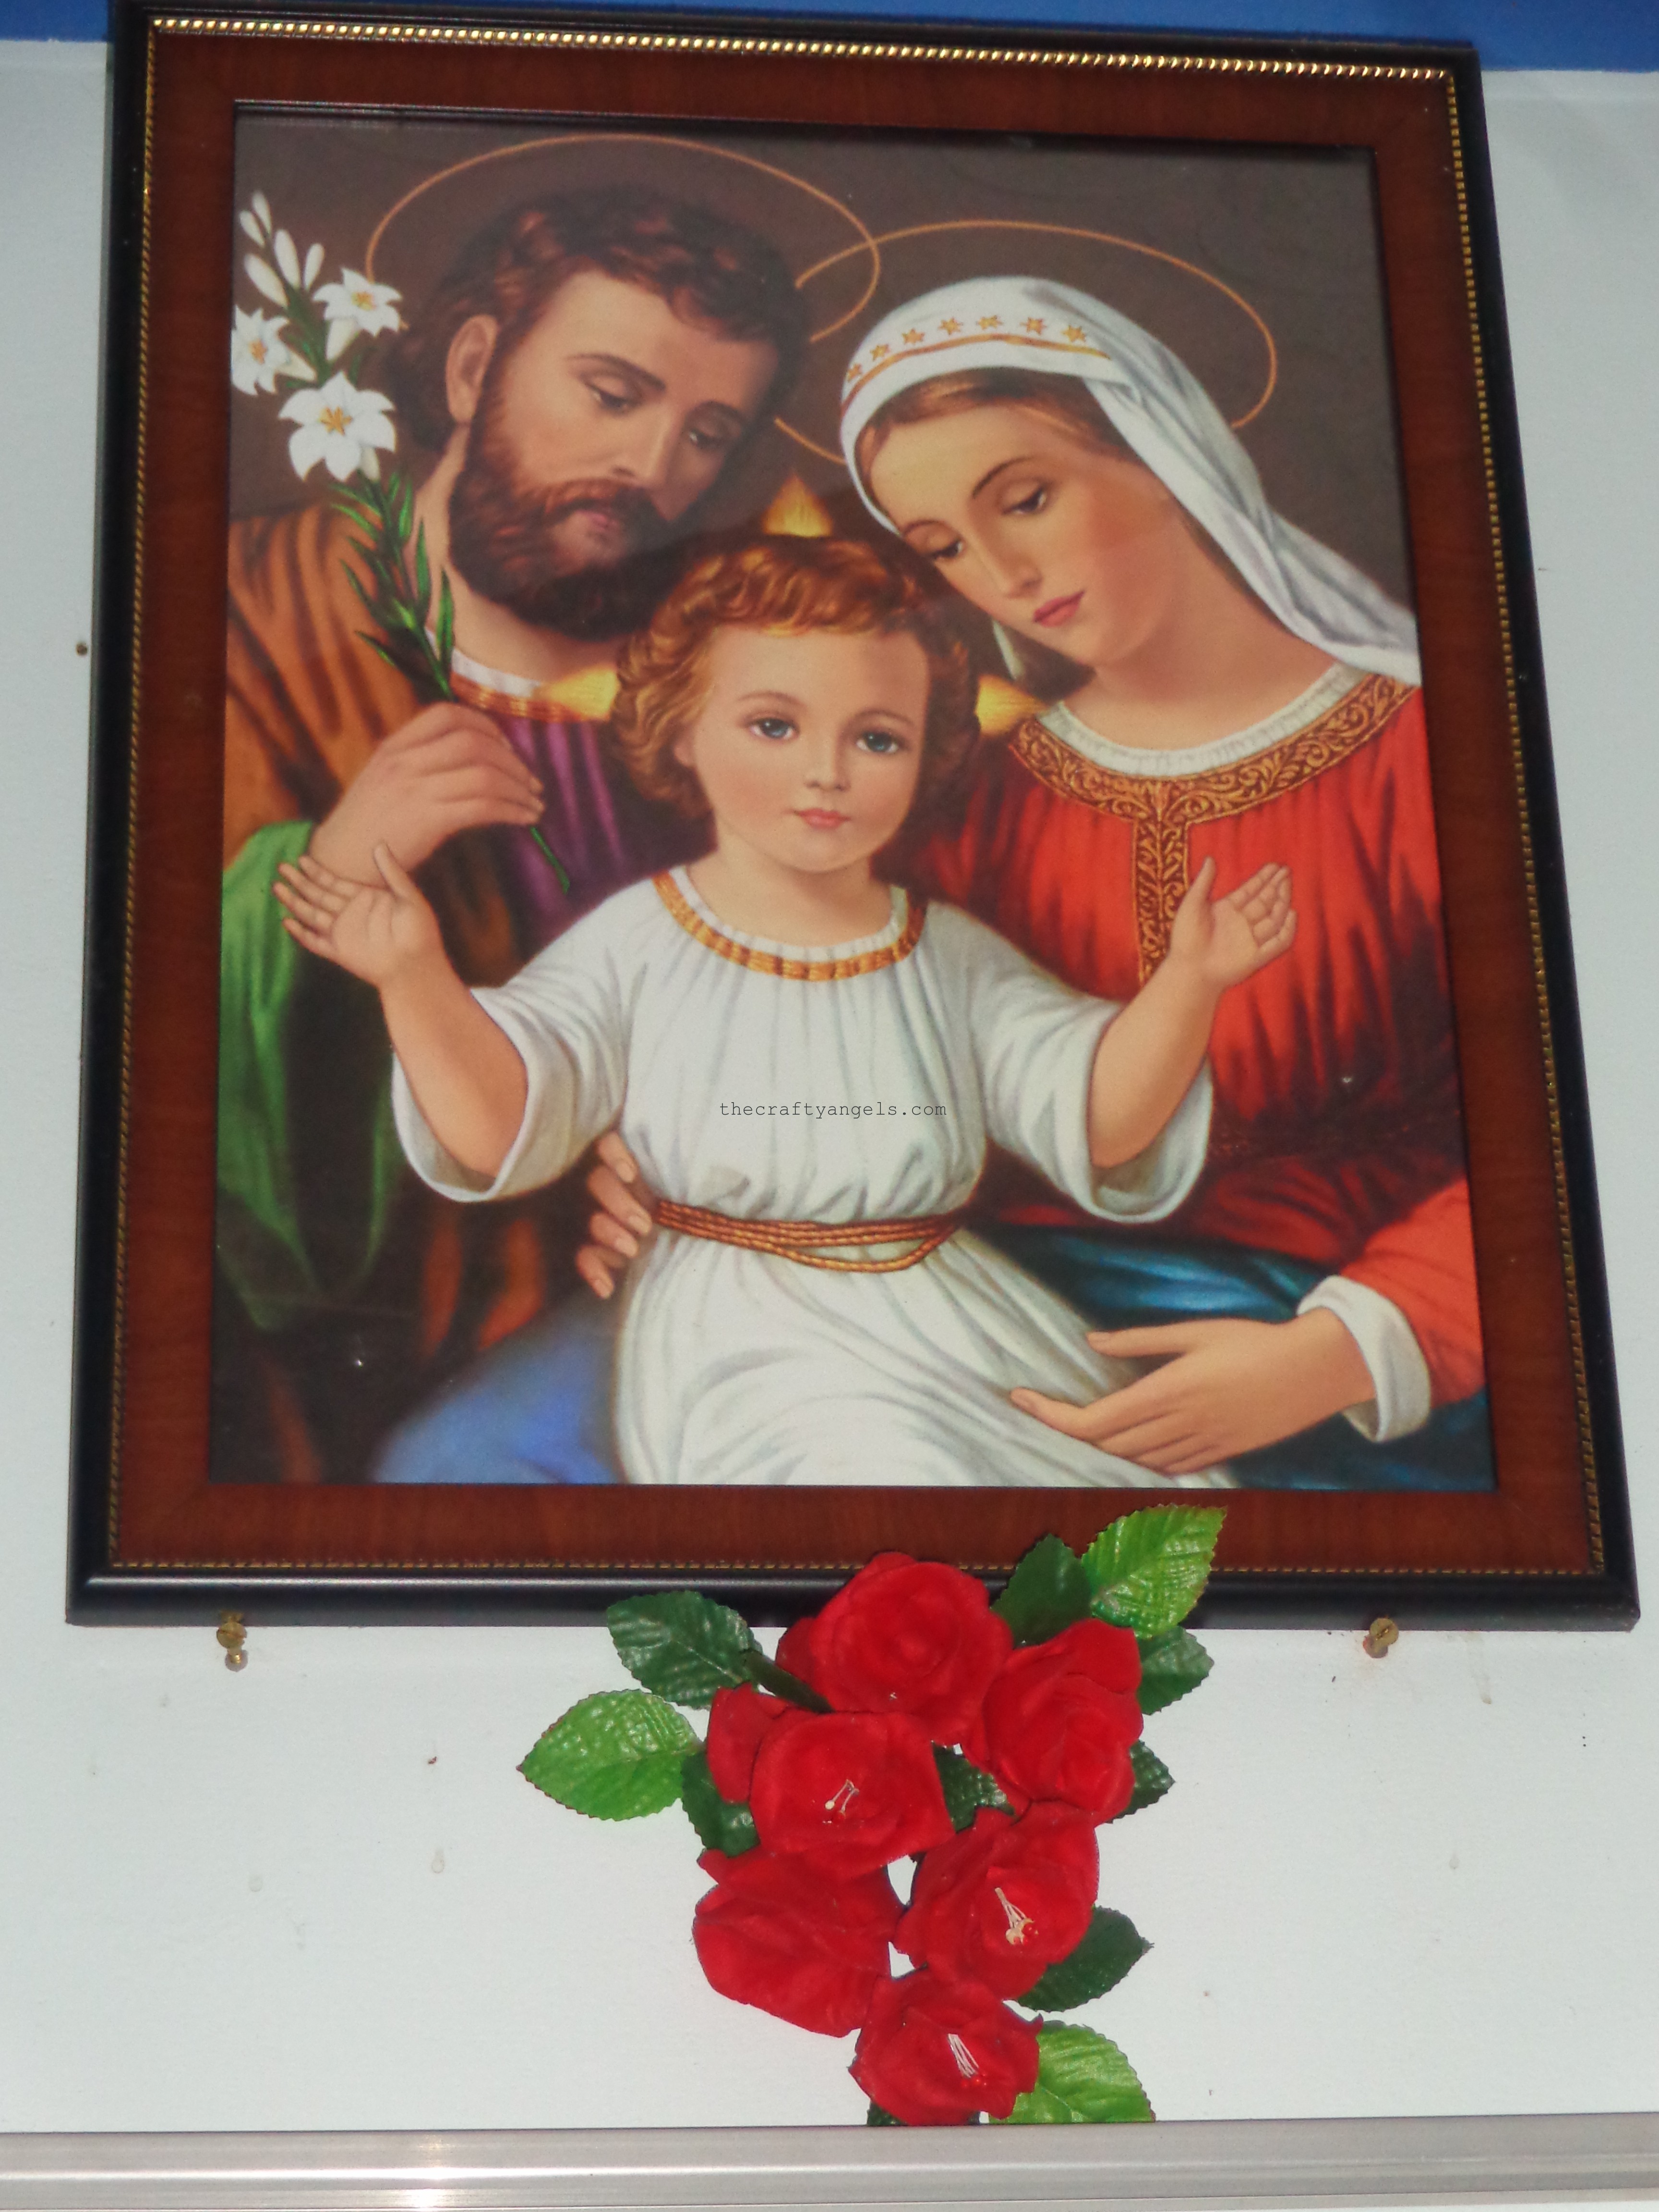
You can also
-
-
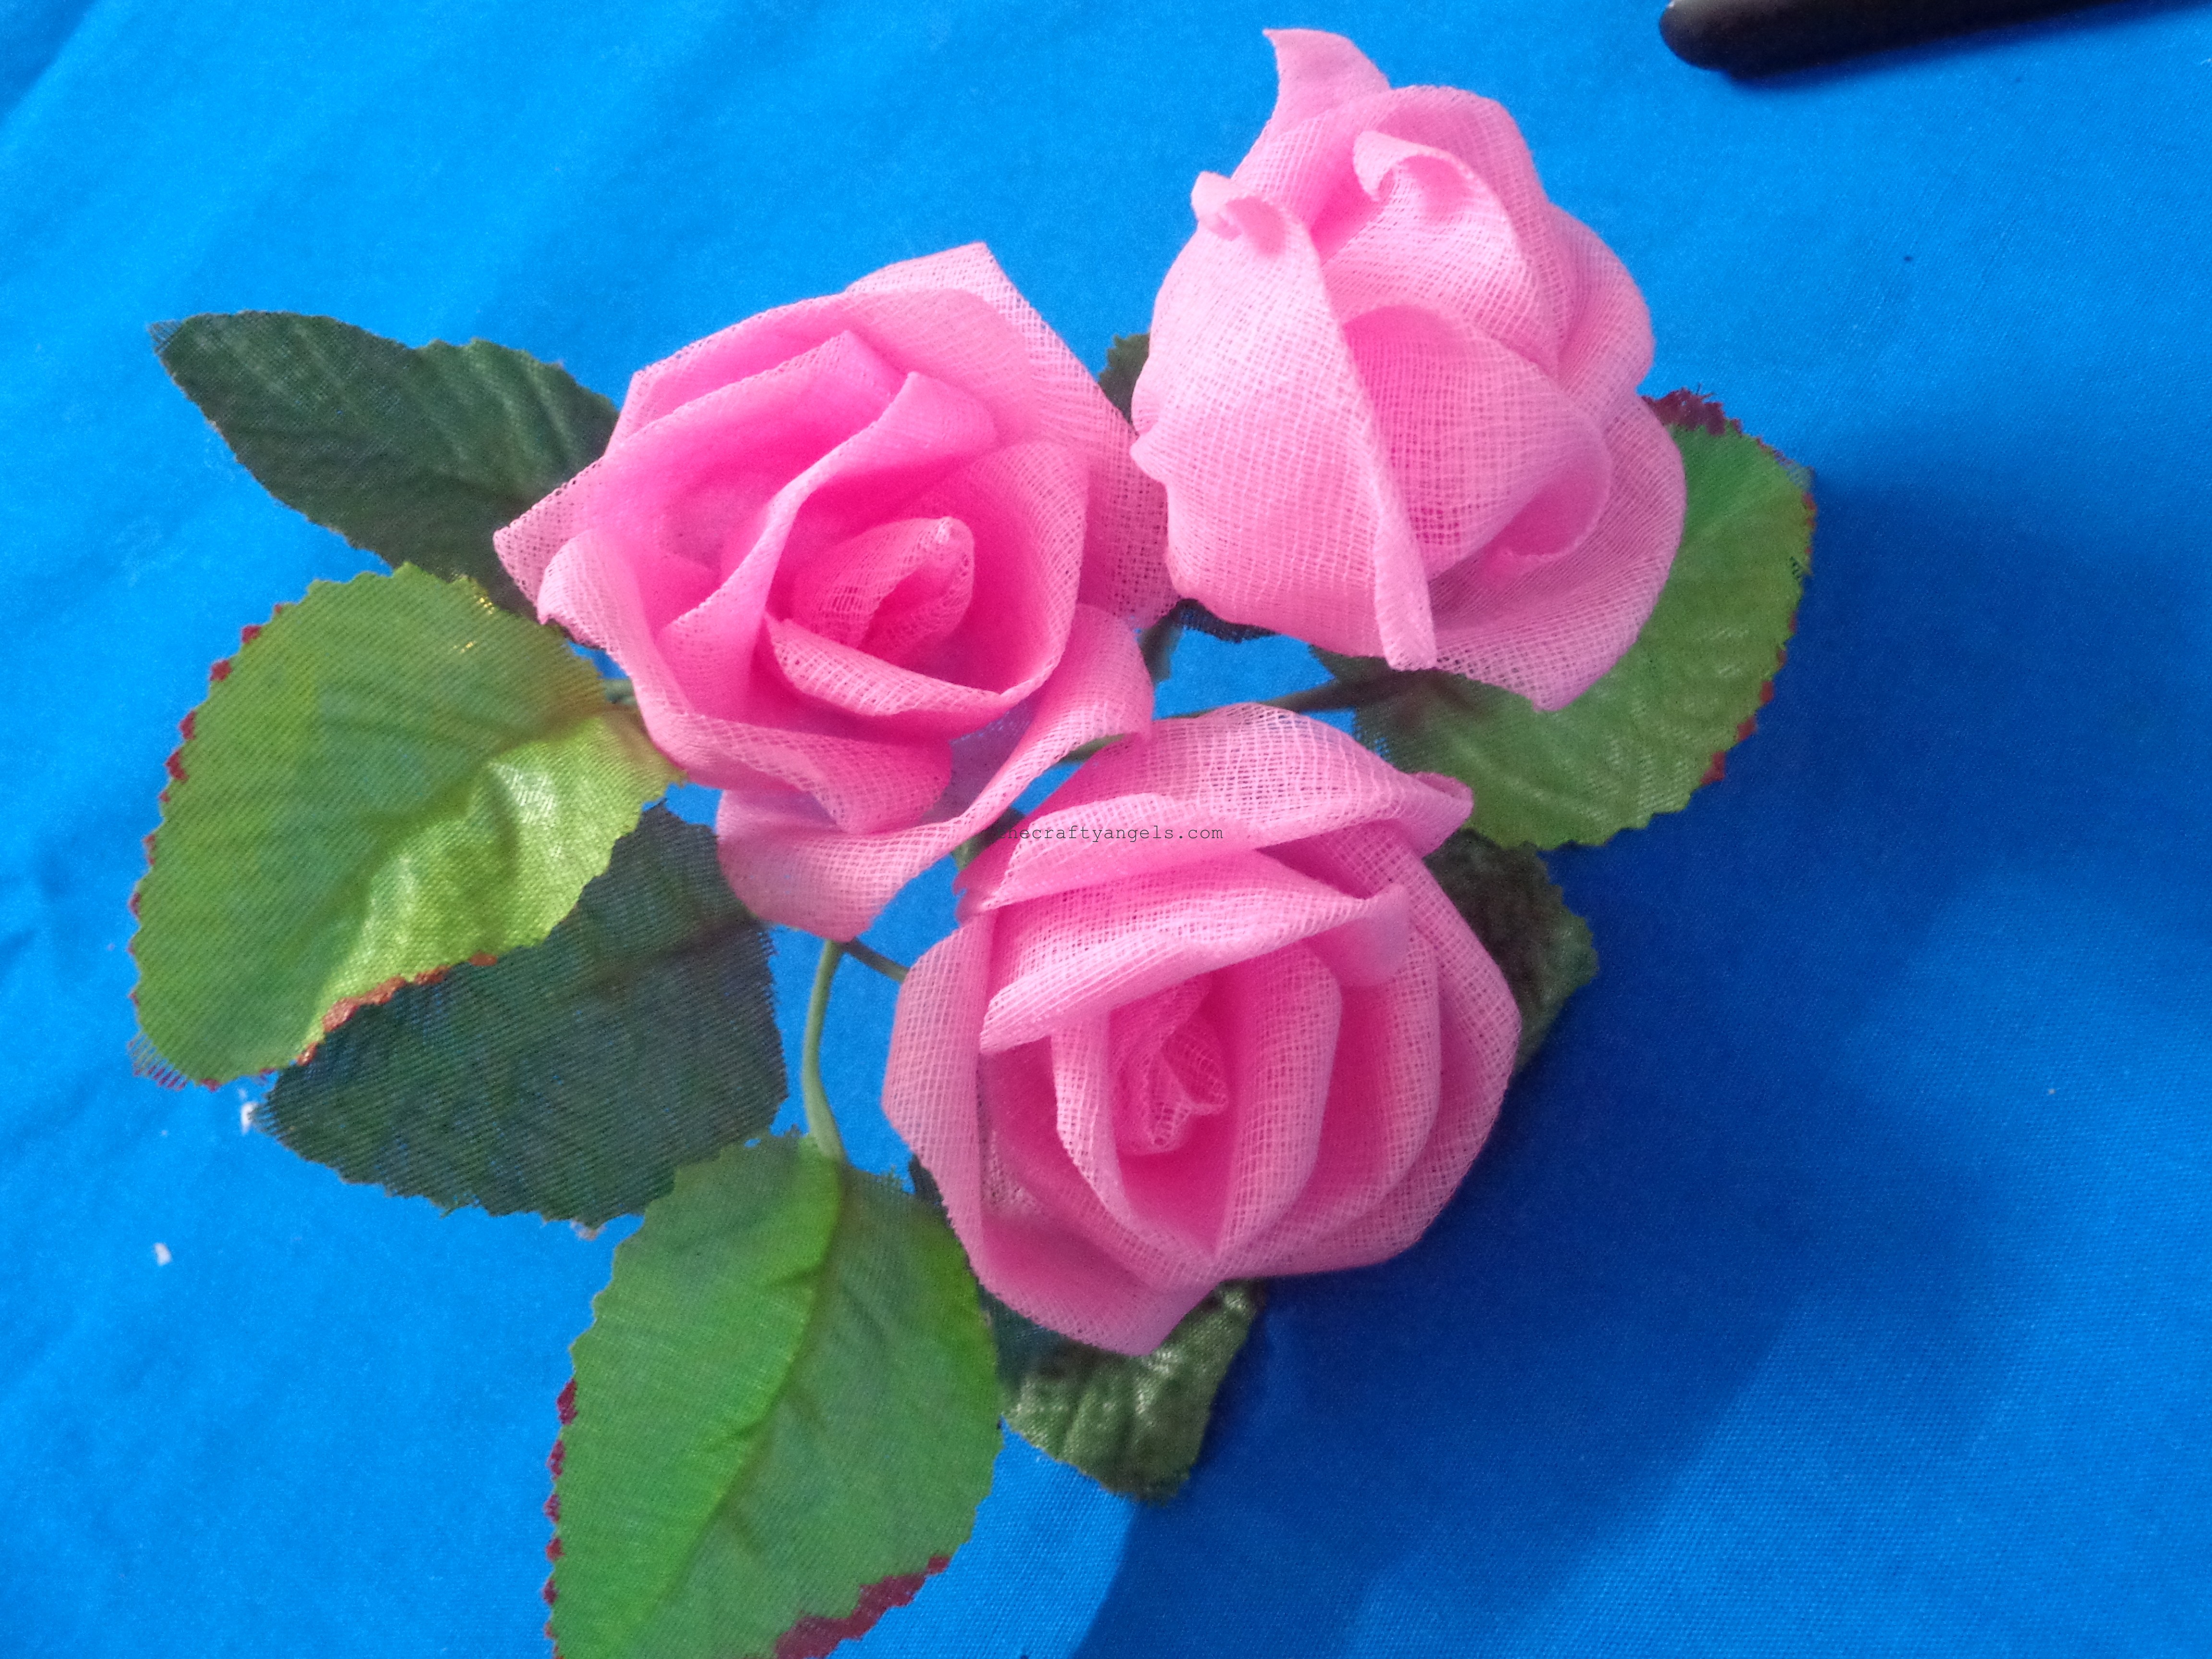
- Bunch these organdy rose flowers to arrange them in a bottle vase or shallow vase along with other flowers
- Use them as wall hanging around or below photo frames like above.
- Turn them into a DIY wedding flower bouquet.
- Attach them to hair accessories like a hair comb or hair band.
-
Did you like this tutorial on organdy rose flower making? If you did like it, do hit the like button and also share it with your friends. If you have similar ideas on organdy roses or if you have tried out this tutorial, do e-mail us and share you joy 🙂 We shall be more than happy to feature your works in our blog.


Very nice.
Thanks dear 🙂 Hope you found the tutorial useful 🙂
very easy , nice & helpful tutorials.
Thankyou vaishali on leaving this really encouraging comment 🙂 WIll try to bring up more tutorials 🙂
I love this and im inspired very much from this we have to make for so thank you
Thanks i just created Rose with Organdy Cloth: https://youtu.be/O6T80WxqrtI
Wow thats nice. Love how the red roses are looking perfect ! glad the tutorial was helpful. You must make more videos 🙂
WOW! Just Awesome.