
Quilling Comb Flower Tutorial with Video
Quilling Comb Flower Tutorial
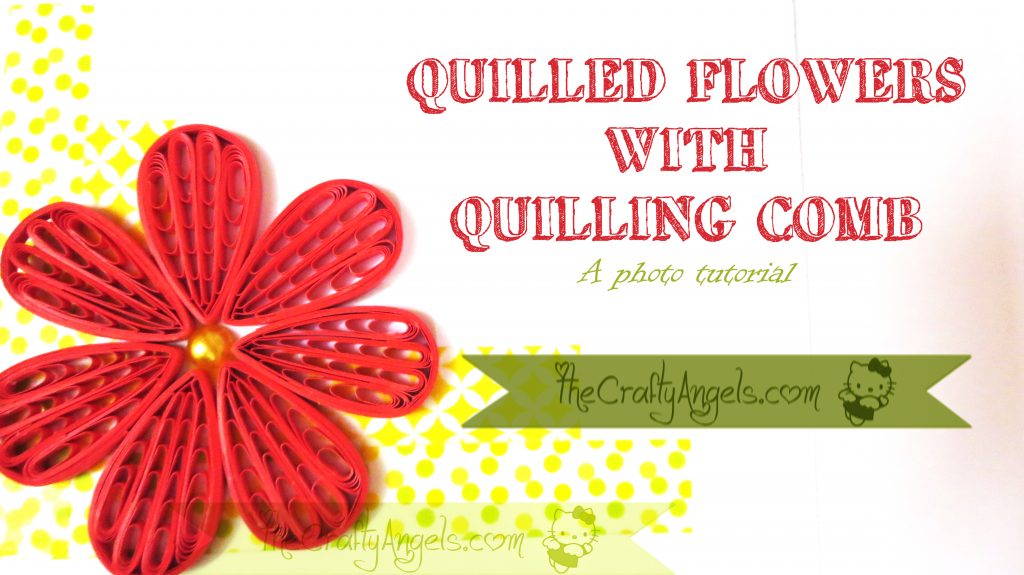 Someone had shared these very beautiful quilling comb flowers on facebook and I just loved how neat and simple it looked. She hadnt posted a tutorial and I was sure it was done with a quilling comb. In my previous post on All-about-quilling-tools (HERE), I was telling you guys how I had purchased a quilling comb and not yet done anything with it! Well when I saw this quilling comb flower on facebook, I immediately grabbed my quilling comb and tried the flower and the one petal was super easy! What grabbed my attention was how different the quilling comb flower looked altogether unlike the loose coil flowers of different shapes.
Materials required to make Quilling comb flower
- Quilling comb
- Quilling strips
- Glue
- Embellishment to fill the center part of flower
Step by Step Tutorial to make quilling comb flower
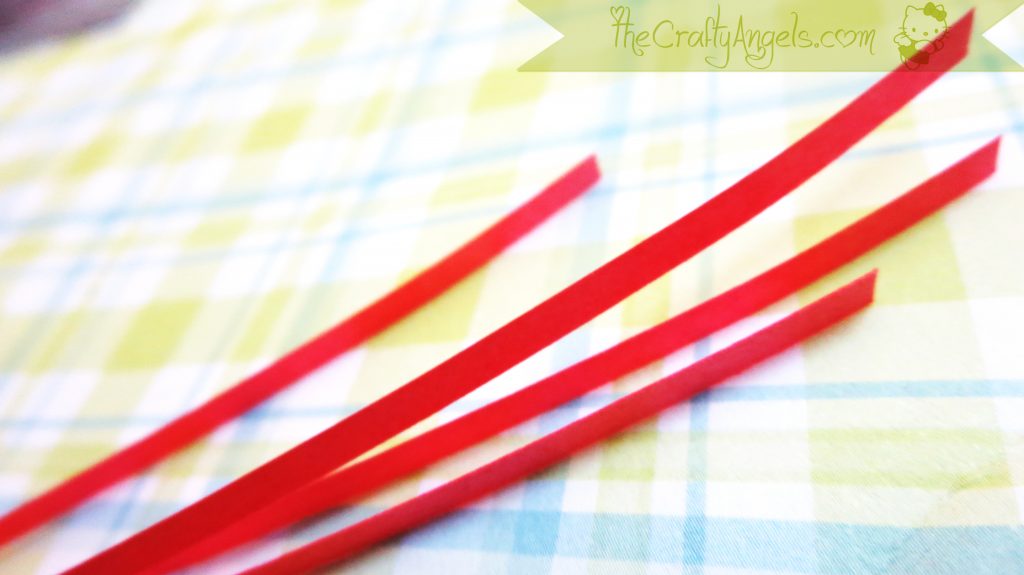
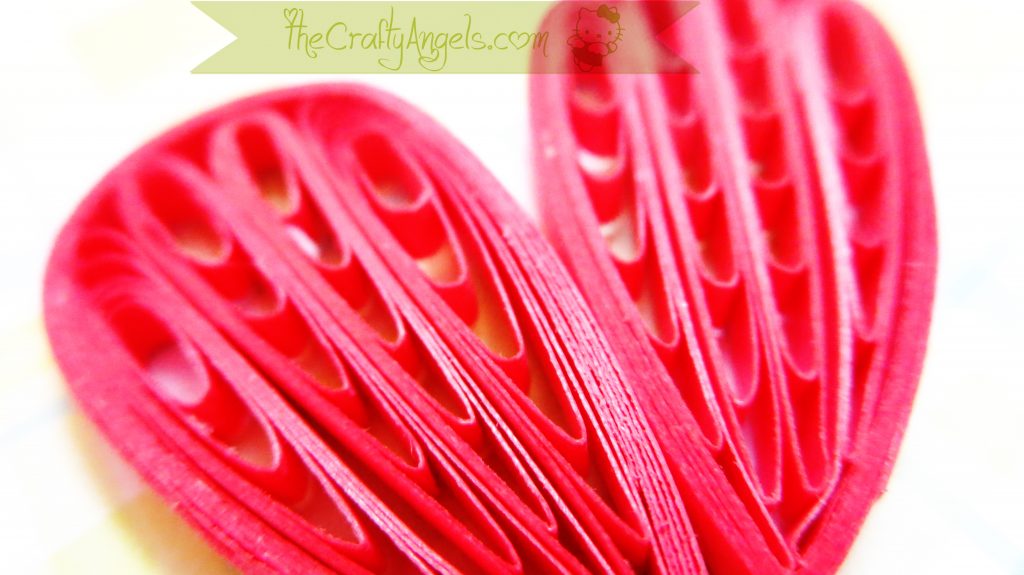
This quilling comb flower is very simple but a little time consuming one but trust me the efforts are worth the final outcome 🙂 For the length of quilling strip to be used, I suggest you try with a random strip to check what length will give you what sized petal because this is totally dependent on the size and spacing of your quilling comb.
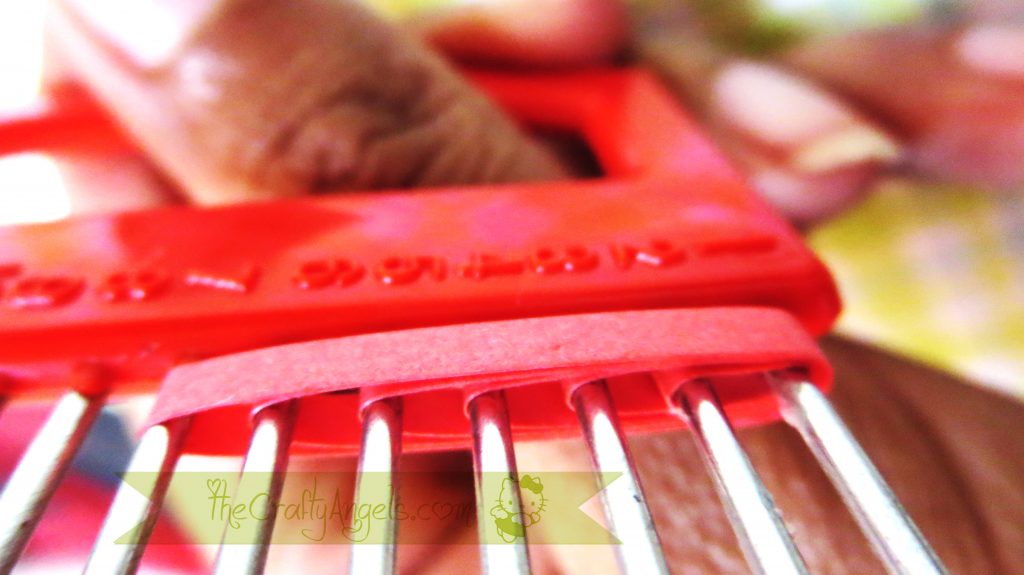
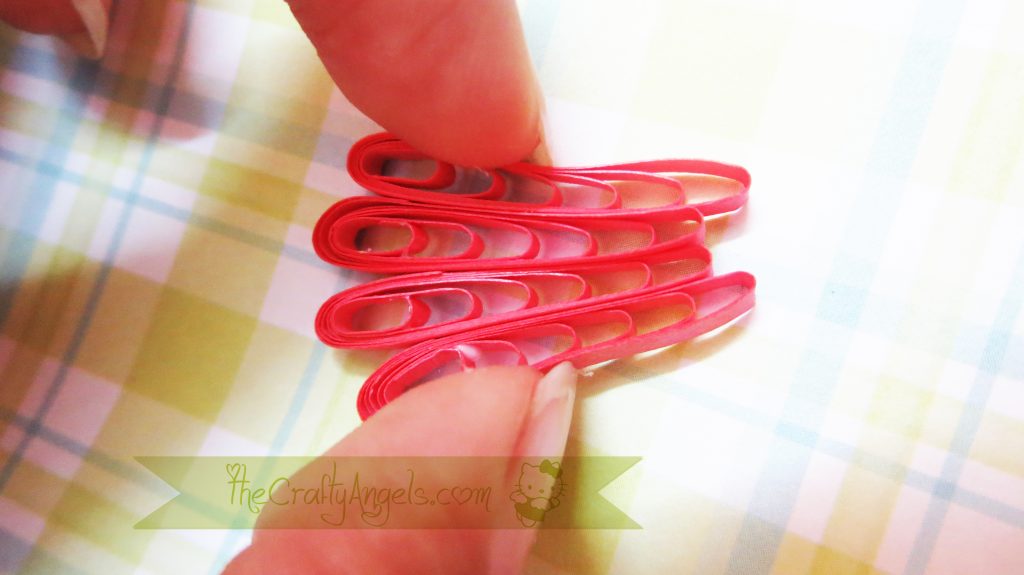
Start by taking a strip and making a loop between the first two tooth of your quilling comb as in photo. It would be advisable to glue the first loop because the chances of it opening out is very high.
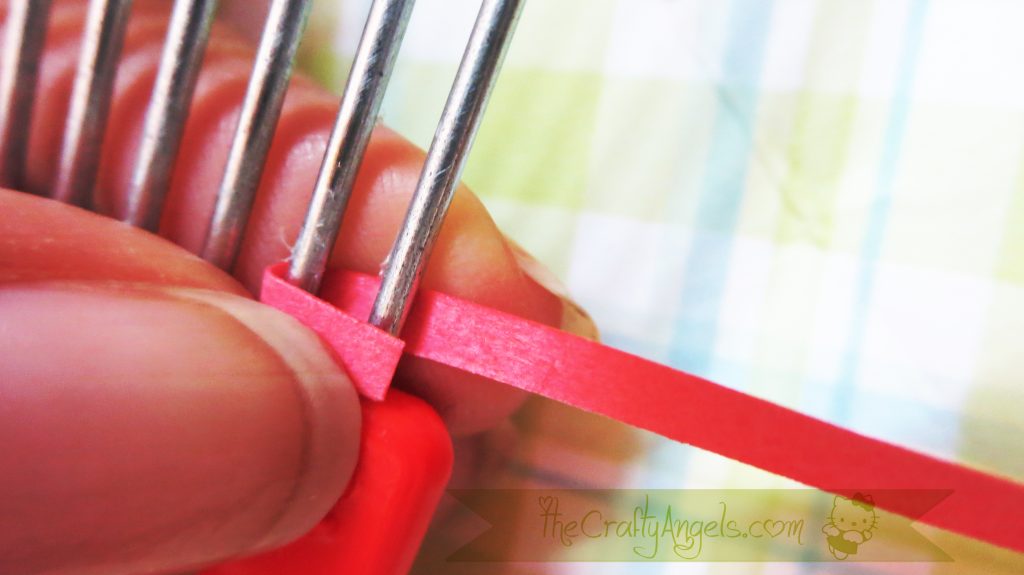
Once the glue is secure, pull up the strip and loop around the third & first tooth as shown in photo. Continue looping in similar fashion and stop when you think you’ve reached the desired petal size.
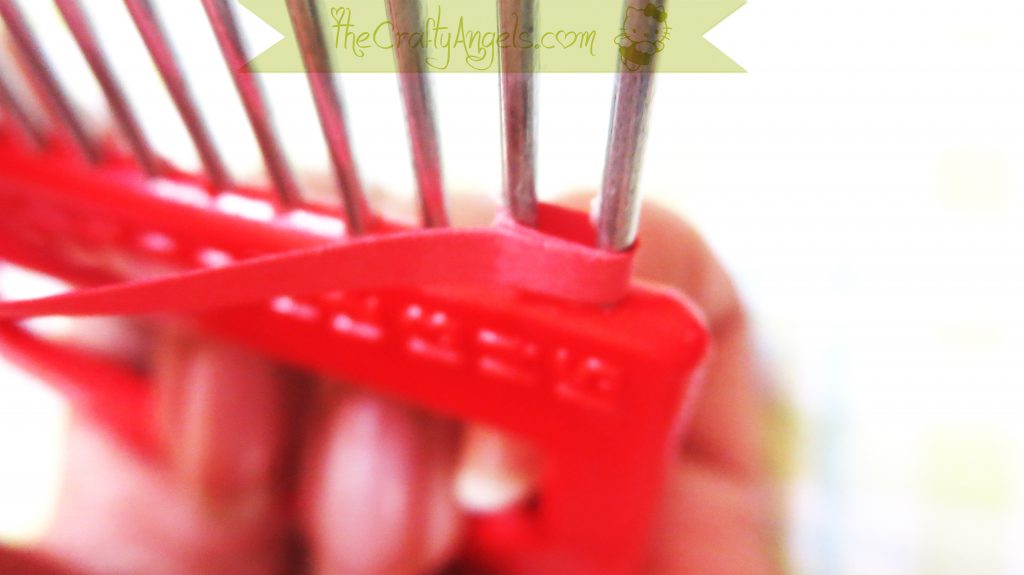
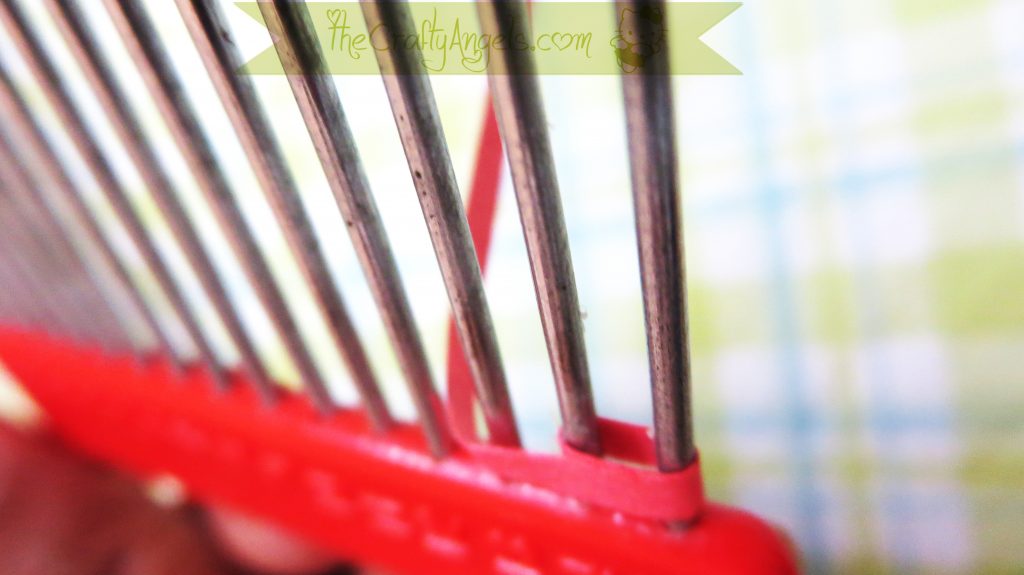
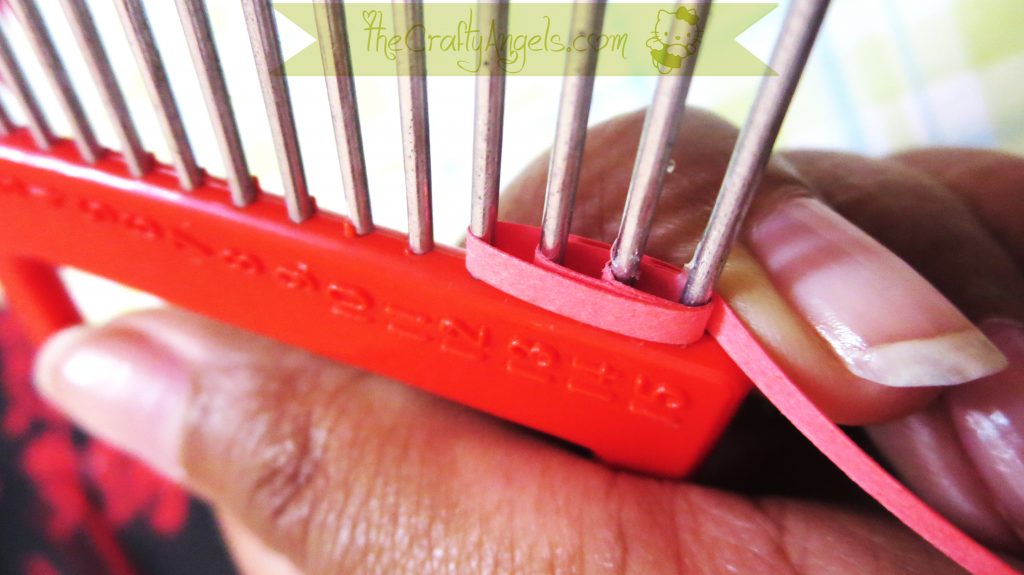
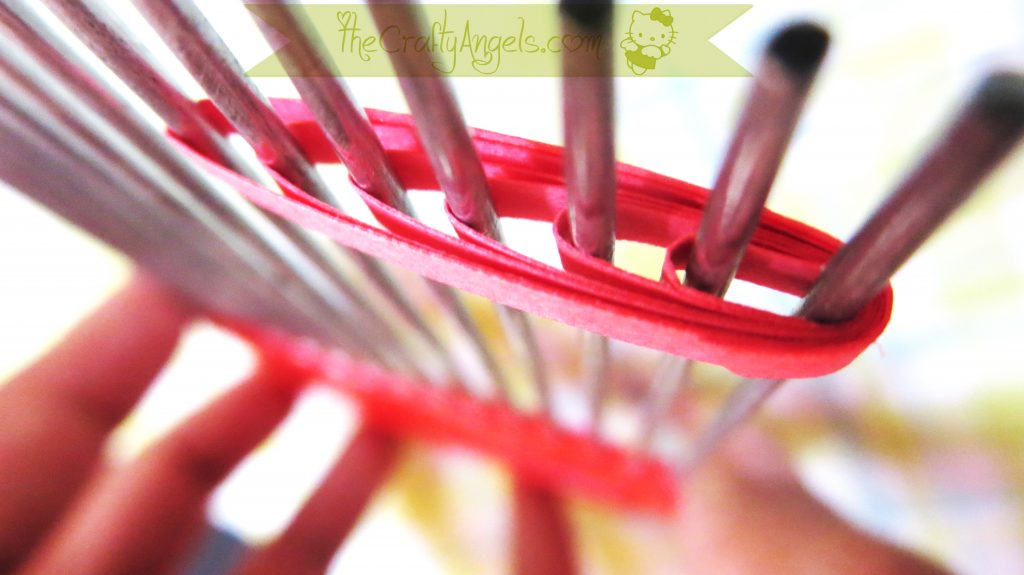
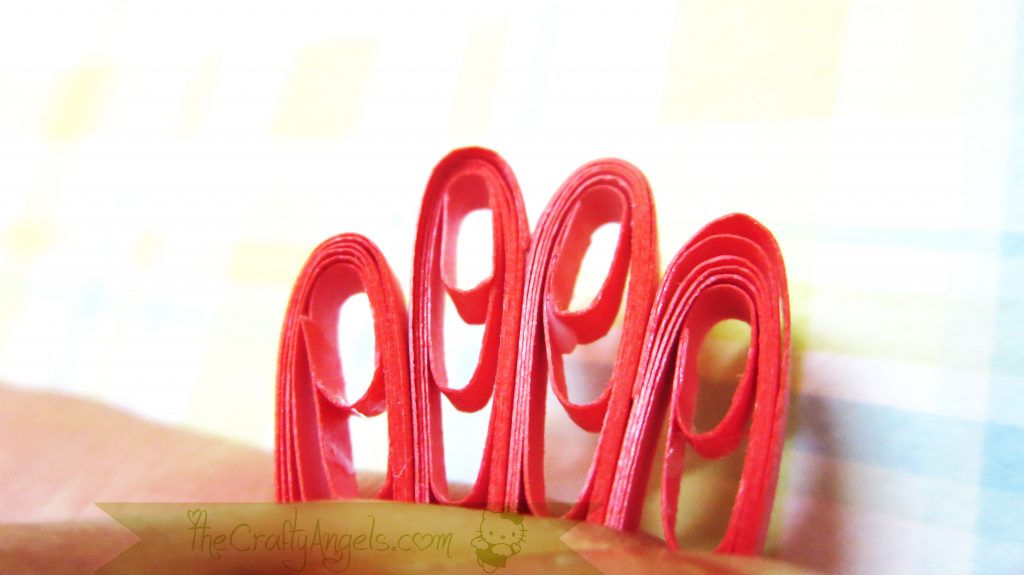
Secure the loose end with glue and very slowly pull out the quilled petal shape evenly so that none of the loop comes out.
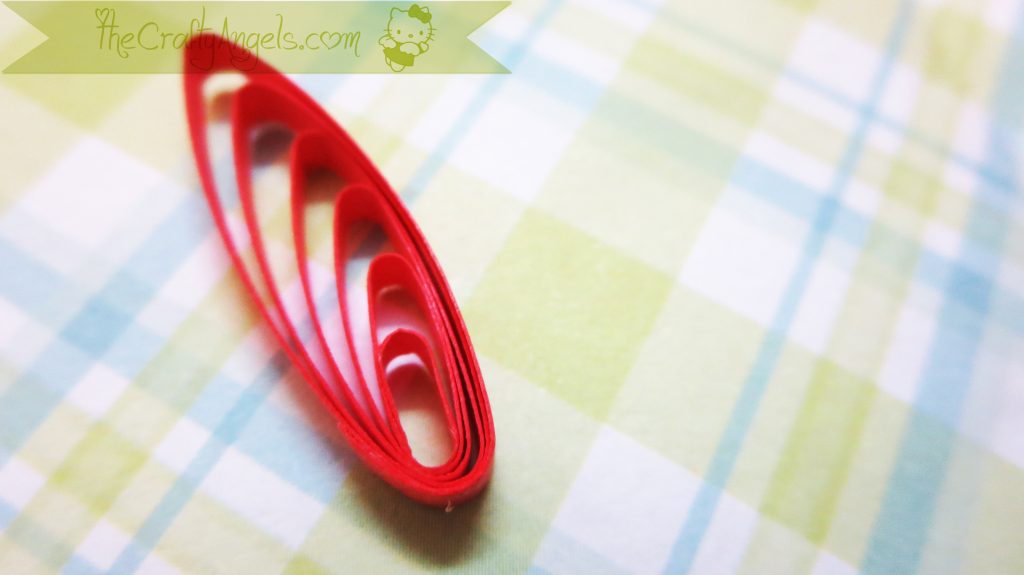
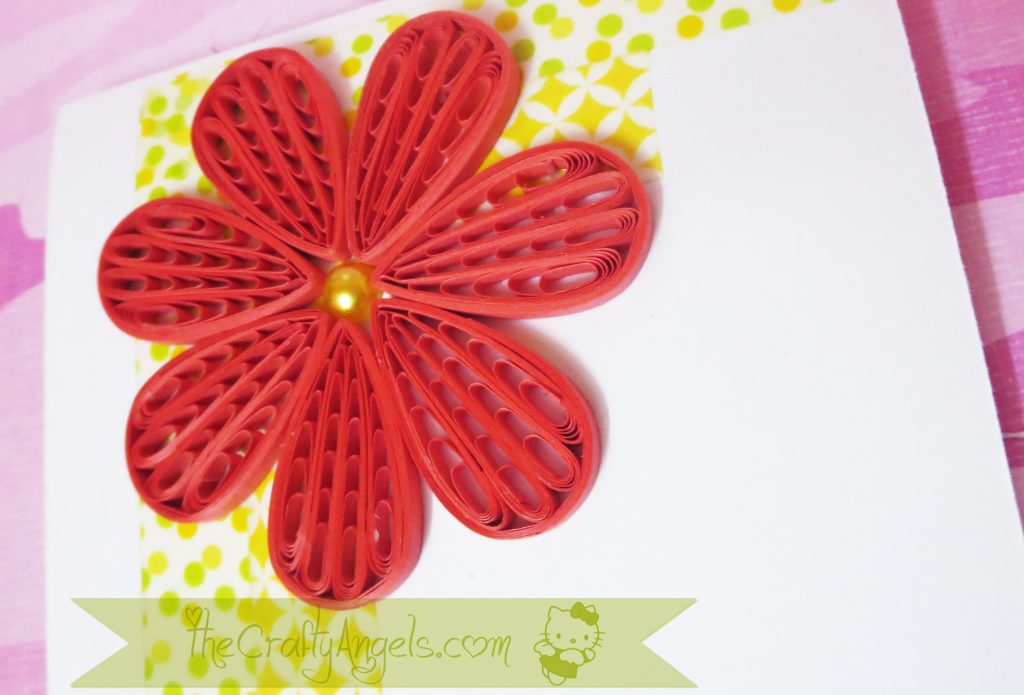
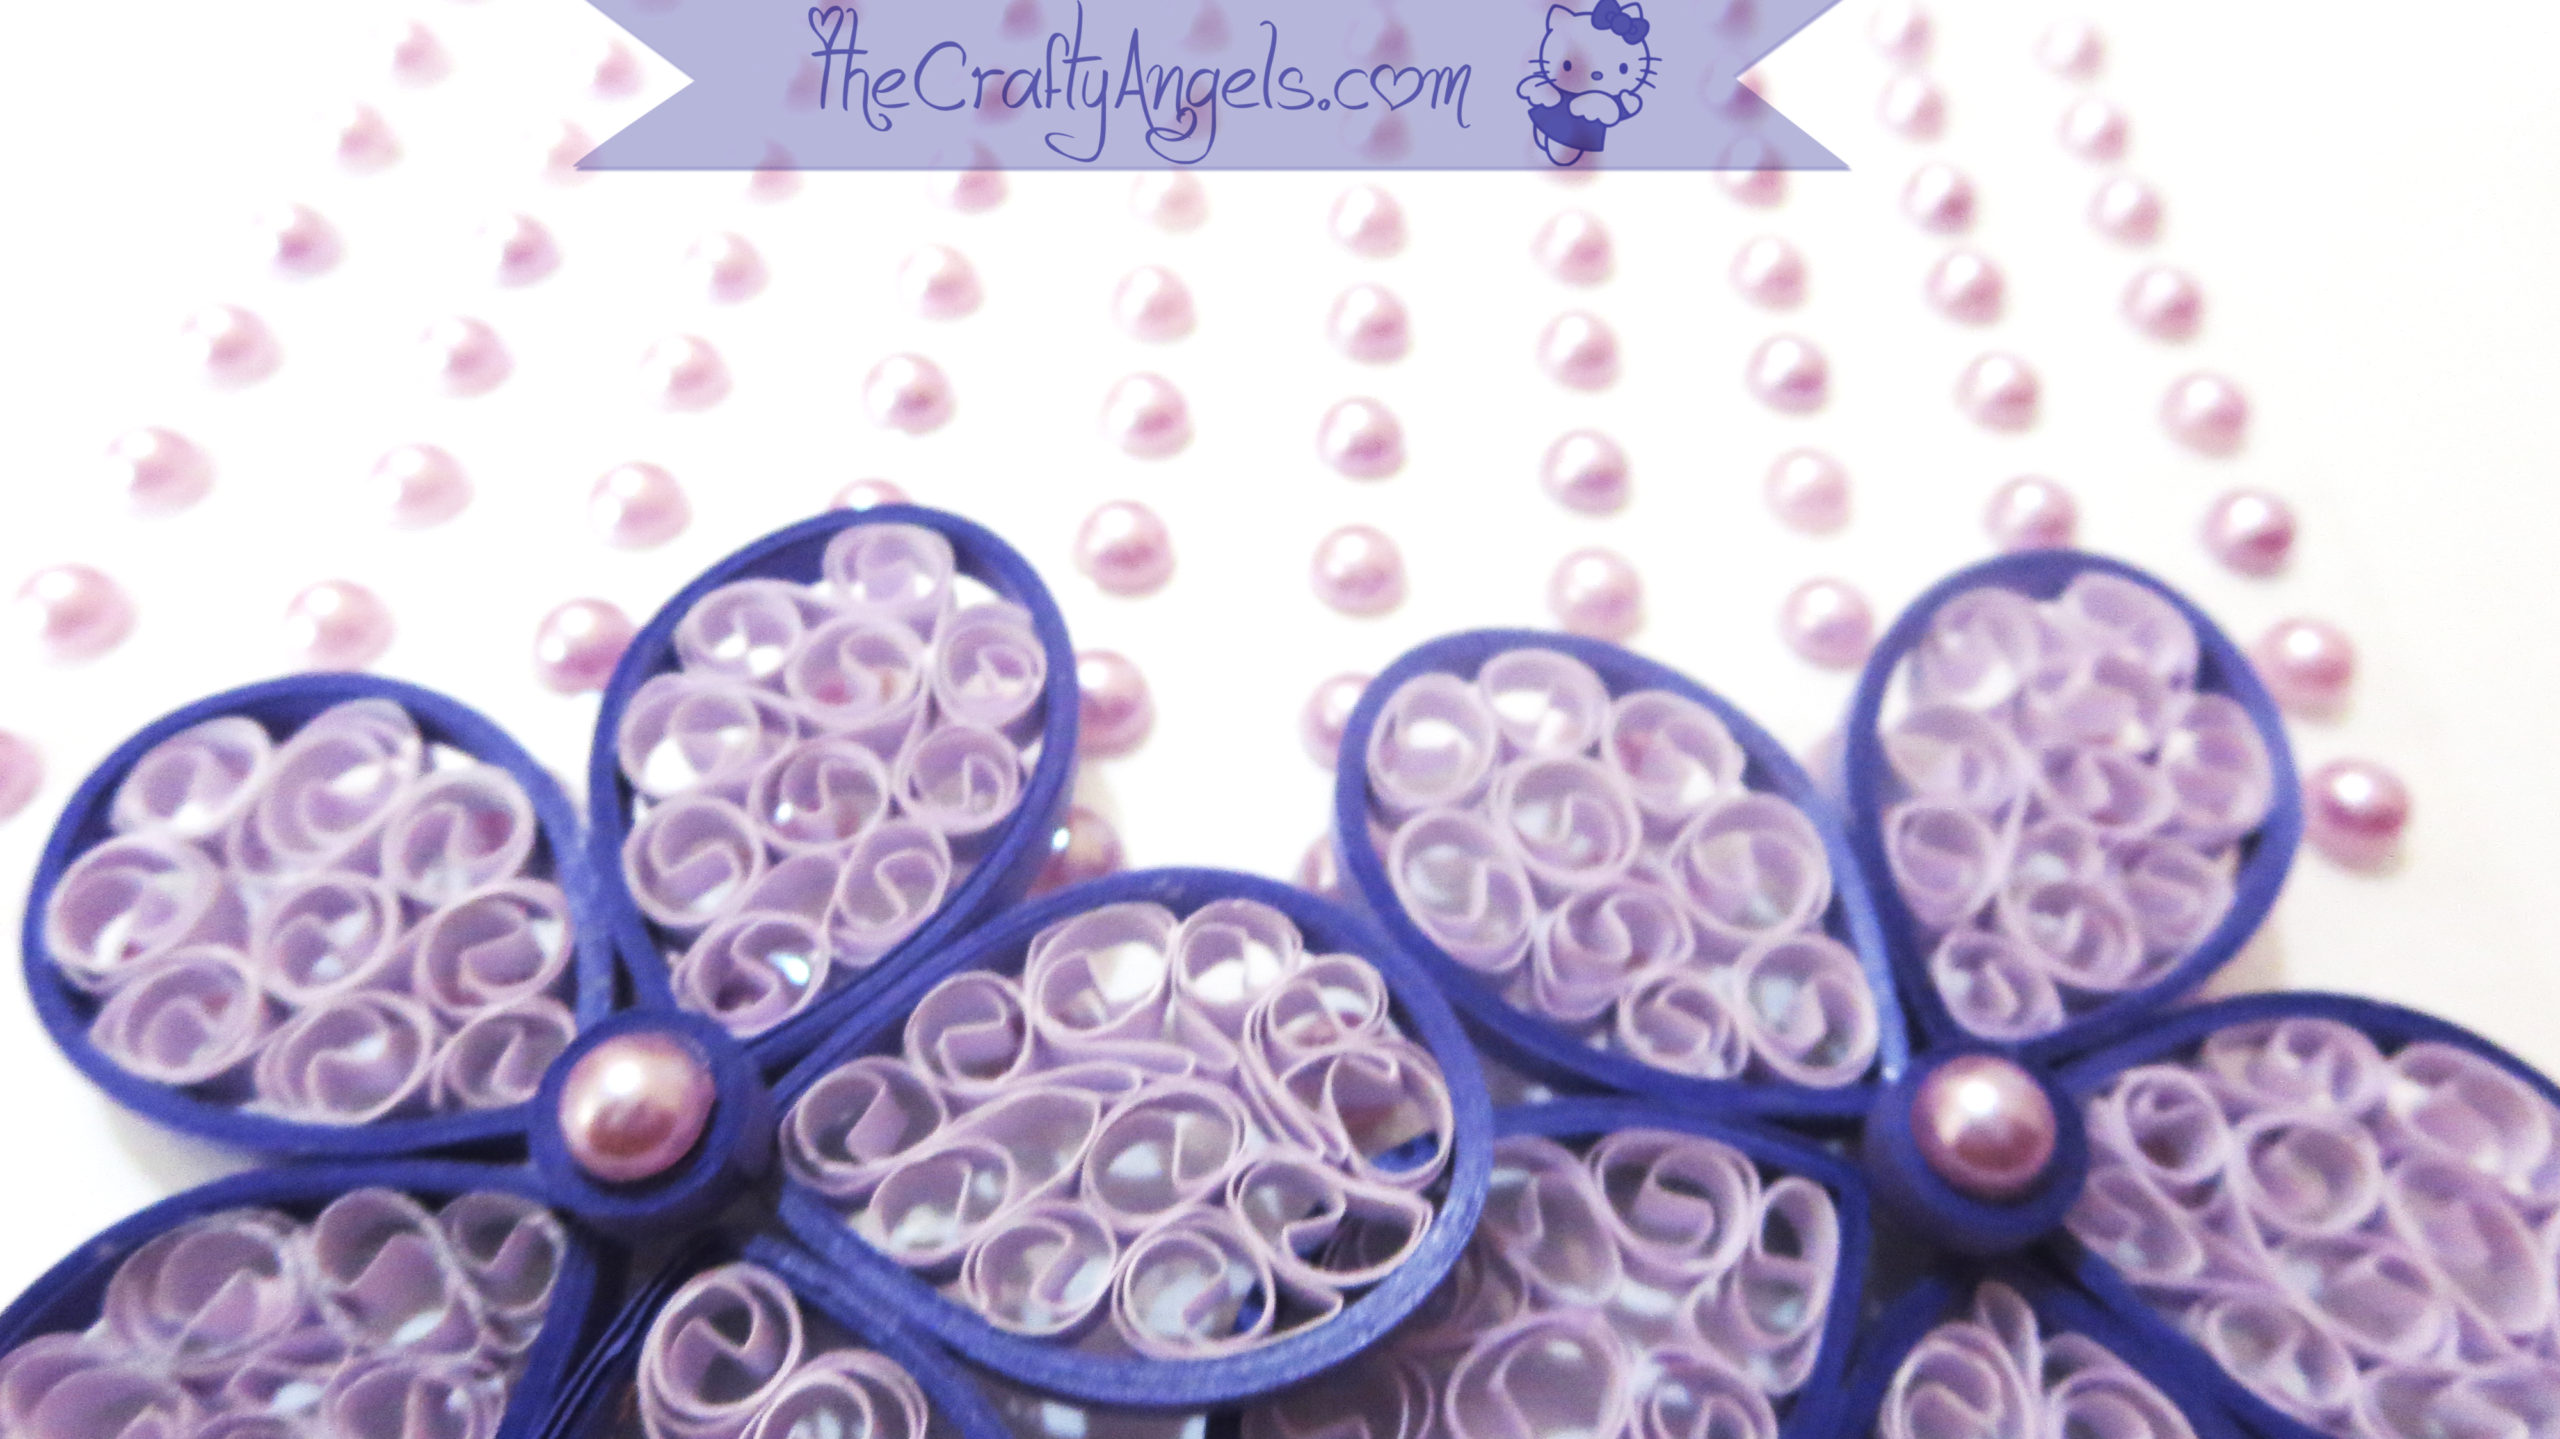
Now the reference quilling comb flower I was talking about had rounded petals that were placed in overlapping layers to form a 3d flower. I but wanted my flower to be stuck on to a card so I decided to go with triangle shaped petals.
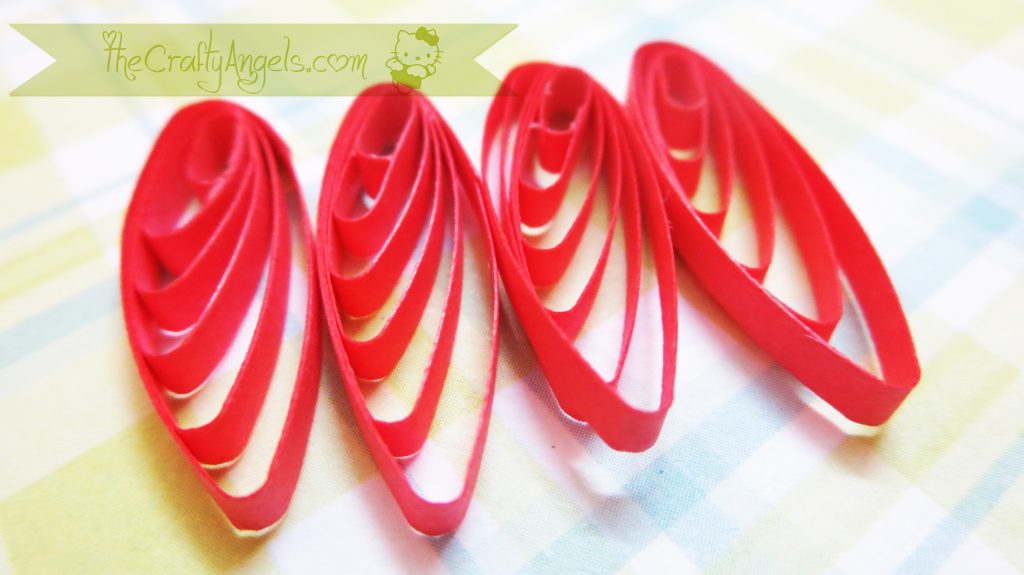
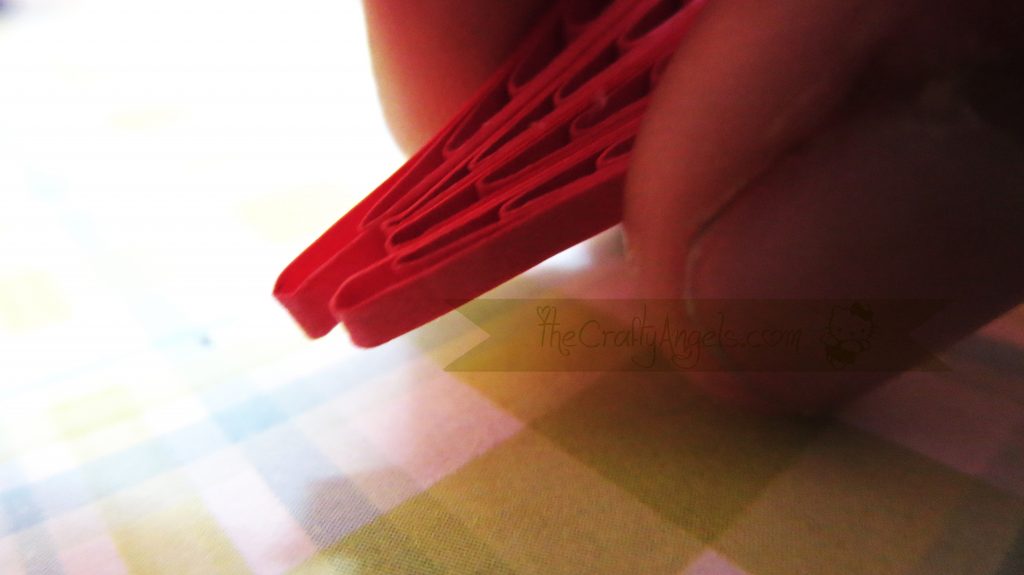
Make four of the above quilled shapes using the quilling comb (the more shapess you add the wider and rounder the petal becomes) and align them like in below photo. The shapes have to be aligned such that all the first loops made on the quilling comb lies in the same side. The outer part of the petals will contain the first loops and so I aligned the four shapes in such a way that the two inner shapes were at one level and the outer two a little below the middle ones.
Holding the petals in this alignment, I pinched the bottom side to create a small tapering. Just pinch the very bottom only and not the middle part else the petal will be triangle shape!
Without leaving hold, apply glue to the sides and wrap around a long quilling strip around the shape to secure them within a petal shape. Dont you think the petal looks very neat and beautiful?
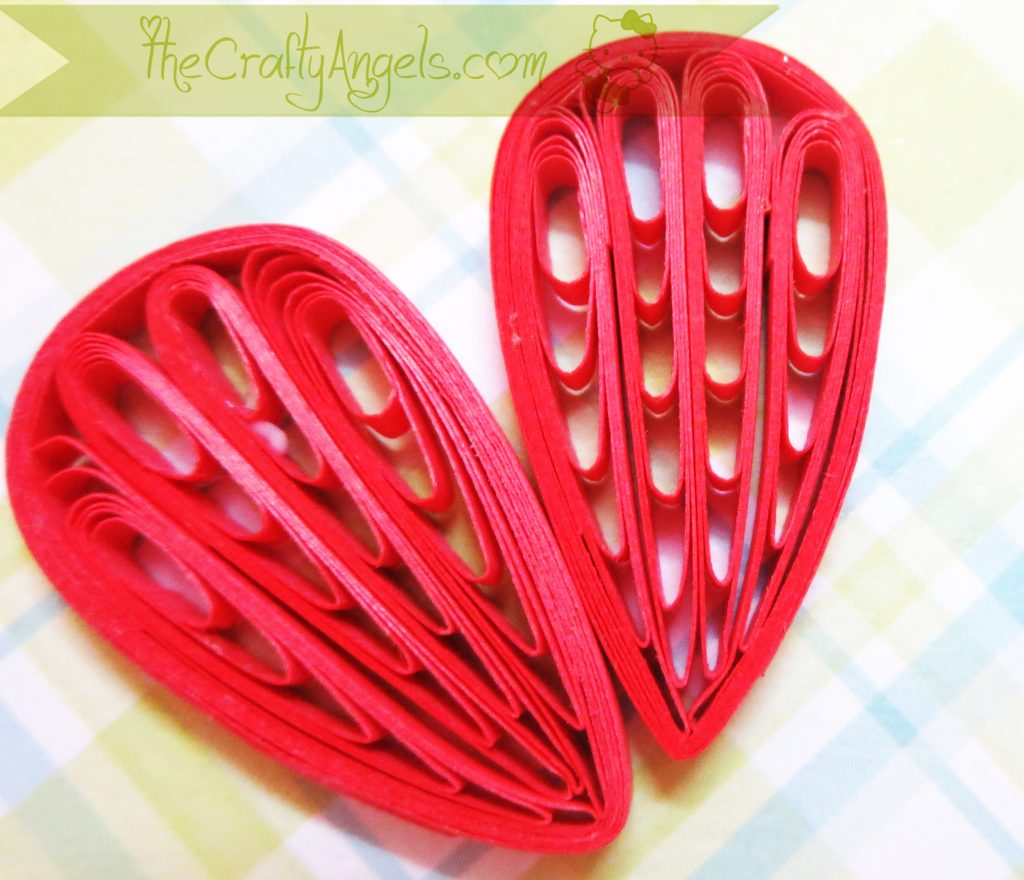
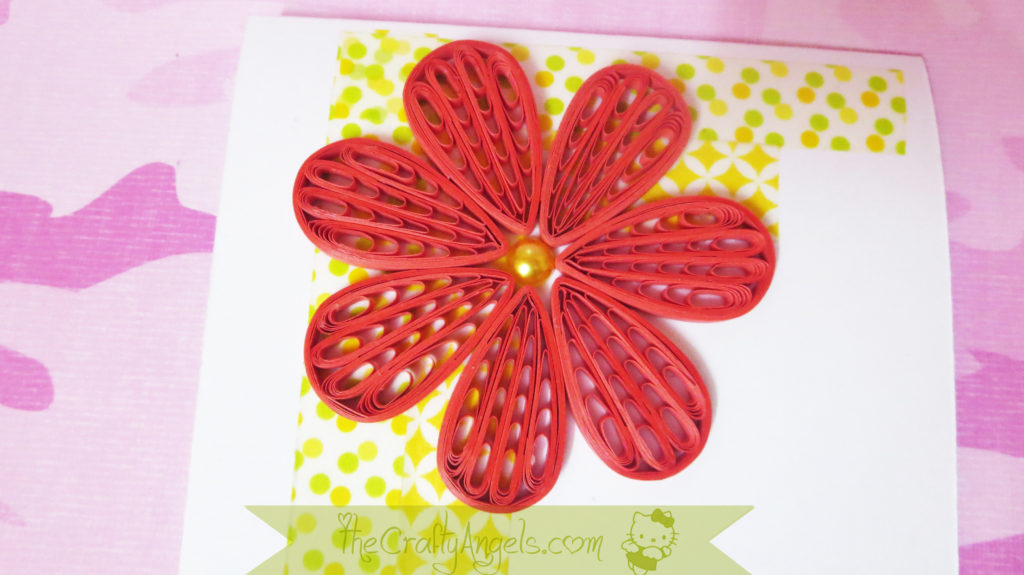
I made more petals in the procedure as above and stuck them together to form a flower. I used a flat pearl to fill in the center gap of the flower.
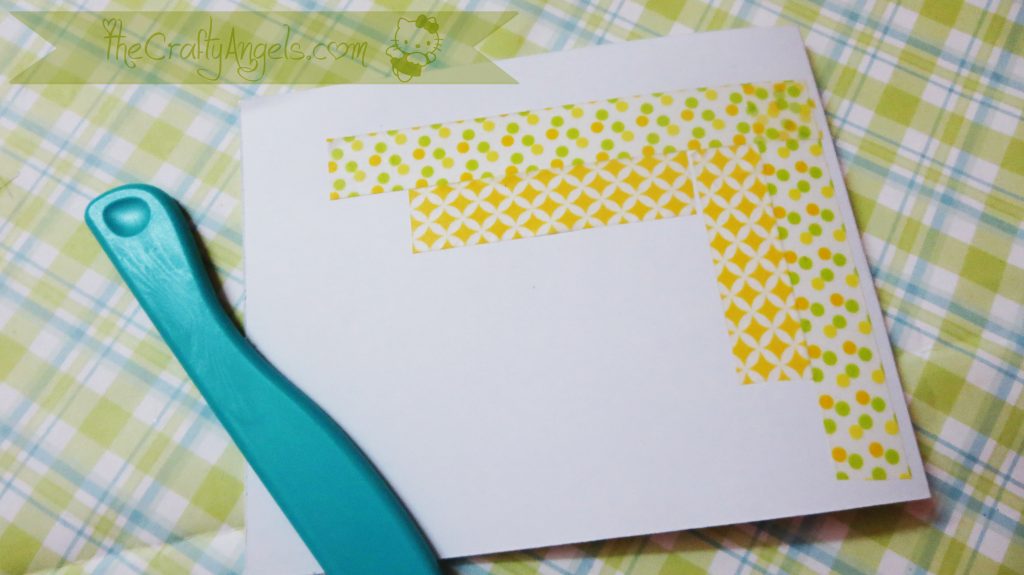
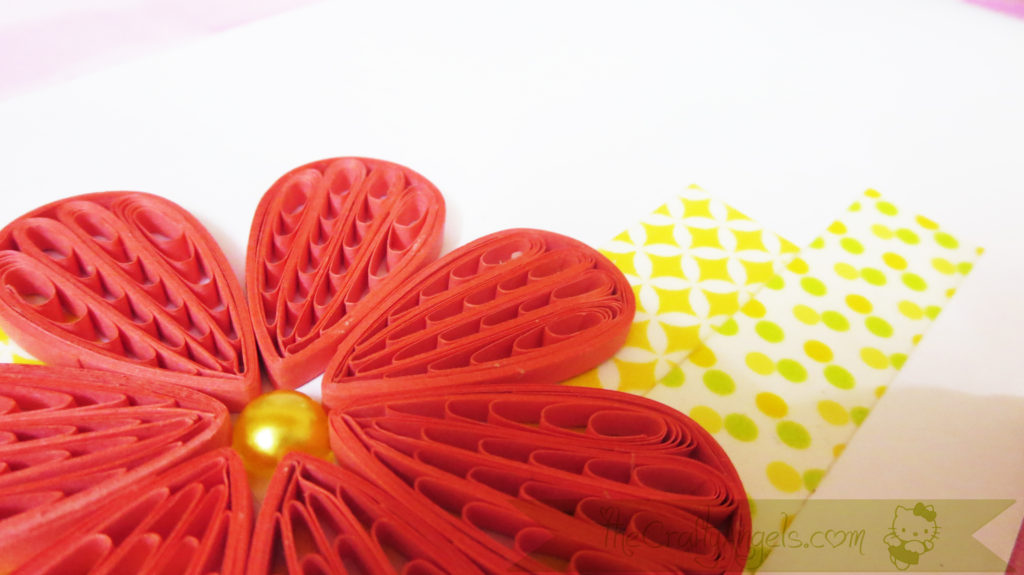
For the card base, I just pulled out some washi tape of two similar shades criss-crossed it across the base card and thats it.
Tips and tricks in making Quilling comb flower :
Remember to glue your first loop because it opened up a couple of times for me and it was very clumsy to reorder the loops.
- Remember not to pinch the whole petal but only the ends else the petal will be an absolute samosa! ( samosa is an Indian triangle shapes snacks !)
- And yes also do remember the top and bottom of the petal – the ring should be outer area and the opposite should be tapered.
- Well thats it. If you follow them correctly I guess you should end up with this flower 🙂
Did you guys like this tutorial? Loved making these and loved the output even more 🙂 I captured a video as well but I have no idea about video editing and uploading so it might take some time to get it across to you guys. In the mean time, if you guys come across some interesting quilling and would like to get a tutorial, please feel free to contact me at thecraftyangels@gmail.com. I would do my best to figure out a way and post a tutorial 🙂
EDIT : The video on how to make these quilled flowers with quilling comb is up on youtube! Do check them out
https://www.youtube.com/watch?v=joN5shwlnAk
And also guys remember to subscribe to my channel 🙂
xoxo
Angela
6 Comments