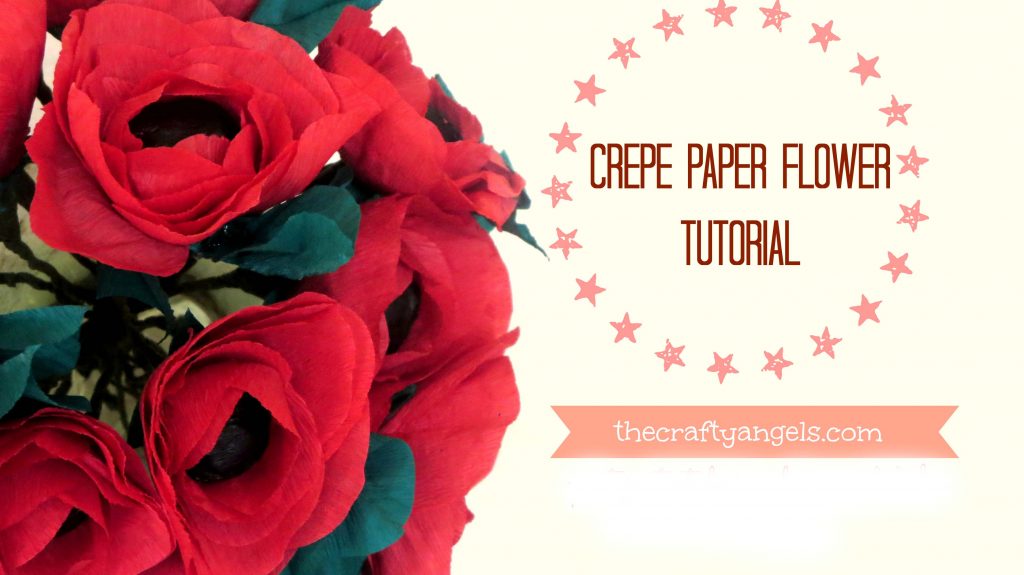
Easy Crepe Paper Flower Tutorial
CREPE PAPER FLOWERS TUTORIAL
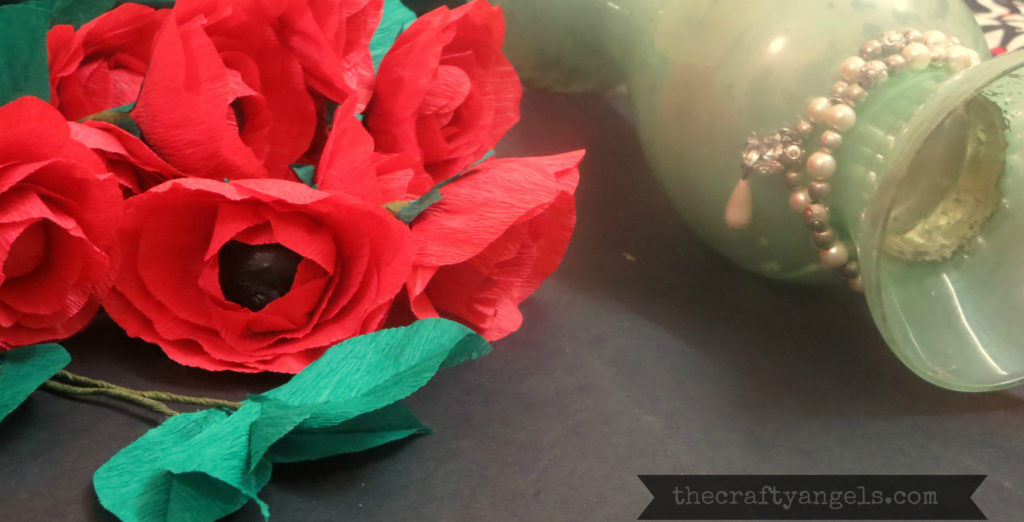
You might have made crepe paper flower a million times but you would not have tried this one – I started off making a rose but ended up in a flower like this which nevertheless looks pretty. I got these pretty vintage silver coated flower vases from Zupiterg about which I have already done a post HERE and also, one of them is up for a free GIVEAWAY (HERE)!! So anyways i made these crepe paper flower to fill into these pretty little beauties. Im sharing with you all a tutorial for these Crepe paper flower that look like a hybrid of poppies and roses!
Materials required in making Crepe paper flowers
- Crepe paper in various colours for petals, bud and leaves
- Flower/craft wire
- Flower/leaf tape
- Glue/hotglue
- Scissors
Step by step method for making Crepe paper Flowers
Before we start the tutorial, I would like to emphasise on the importance of crepe paper – they have these creases along one direction that gives it an elastic kind of property. The beauty of the crepe paper flower made lies wholly on the creases and how well you play with it so wherever in the tutorial its mentioned about alignment of creases, make sure you follow them correctly :
- Start by preparing your bud. Cut out a small square piece, fill it with waste paper/cotton to make a small bud and secure it with your craft wire.
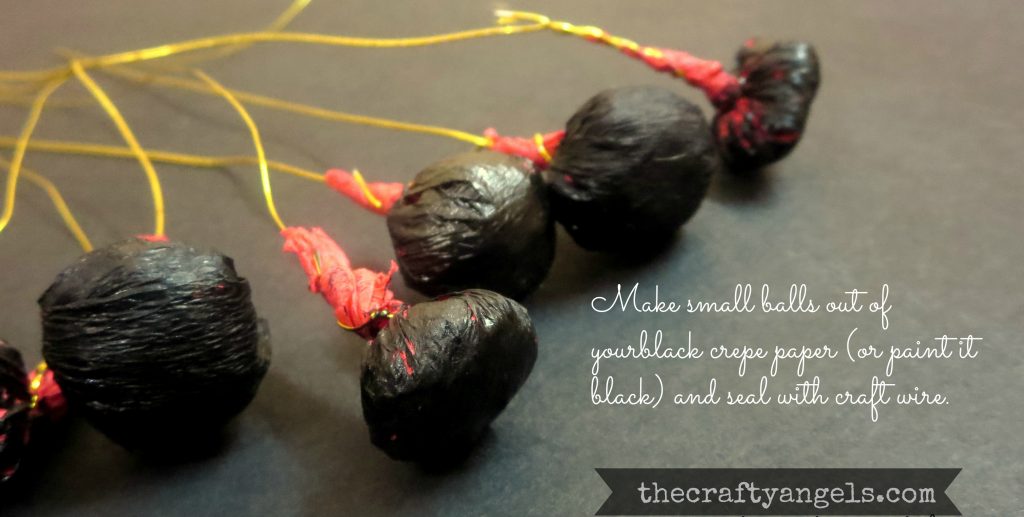
- Your flower is going to look beautiful if you have a contrast color bud. I have used red and black combination for my flower and since I did not have black crepe paper, I made buds out of red ones and painted them black with fevicryl acrylic paint.
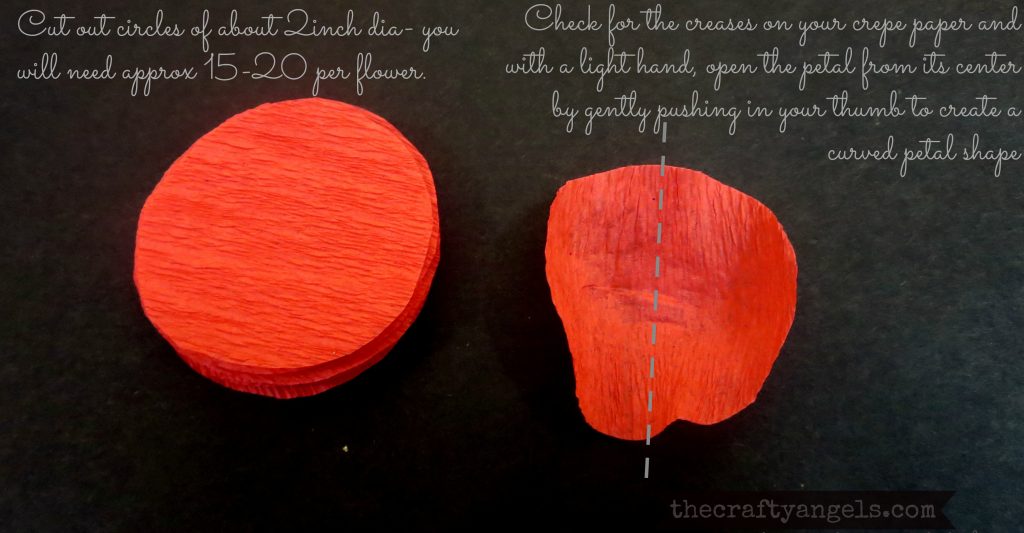
- For the petals, you need two shapes – a round petal (15-20petals) of approx. 2 inch diameter and an oval petal (5-7 petals) of approx. 1.5 inch length as shown in photo. Make sure that for the oval petal, the longer diameter is along the crease of the crepe paper.
- For the round petals, just open them up by placing both thumbs on the center of the petal and pulling them apart so that you get a depression sort of curved petal shape as in photo below. You might require 15-20 petals of this type per flower depending on how well you arrange them.
- For the oval petals, do the same as above by using your thumb finger and get a curved shape. Now, with help of a scissor, cut the petal along the longer diameter, till to near the center of the petal.Take the two cut out flaps and lace one over the other and glue together to get a curved conical shape petal as in photo below

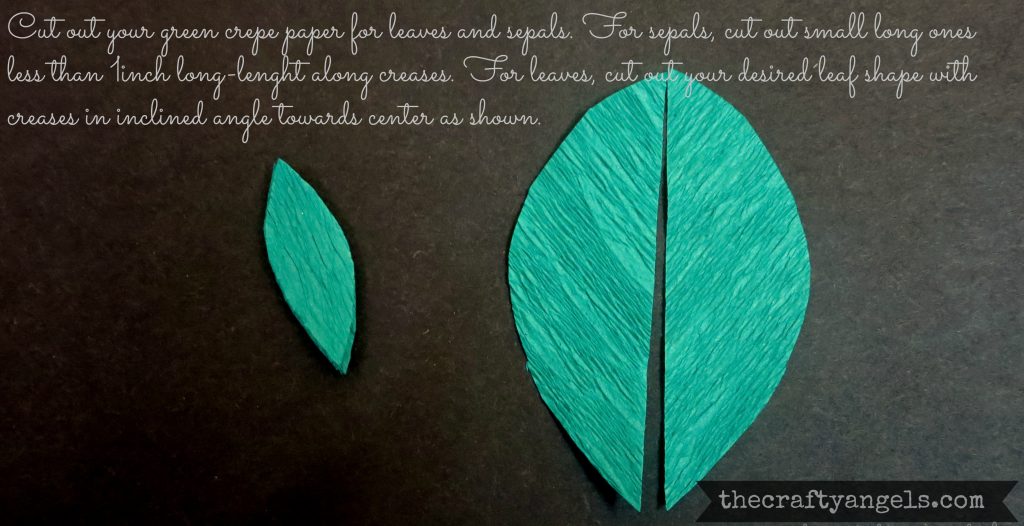
- For the leaves and sepals, you need to cut out shapes as below. For sepals, keep your creases along the length of the cutout. For your leaves, you require two cutouts per leaf and make sure you cut the pieces such that the creases eventually get aligned like the veins in the leaves.A tip could be to cut out squares first, cut them across the diagonals to get triangles and then cut our “D” letter shapes along the hypotenuse of the triangles (too much math eh?!) If you want real like leaves, you can go ahead with more fringes but I have cut out simple lemon leaves here.
- Once you have all the cutouts ready ( I did all the cutting together while letting my daughter tear up another sheet into bits and pieces!) you can start with making the crepe paper flower. Take the oval petals and stick them around the bud such that the cone snugly fits into the bud and the bud sides get covered in them.
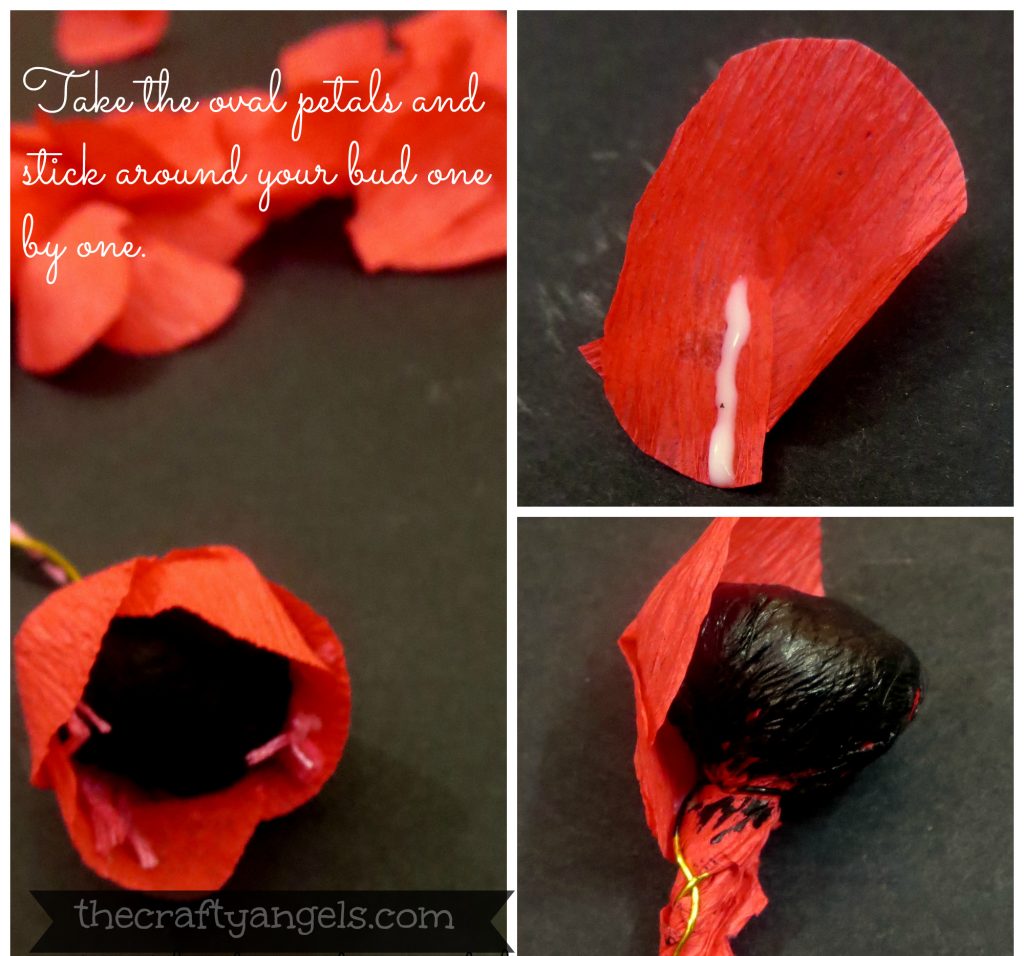
- I tried to have some pollens and stamens by adding some embroidery threads but it was a failure and that flower looked odd so don’t try that! As you can see from the pic, the botton side of the petal which is a sharp triangle shape, lies along the stem – it can be secured with a thread if you want as well.
- Once your first set petals are done, you can add the next set of round petals around it. Place your petals and apply glue in a straight like perpendicular to the crease lines as in photo. The lines where you place the glue will determine the openness of your flower. Once you have made one flower, you will know where to apply – as a general tip, inner layers need to have glue towards the end ( so that the petals are longer) and outer ones need to have to towards the center ( so that the petals are shorter) inorder to get your flower have a hemispherical shape rather than a conical one with layers of petals swirling inside.
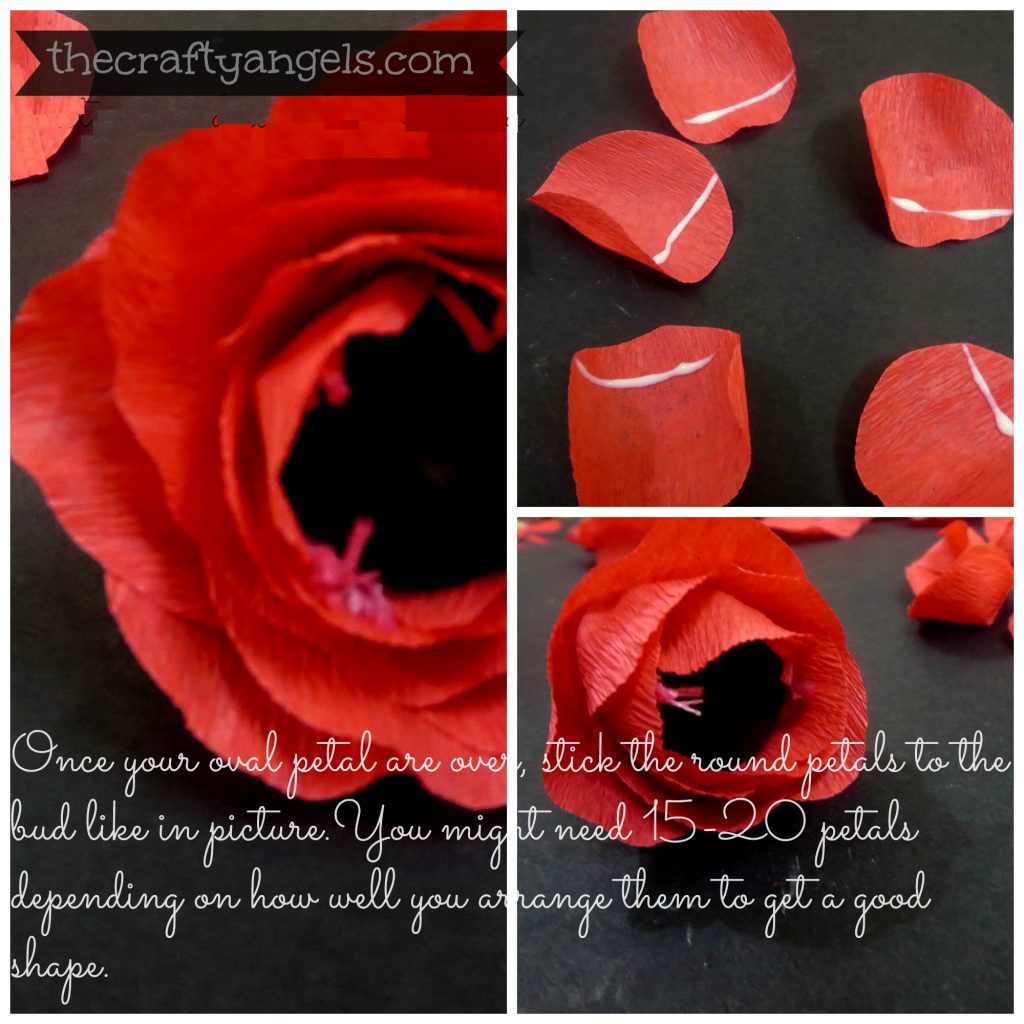
- Only first 2-3 of round petals need to be wrapped around the stem and secured. The next round petals should be stuck flat on the bottomside of the flower. You might require 15-20 petals depending on whether you are able to assemble them symmetrically or not.
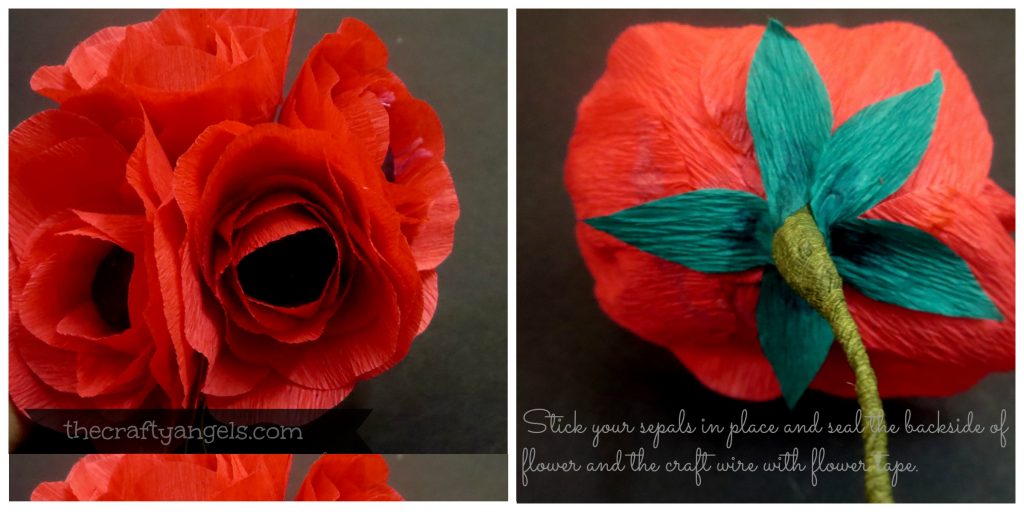
- Once you are done with It and your flower has a real flower look, you can bind the backside of flower with stem using flower/leaf tapa and stick your sepals around.
- For the leaves, you can use two shades of green for the two halves if you wish. Apply a light line of glue along the center line and stick two halves together. Make sure that the two halves you selct are placed in such a way that the creases make a v shape like veins of a leaf.
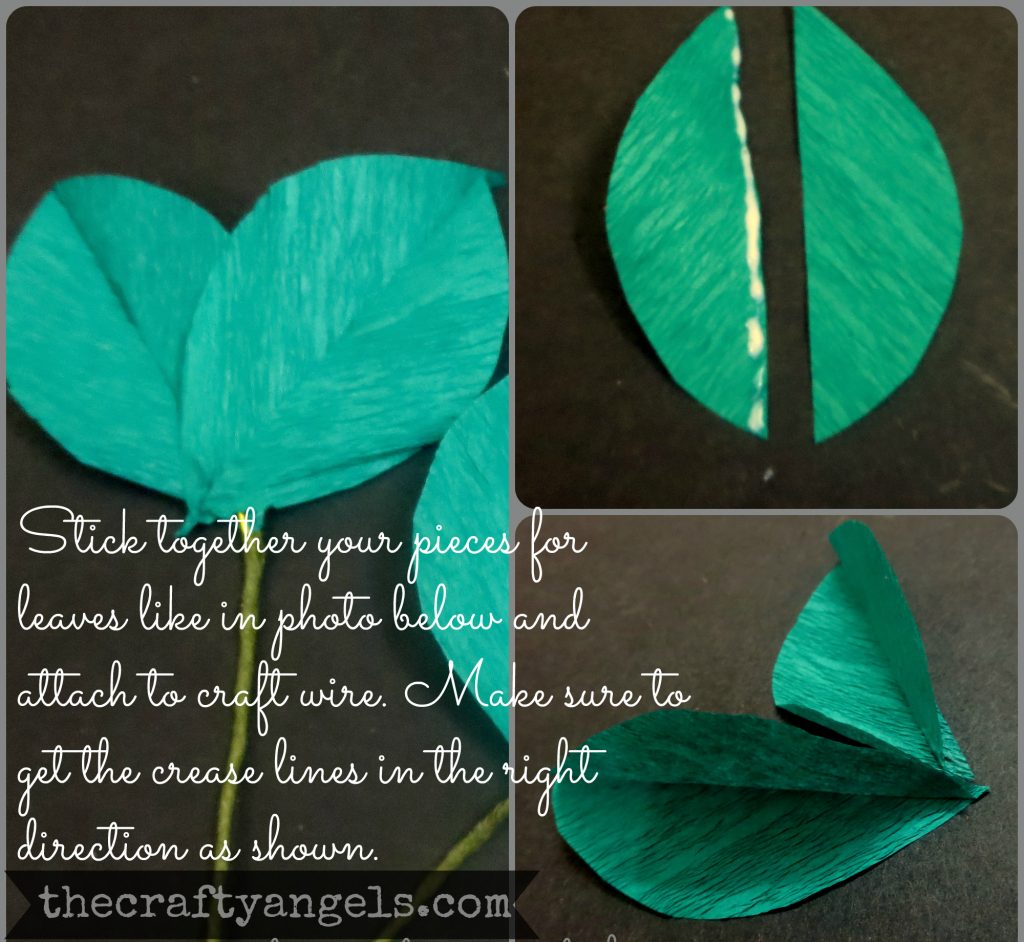
- I used hot glue to adhere two leaves onto a single flower/craft wire like in photo below.
- So now that you have your crepe paper flower and leaves ready, you can bunch them up the way you want – flower bouquet or wedding bouquet or flower vase anything as you wish.
Tips for making Crepe Paper Flower
- I always suggest cutting out templates from a paper or carton box, otherwise you might end up cutting out different size cutouts once your first batch is over!
- Mind the crease lines on the crepe paper – they hold the key to the whole flower shape
- As I told you before, for leaves, cut squares along diagonal and cut “D” shapes to get the two halves I talked about.
- And yes follow the tutorial correctly and send me any queries if something dint work right!
Hope you all enjoyed the crepe paper flowers and hoping you would try them this valentines season (If your roses don’t work out well: P). Guys do check out these crepe paper flowers that were done by my sister (HERE) and also the tissue paper flowers (HERE) if you need more ideas on flower making. Do let me know if you’ve tried them and have any suggestions for the tutorial 🙂
Linking to

Angela