
Quilled Wall Hanging Tutorial with quilled malaysian flowers
Quilled Wall Hanging Tutorial
 In my last few posts, I had mentioned how I was working hard on my quilled wall hanging. Working hard only because I have to hide from my lil one and do all the crafty works else she will mess up my whole supplies! There is going to be little words and more photos in this post because I have already covered all basic shapes required in this quilled wall hanging through my previous posts. I had intended to make a huge project this time covering a major part of my living room wall with something quilled and my husband suggested a quilled wall hanging just like the bangle wall hanging I had done last year (HERE).But as my work progressed I realised I wasnt really equipped with ample amount of quilling strips to complete a HUGE project so I settles with this medium sized quilled wall hanging 🙂
Be sure to also check out all the quilling tutorials covered :
- Beginners quilling tools & supplies
- Basic Quilling tutorial : Making Flat Tight Quilled Coils
- Basic Quilling instructions : Quilled Teardrop Shape
- How to make Quilled Flower Petals without tools
- How to make Quilling Leaves without tools
- Quilling Butterfly Tutorial
- Tight Quilled Flower Tutorial
- Beehive technique Quilled flower tutorial
- Quilled Wall Hanging Tutorial
- Quilled Hearts Card Tutorial
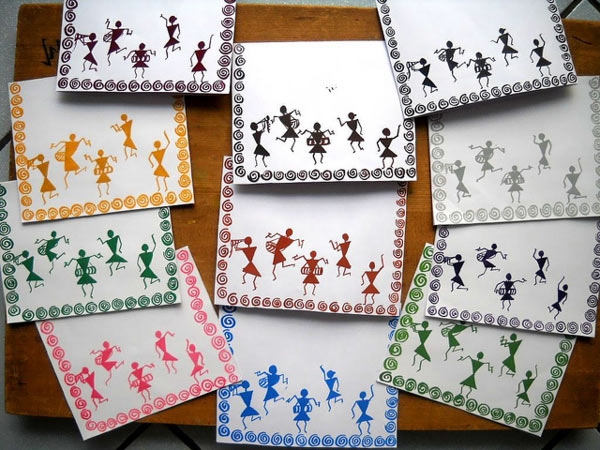
- Quilled Malaysian flowers Tutorial
- Quilling Comb Flower Tutorial with Video
- Double Sided Quilling Comb review & Tutorial
- Quilling Combing technique : Quilled bird
Materials Required to Make Quilled Wall Hanging
- quilling strips
- circle sizer
- tweezers
- glue
- scissors
- twine
Step by Step Procedure to Make Quilled Wall Hanging
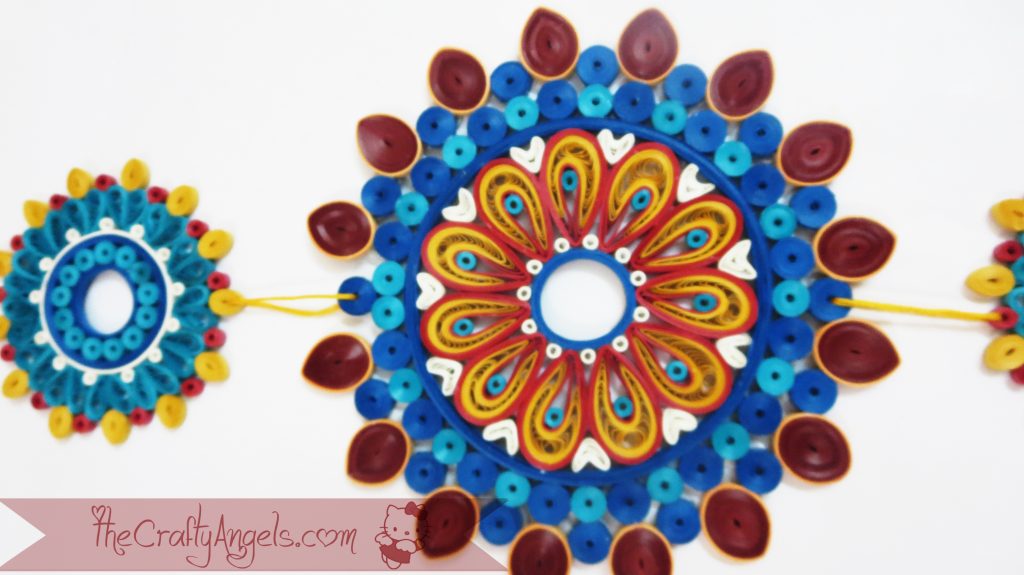
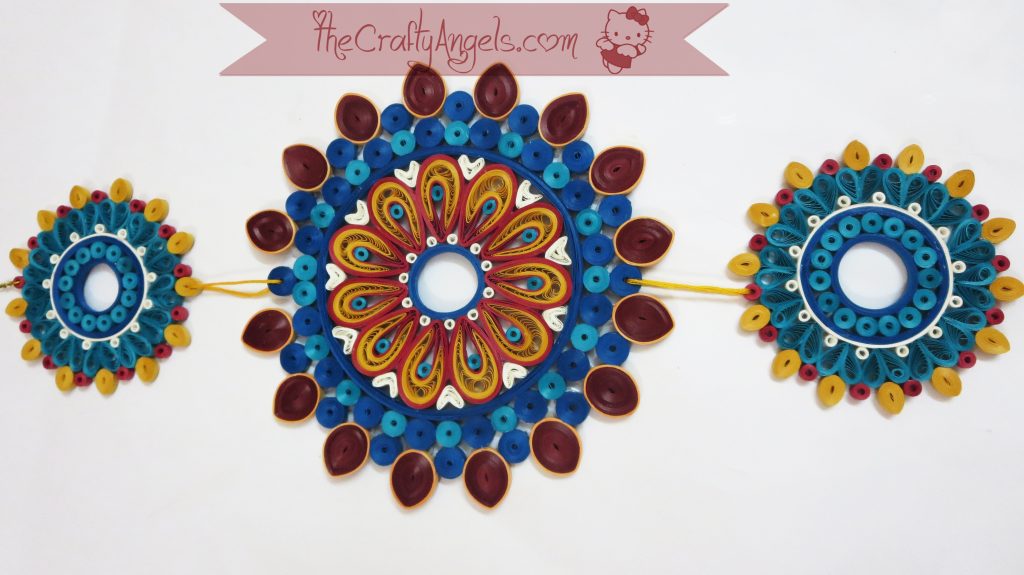
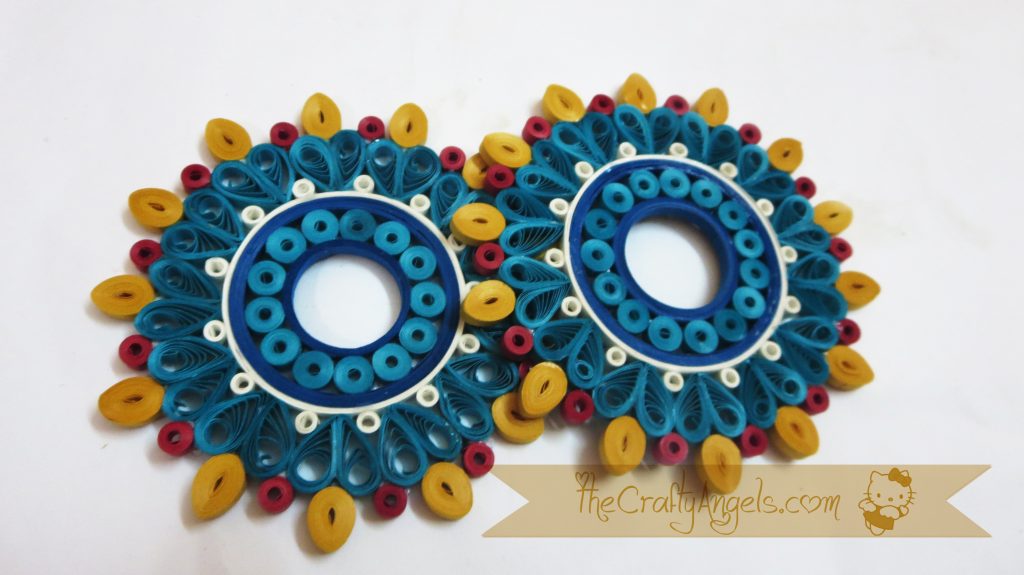
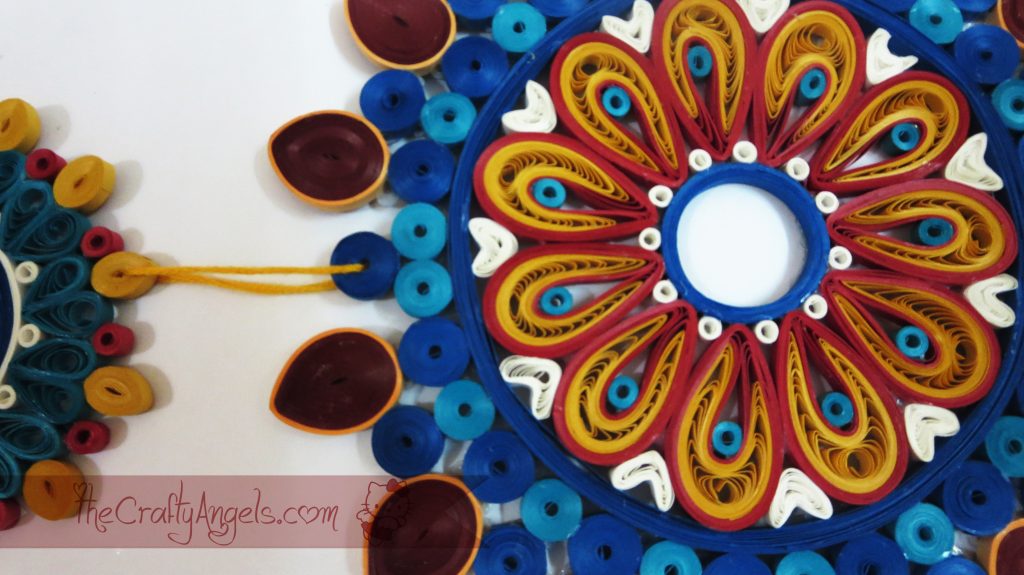
- My quilled wall hanging as I told you is based on my bangle wall hanging (HERE) and so I decided to have three parts, the middle one being the prominent one and the other two on top and bottom. I started making the top & bottom smaller designs first since they were going to be identical.
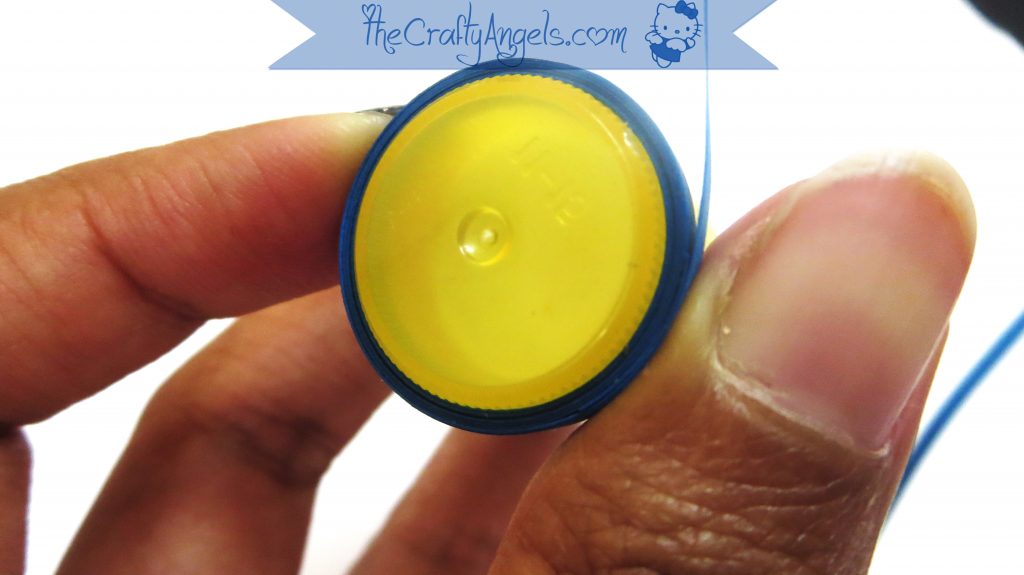
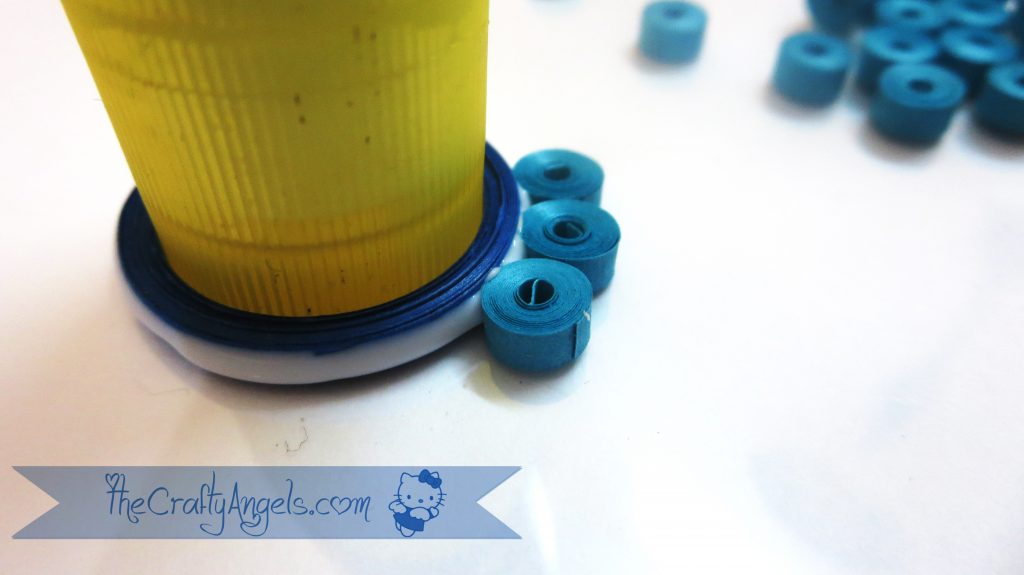
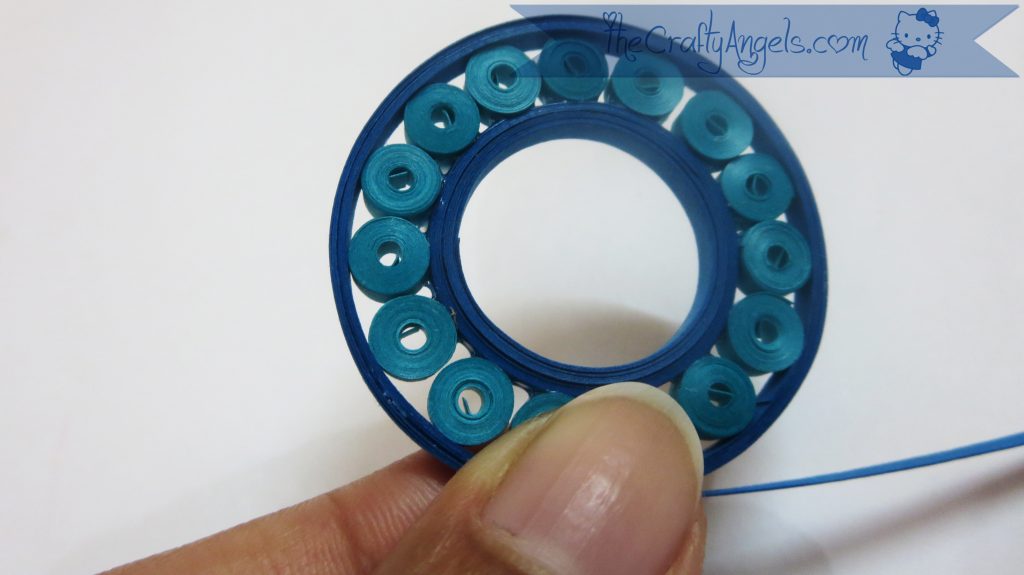
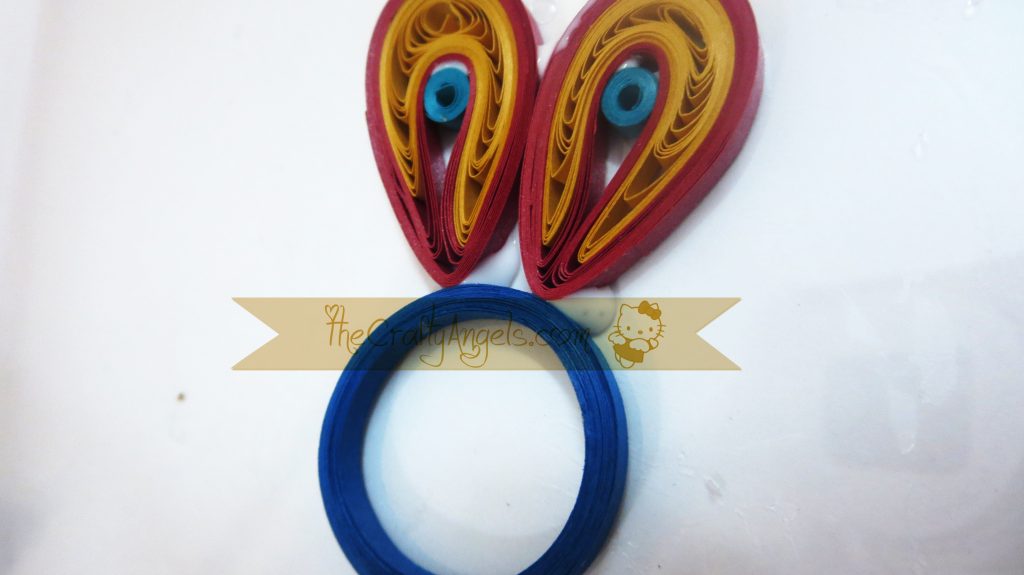
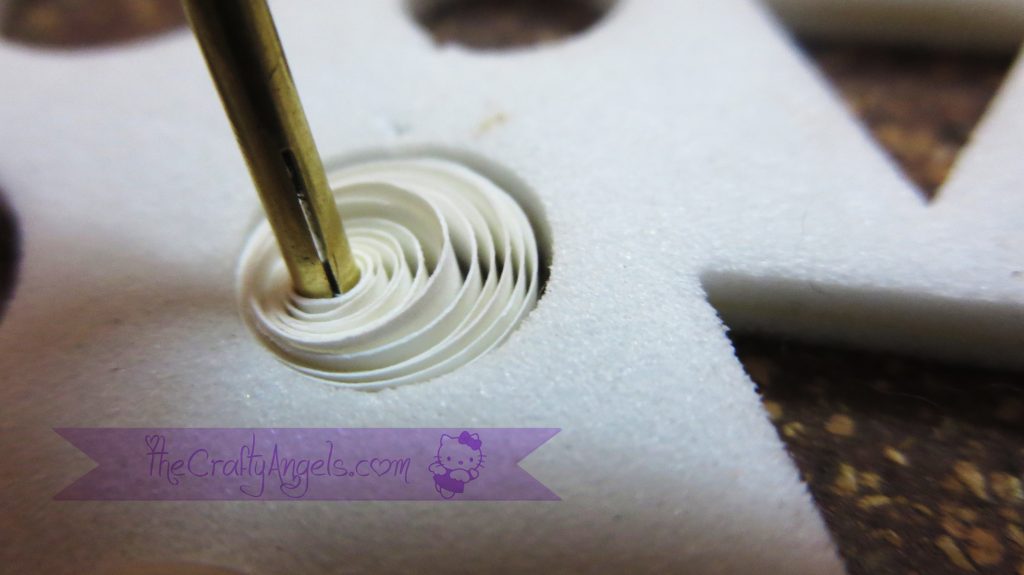
- I started with a hollow ring of quilling paper by rolling it around a fevistick tube. You can use your border buddy if you own one to get this shape but I don’t mind my glue stick 😀 I used about 3-4 strips around by applying glue in between randomly while making a round so that it turned out to be sturdy and rigid. Make sure you leave it on the template itself till it dries so that your round doesnt become an oval!
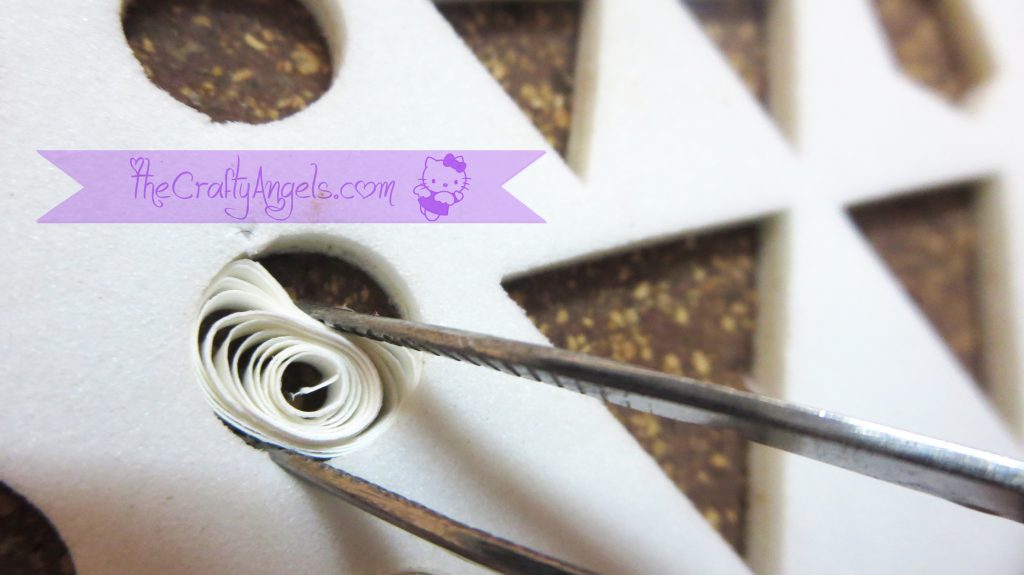
- I made these little tight coils and stuck them around the ring and made another ring around this one.I found it a little difficult to make this ring and unfortunately i dint have an exact size template to wind around. So instead of starting by appying glue around and winding, I simply wound the quilling strip and made a ring which I later glued to the design.The tutorial for making perfectly flat tight quilled coil was posted before HERE which I recommend for beginners.
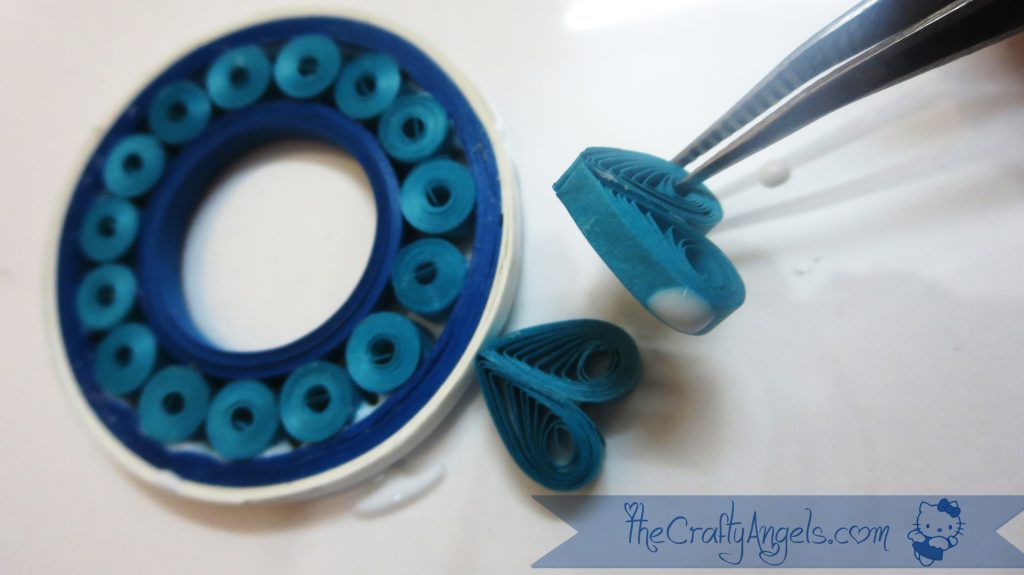
- I then prepared little hearts using loose teardrops and stuck them around this ring. Since this was a quilled wall hanging, I dint mind messing one side ( that was going to face the wall) with glue 😛 I used an acetate/OHP sheet as base and completed one round of hearts around the ring.The tutorial for making quilled hearts have been shared HERE along with a lovely card.
- Since I had used colors of same tone for both the ring and the hearts, I felt something was missing and so I made these tiny tight coils with white strips and inserted them in between the rings and the hearts.
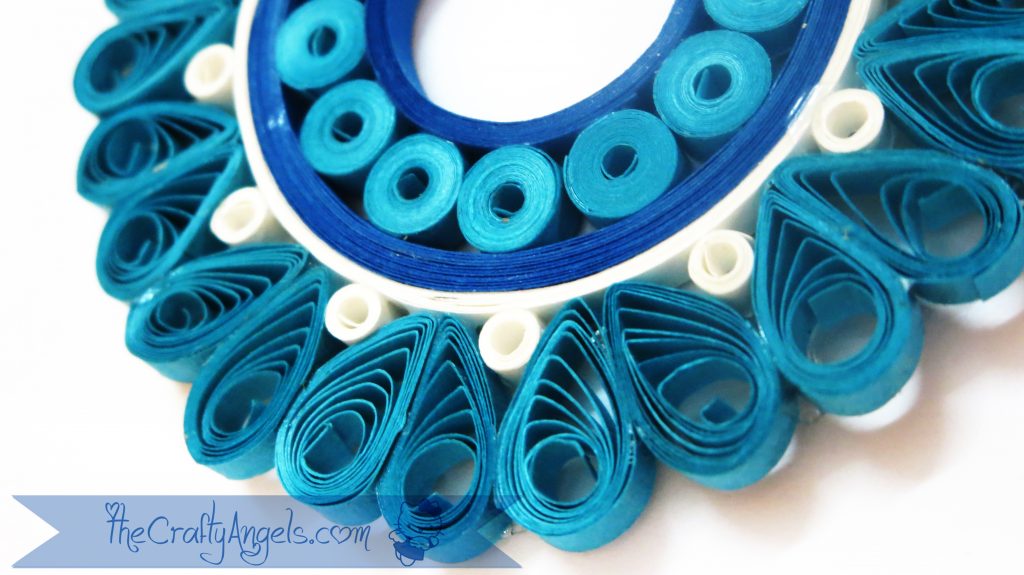
- The size of the design was huge enough as I had decided but the colors it had were only 3 and so I have left with lesser choice of design for my middle design. I added one more layer around to add yellow and red color to the design. Made these yellow tight tear drops ( tutorial posted HERE) and red tight round coils ( tutorial posted HERE) and glued them alternately around the heard crevices.
- I made two identical ones of the same design for the top and bottom shaped in my quilled wall hanging.
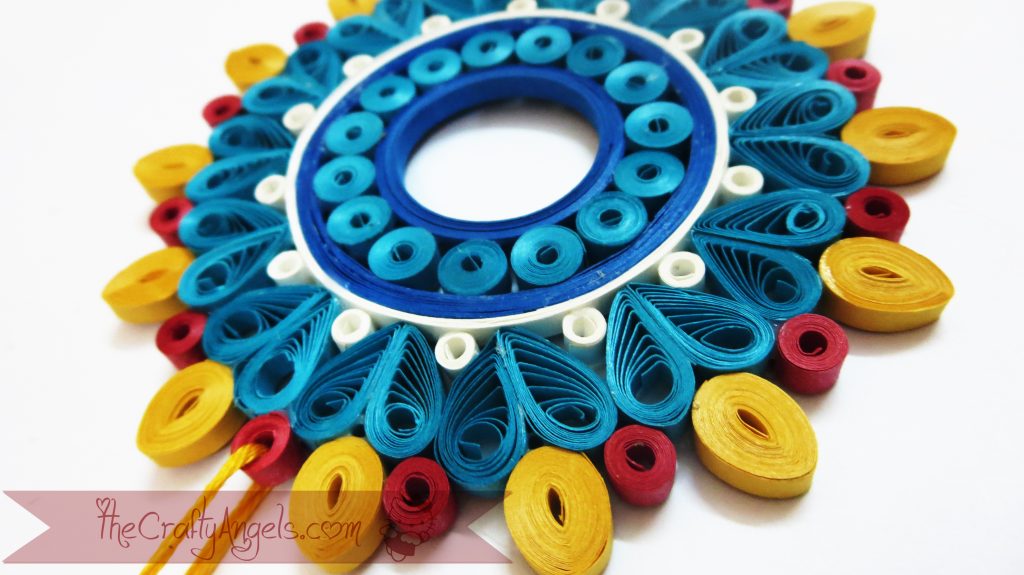
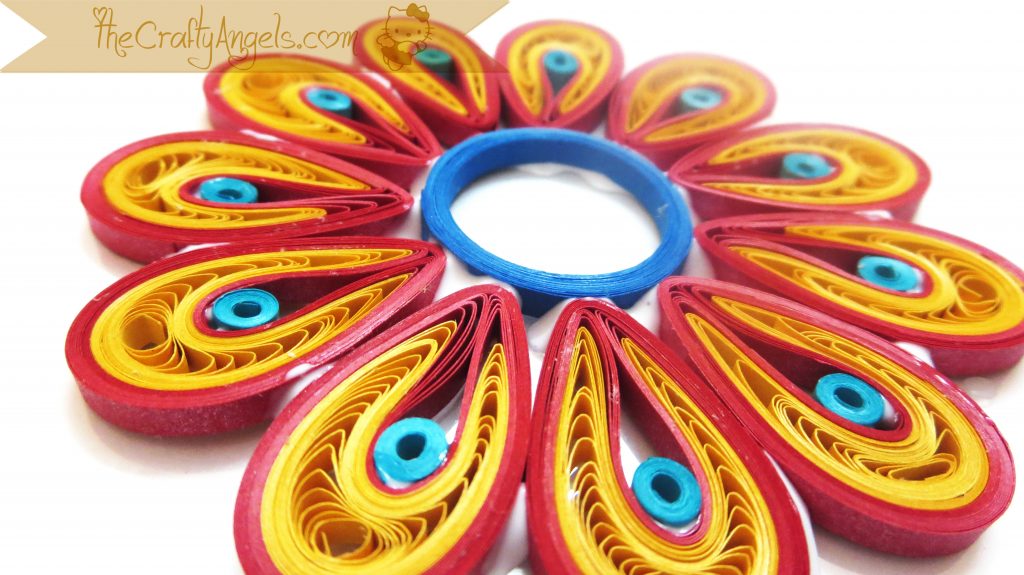
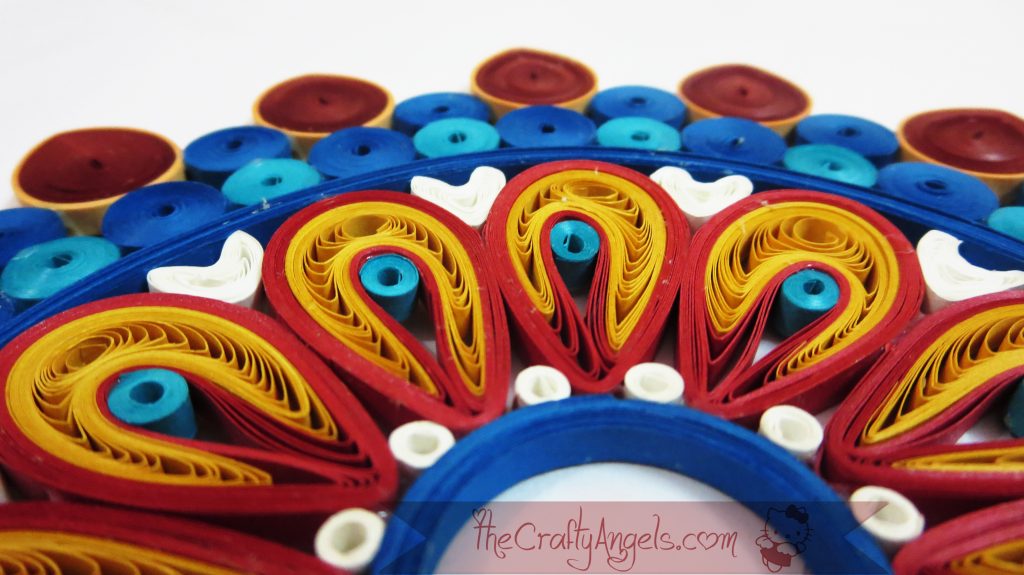
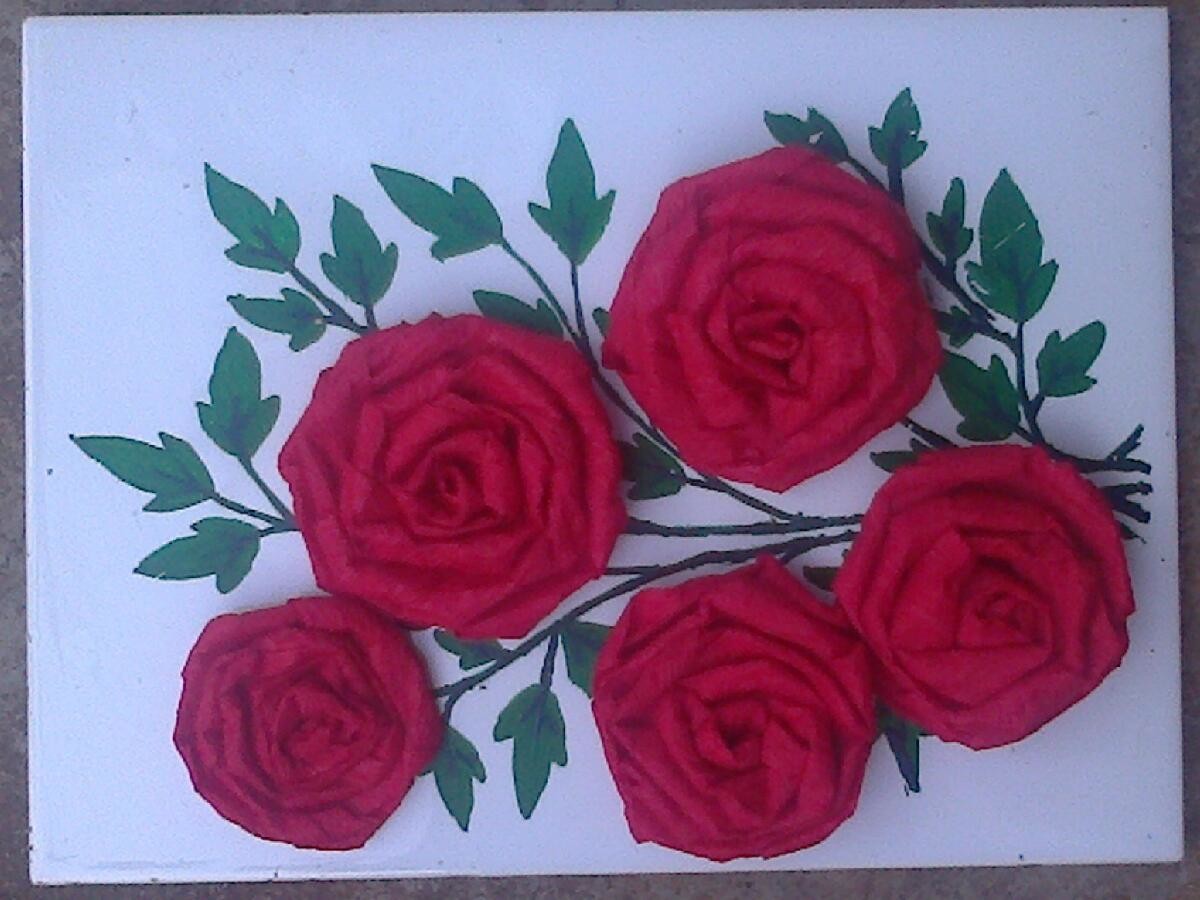
- Coming to the main middle figure, It had to have more colours and more attraction and hence more work! I started again with a hollow ring using my gluestick and made many tight coils to fill up spaces here n there. I made a quilled malaysian flower at the centre for which again I have previously shared a detailed tutorial with secret tips & tricks HERE. I made the flower in yellow & red colour and added a dash of blue ( which is the highlight color of my quilled wall hanging) by inserting tiny tiny tight circular coils inside the petals .
- Following the layout in the smaller design, I inserted contrast white colour small tight coils between the petals at the bottom and finished off that layer by sealing it with another ring of blue.
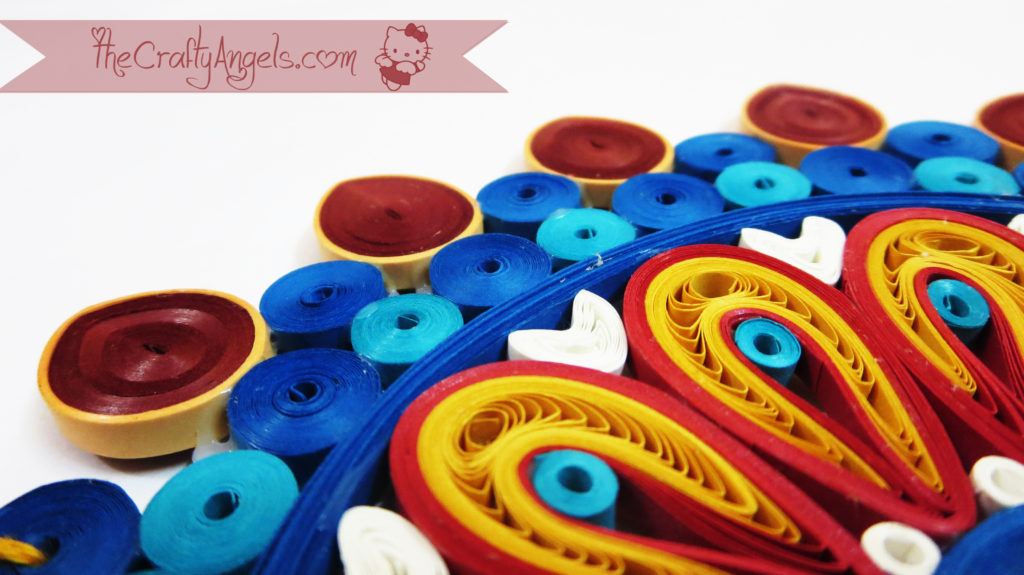
- The design still had to be spread for another 2-3 layers to make it huge so I made two layers of simple tight circular coils – one in alternate light and dark blue, the other with spaced single colour.
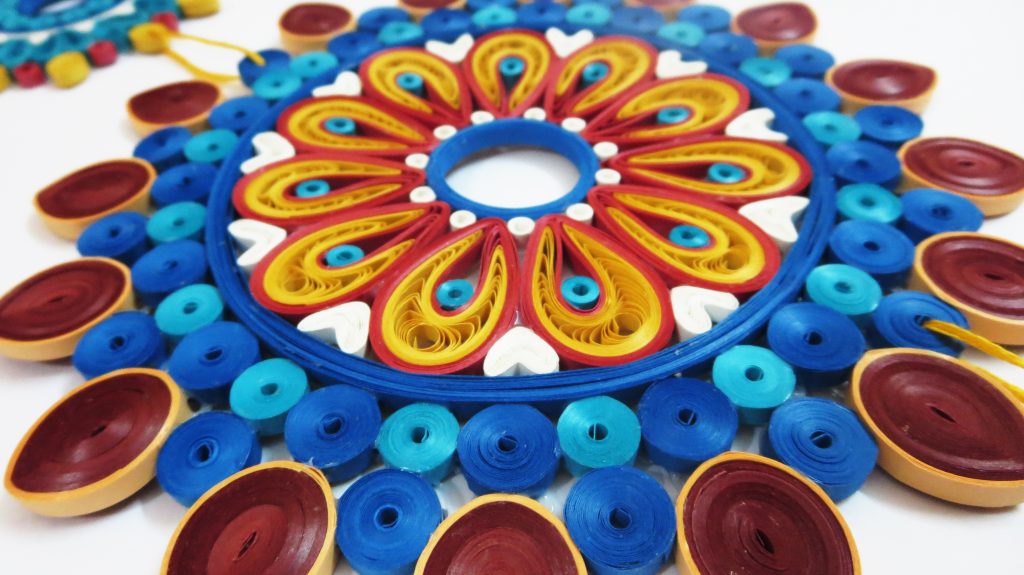
- I had yet to finish off a colour balance in the whole design so I went with tight teardrops in red with yellow border. Unfortunately my reds and yellows finished off and so had to adjust with maroon and peach shaded random strips ha ha!
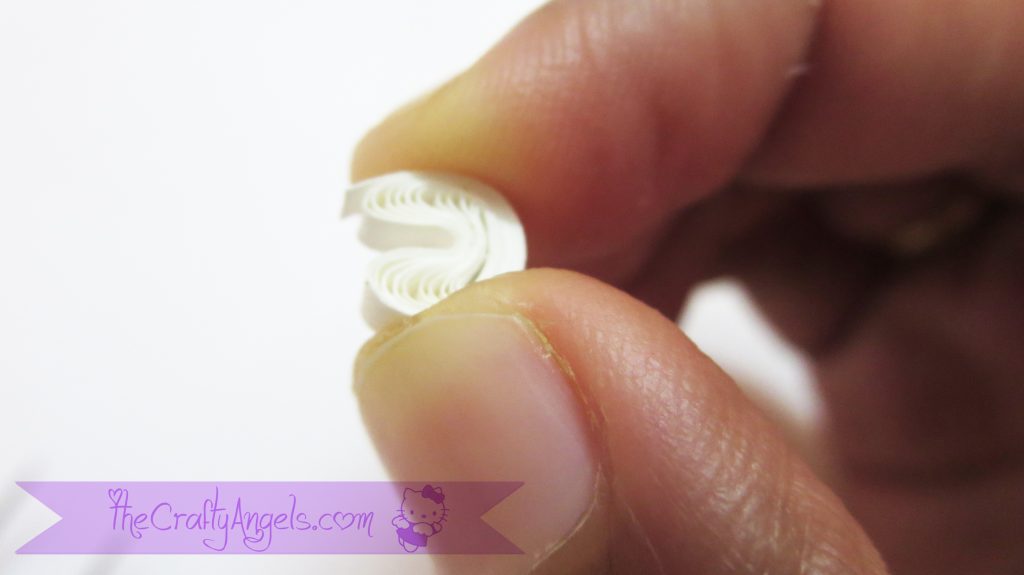
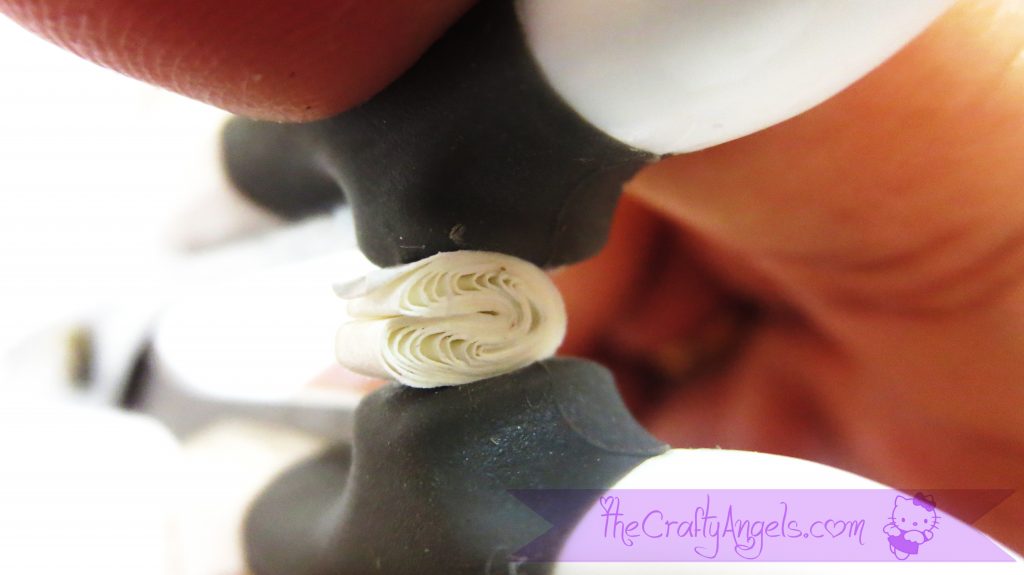
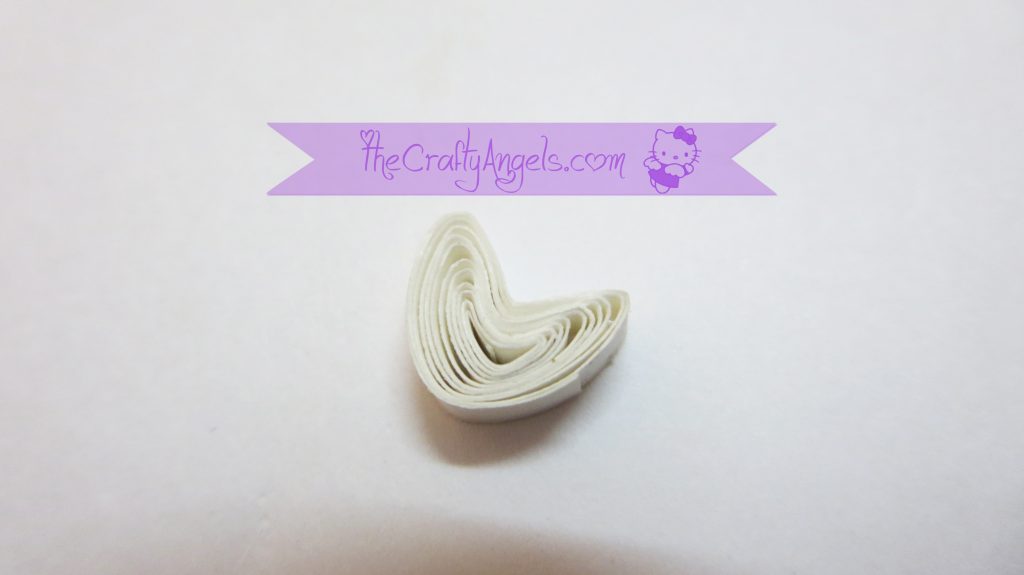
- There were these very visible gaps between the quilled malaysian flower petals and the ring adjoining it so I made these little “V” shaped hearts with single loose coil and filled up that space. The single coil heart was made in just three simple step- Make a loose coil, fold it at half the diameter like how you fold your quilled malaysian flower petal, pinch the U end of petal to form a V shape, release!I made use of my scissors to make the “V” shape because the coil was too small to even hold it properly between my fingers!

- Here are some final closer pictures of the quilled wall hanging. If you have any doubt regarding this, do refer to all tutorials mentioned within the post.


Tips and tricks for Making Quilled Wall Hanging
- Any thing quilling according to me must be sturdy and rigid so that it stays for a longer time. That meand the design should have more of tight coil designs and less of loose coils designs.
- Since the its a wall hanging, one side can be used as a rough side where you can mess up all the glue but keep the other side very very neat.
- I strongly recommend using a tweezer because there are lot of teeny weeny shapes to be inserted here and there which becomes easier and mess free when worked with a tweezer.
- Try to fill in gaps between figures so that the design is almost a fully filled flat piece of hmmmm..wall hanging!
- I love the paper matte original look in my quilling so i do not apply/use any sealant or varnish. But if you are okay with the glossy finish, a coat of glue followed by varnish is highly recommended to increase the sturdiness of the quilled wall hanging.
Thats all for now folks! That was a very long post with lot of photos. Currently working on a recycle craft and its a huge one too. Hoping to finish it off soon and come out with a tutorial 🙂 Follow me on instagram HERE to get sneak peaks of current project and also something about me & my family 😉
xoxo
Angela

Beautiful Angela!
Thanks a lot Dhiyana for coming back 🙂 This wall hanging was a lot of effort for me because for every 5 shapes I was making I had to share one with my daughter so that she lets me make the rest 😛
Hi Angela,
I like you wall hanging design. Could you please tell me what is the size of the strips that you have used in your this particular design?
Thanks,
Leena