
Quilling Technique Tutorial :How to make Quilling Leaves without tools #11
Quilling technique : Quilling Leaves Tutorial
Quilling is the in-thing these days and almost everyone is trying their hand at this addictive paper craft. The tutorial I am sharing with you all today is my first exhaustive quilling project that I did for a craft competition in my office. Quilling is an age-old paper craft that involves many many techniques both old and evolving. There are umpteen number of quilling tutorials in the blogosphere and youtube but here I am sharing with you my personal experience and instructions for quilling leaves.
[irp posts=”2307″ name=”Quilling Combing technique : Quilled bird”]
Be sure to also check out all the quilling tutorials covered :
- Beginners quilling tools & supplies
- Basic Quilling tutorial : Making Flat Tight Quilled Coils
- Basic Quilling instructions : Quilled Teardrop Shape
- How to make Quilled Flower Petals without tools
- How to make Quilling Leaves without tools
- Quilling Butterfly Tutorial
- Tight Quilled Flower Tutorial
- Beehive technique Quilled flower tutorial
- Quilled Wall Hanging Tutorial
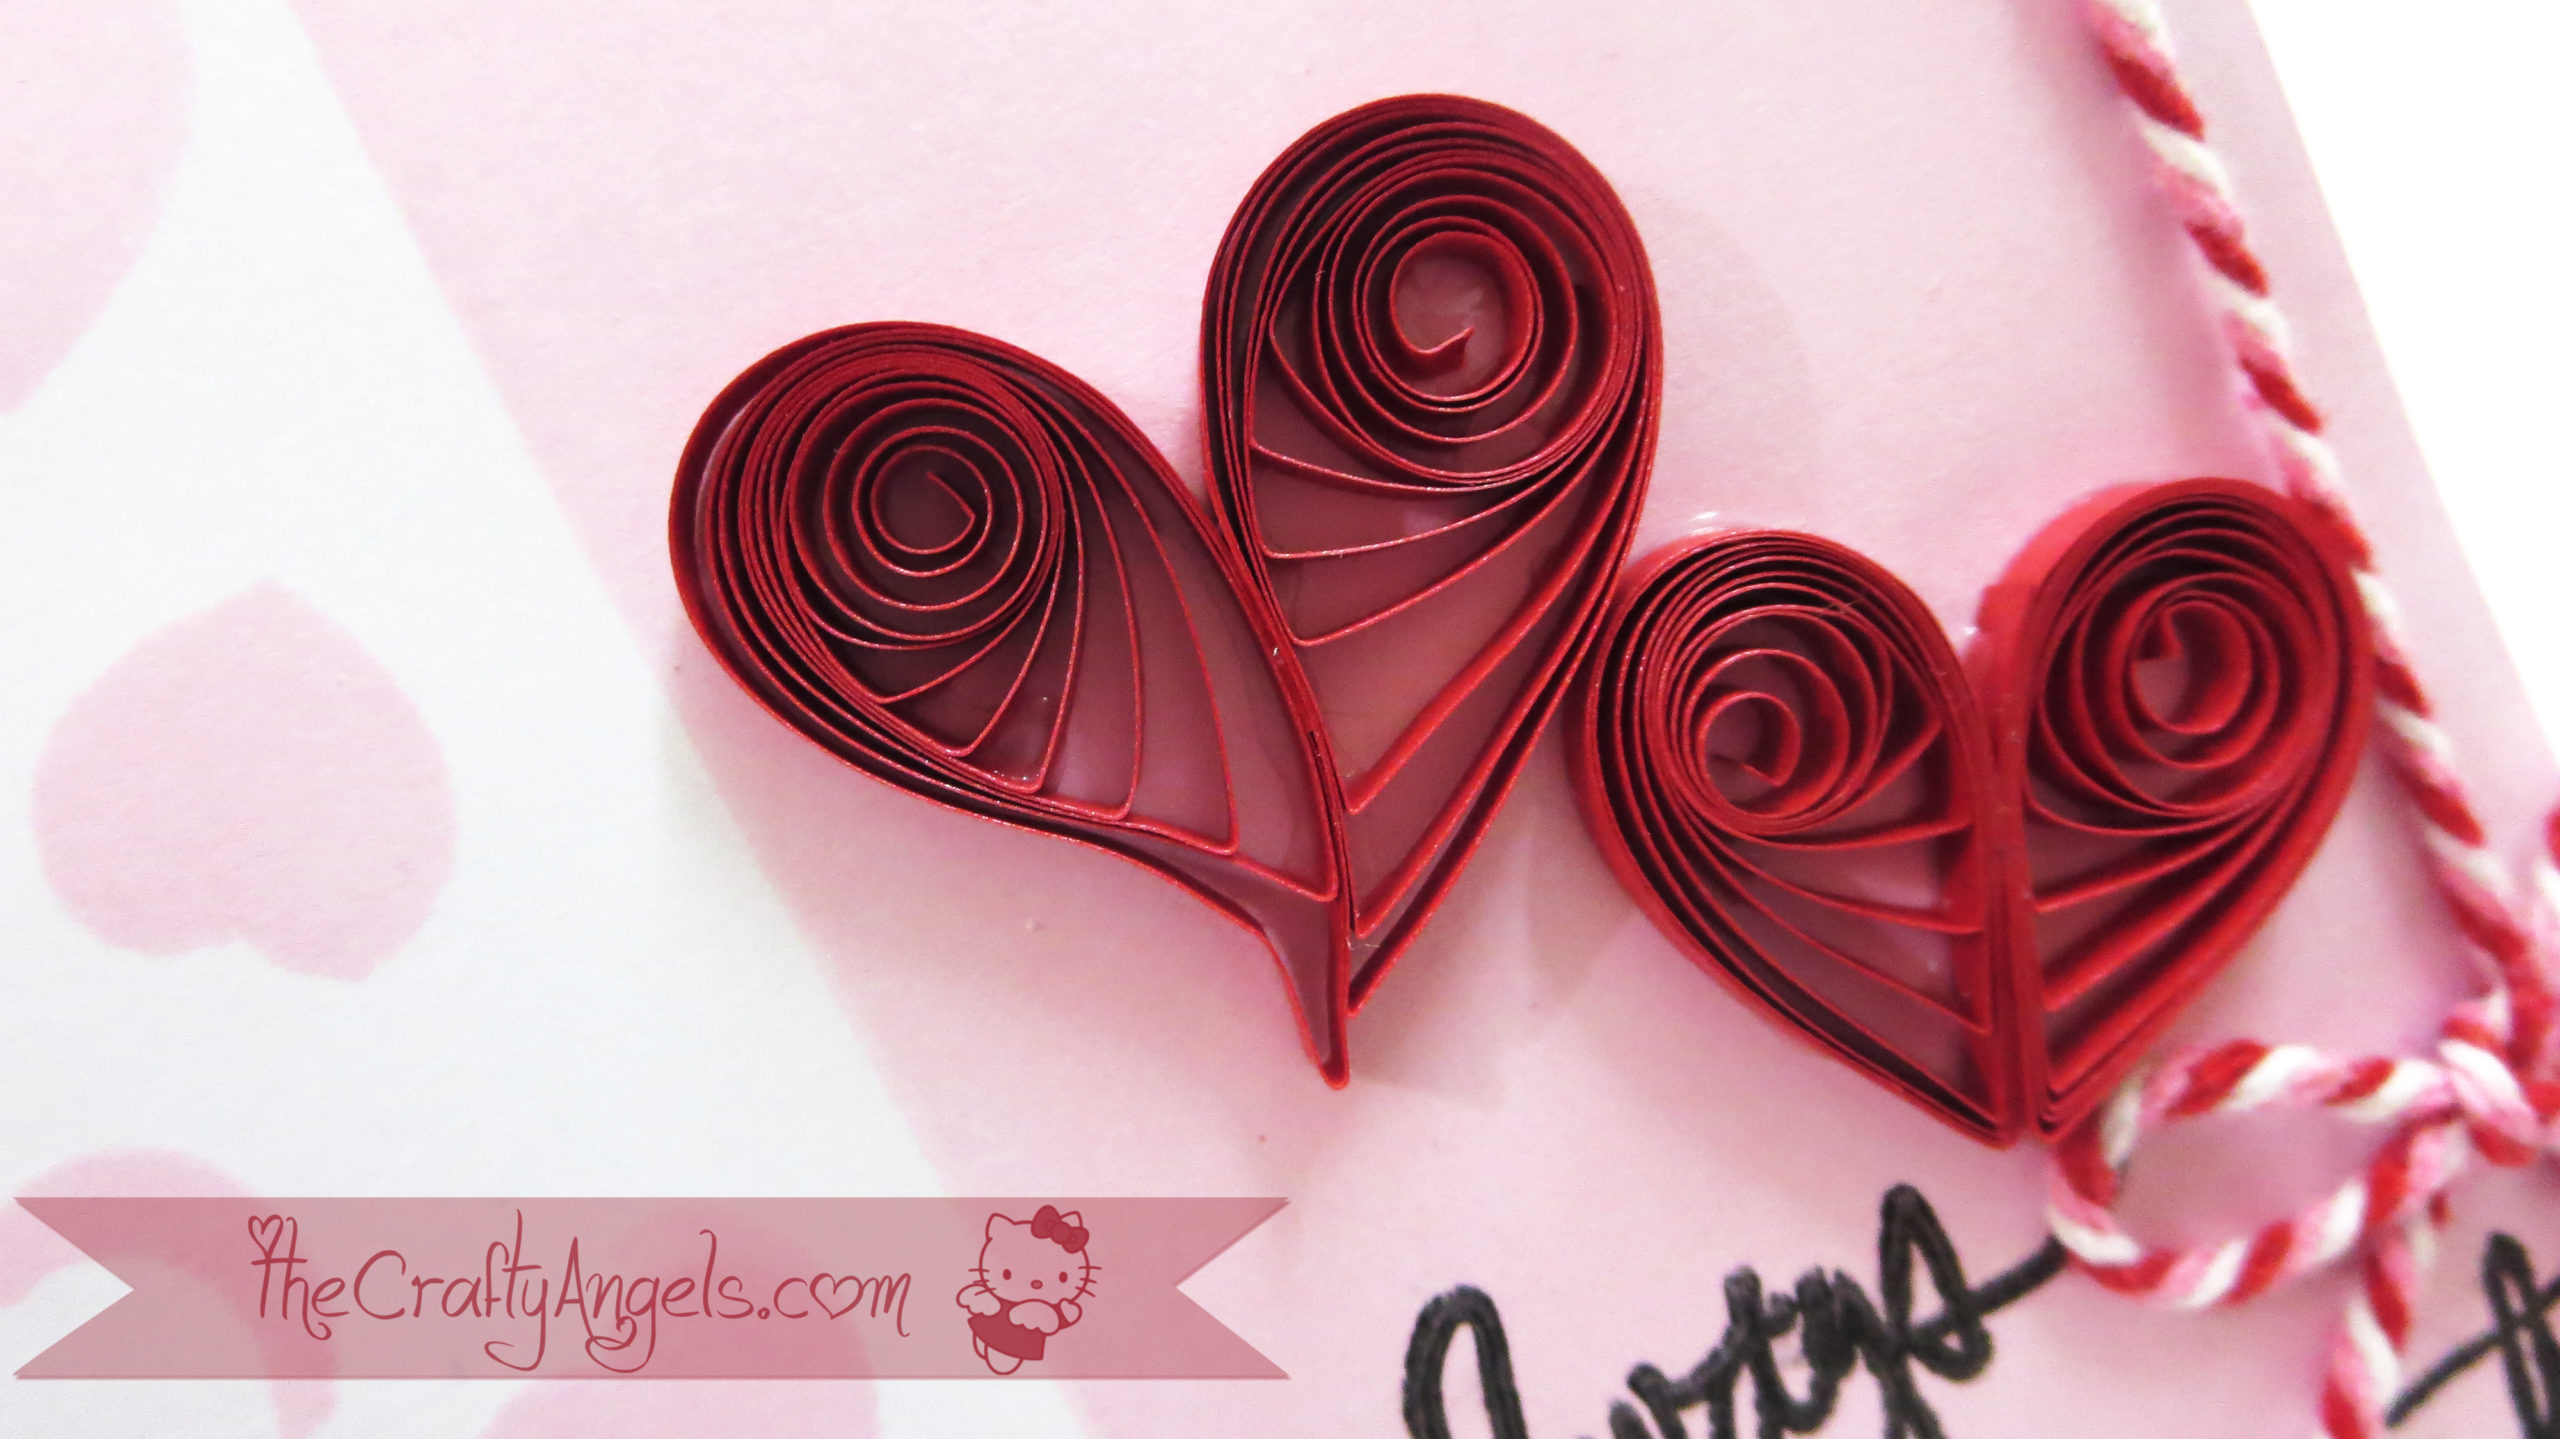
- Quilled Hearts Card Tutorial
- Quilled Malaysian flowers Tutorial
- Quilling Comb Flower Tutorial with Video
- Double Sided Quilling Comb review & Tutorial
- Quilling Combing technique : Quilled bird
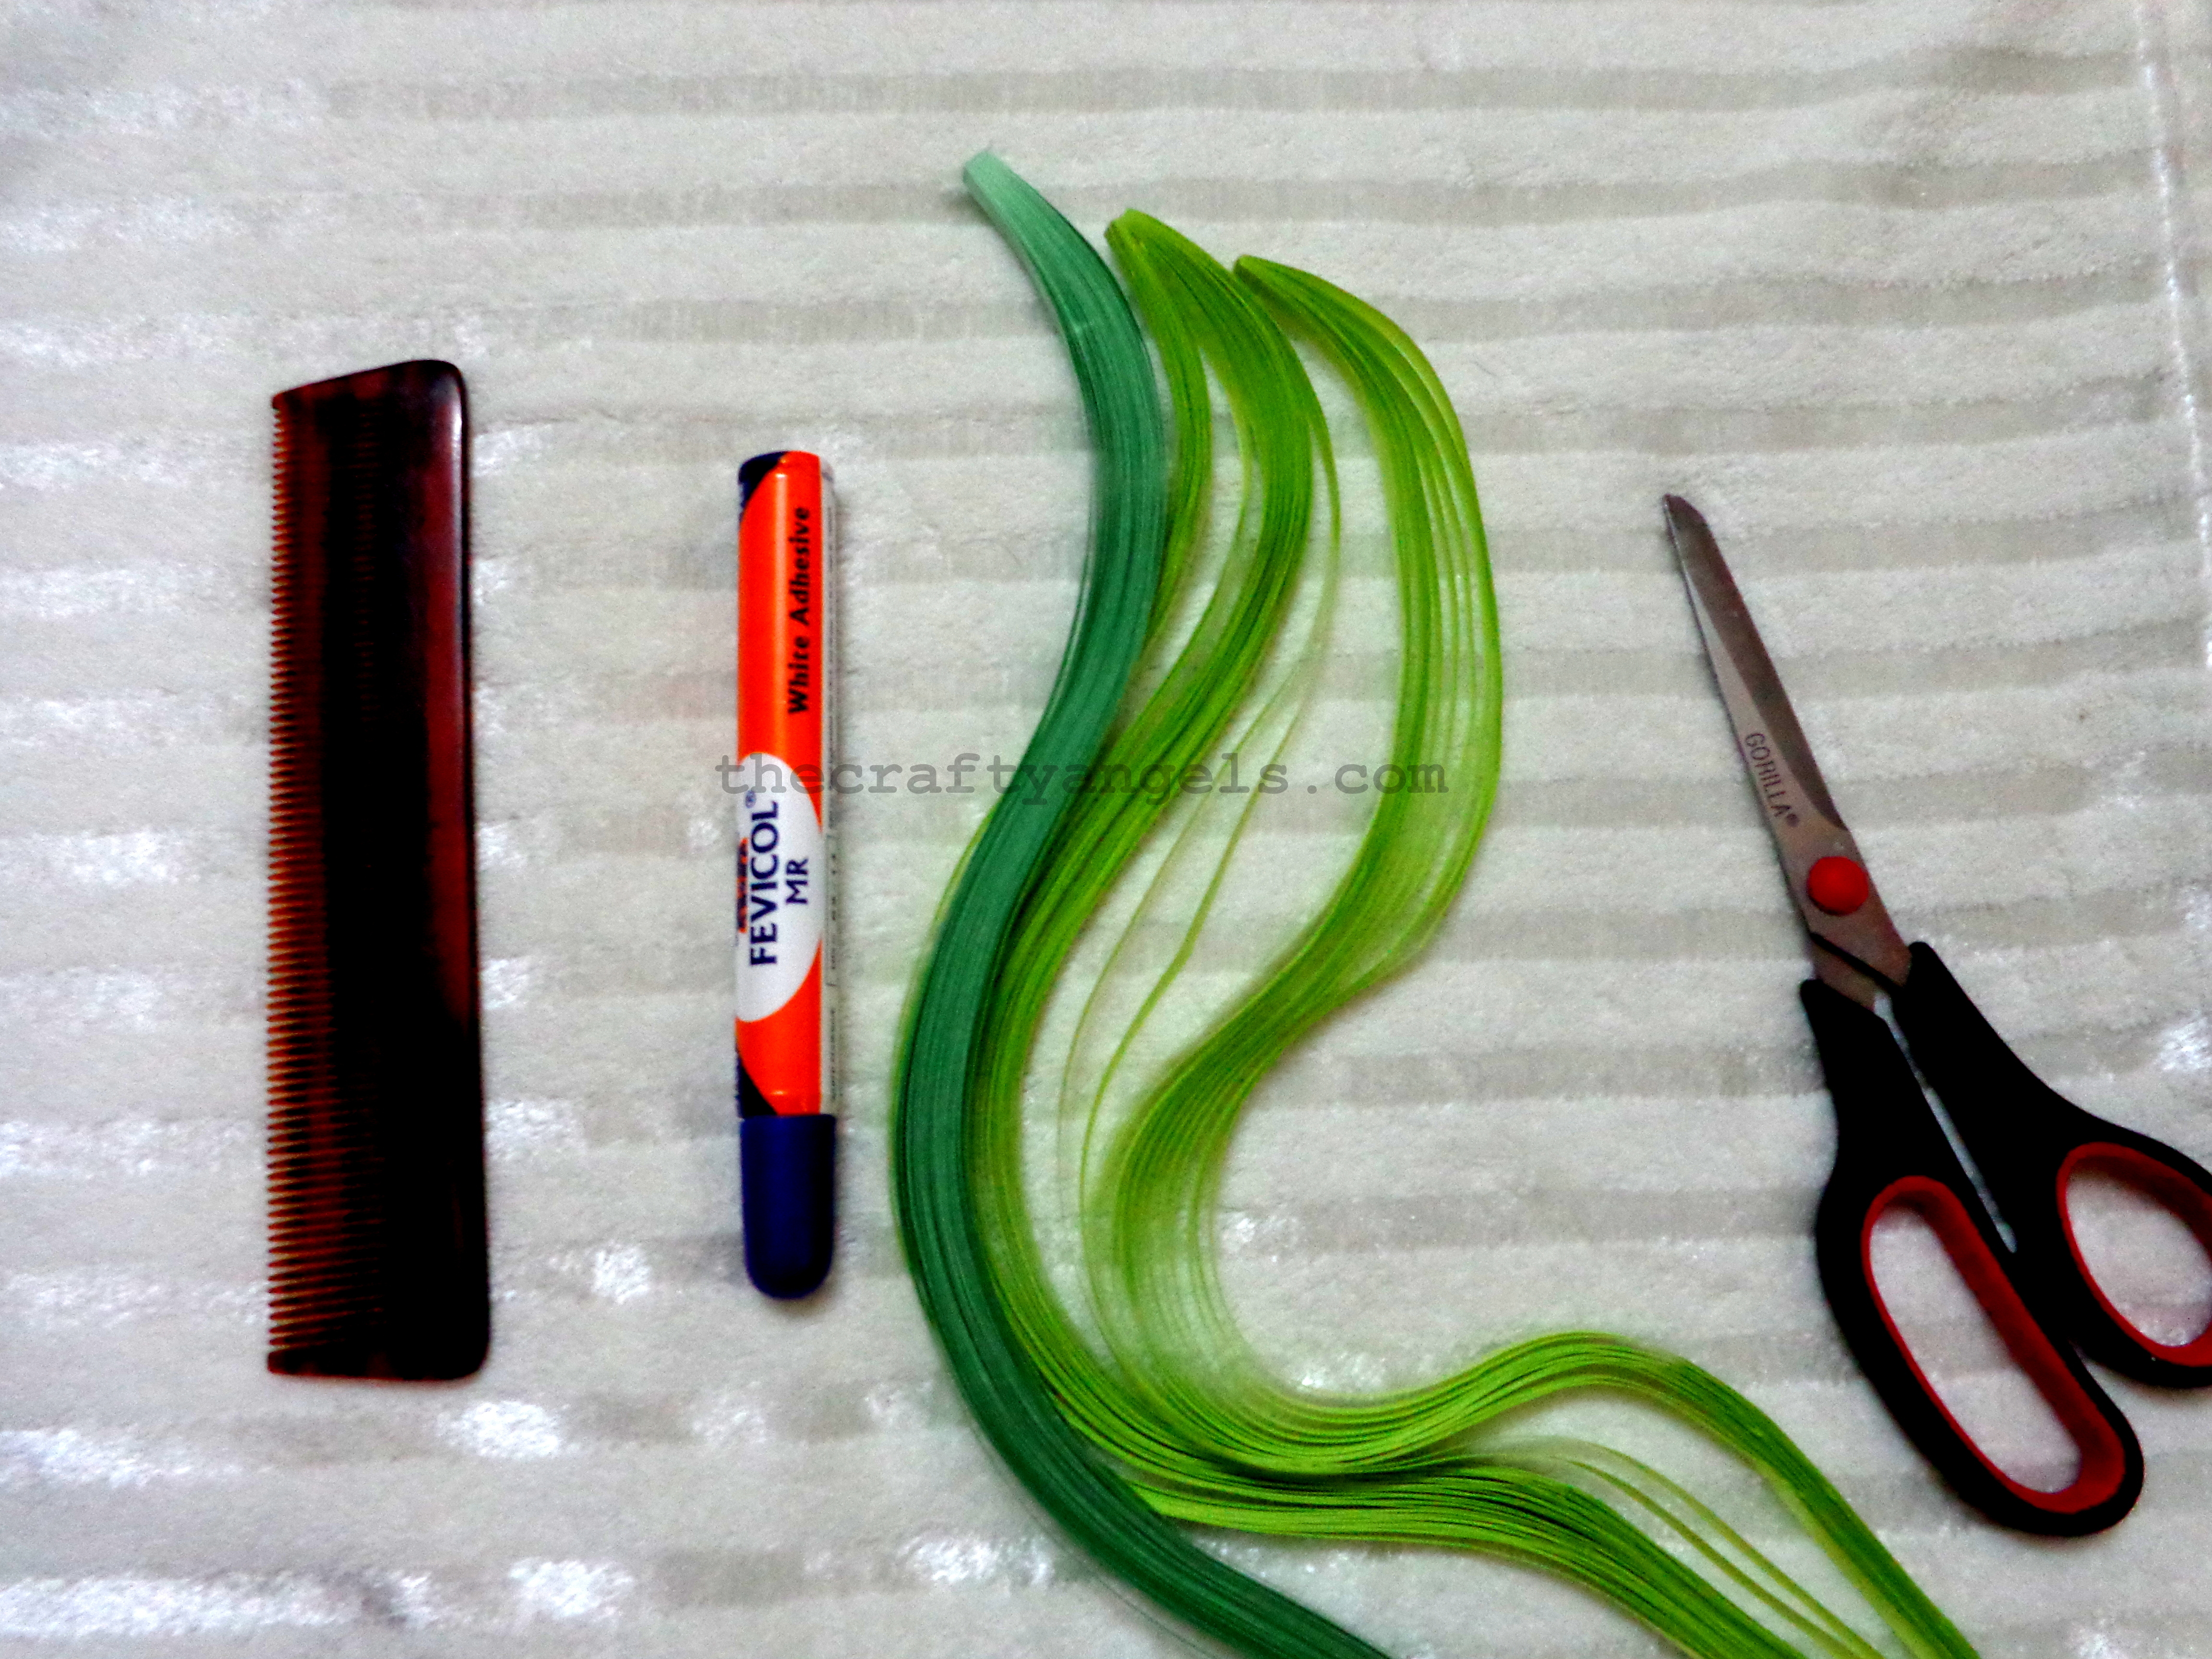
Materials required for quilling leaves :
- Quilling strips ( the ones ive used for this project were purchased online from craftadda.com)
- Hair comb
- Glue
(If you dont have precut quilling strips, you can refer to my previous quilling tutorial where I have explained how make your own ones)
[irp posts=”1809″ name=”Tight Quilled Flower Tutorial : A Shaker Card”]
Step by step instructions on how to make quilling leaves :
Quilling requires a lot of patience and dont be disappointed if you dont get it right the first time. For making these quilling leaves, you have to join two strips to get a longer strip and follow a zig-zag pattern like in the photos below. I always try to write down the instructions so that its easy to follow but I guess the photos explain a lot better for this quilling leaves tutorial. 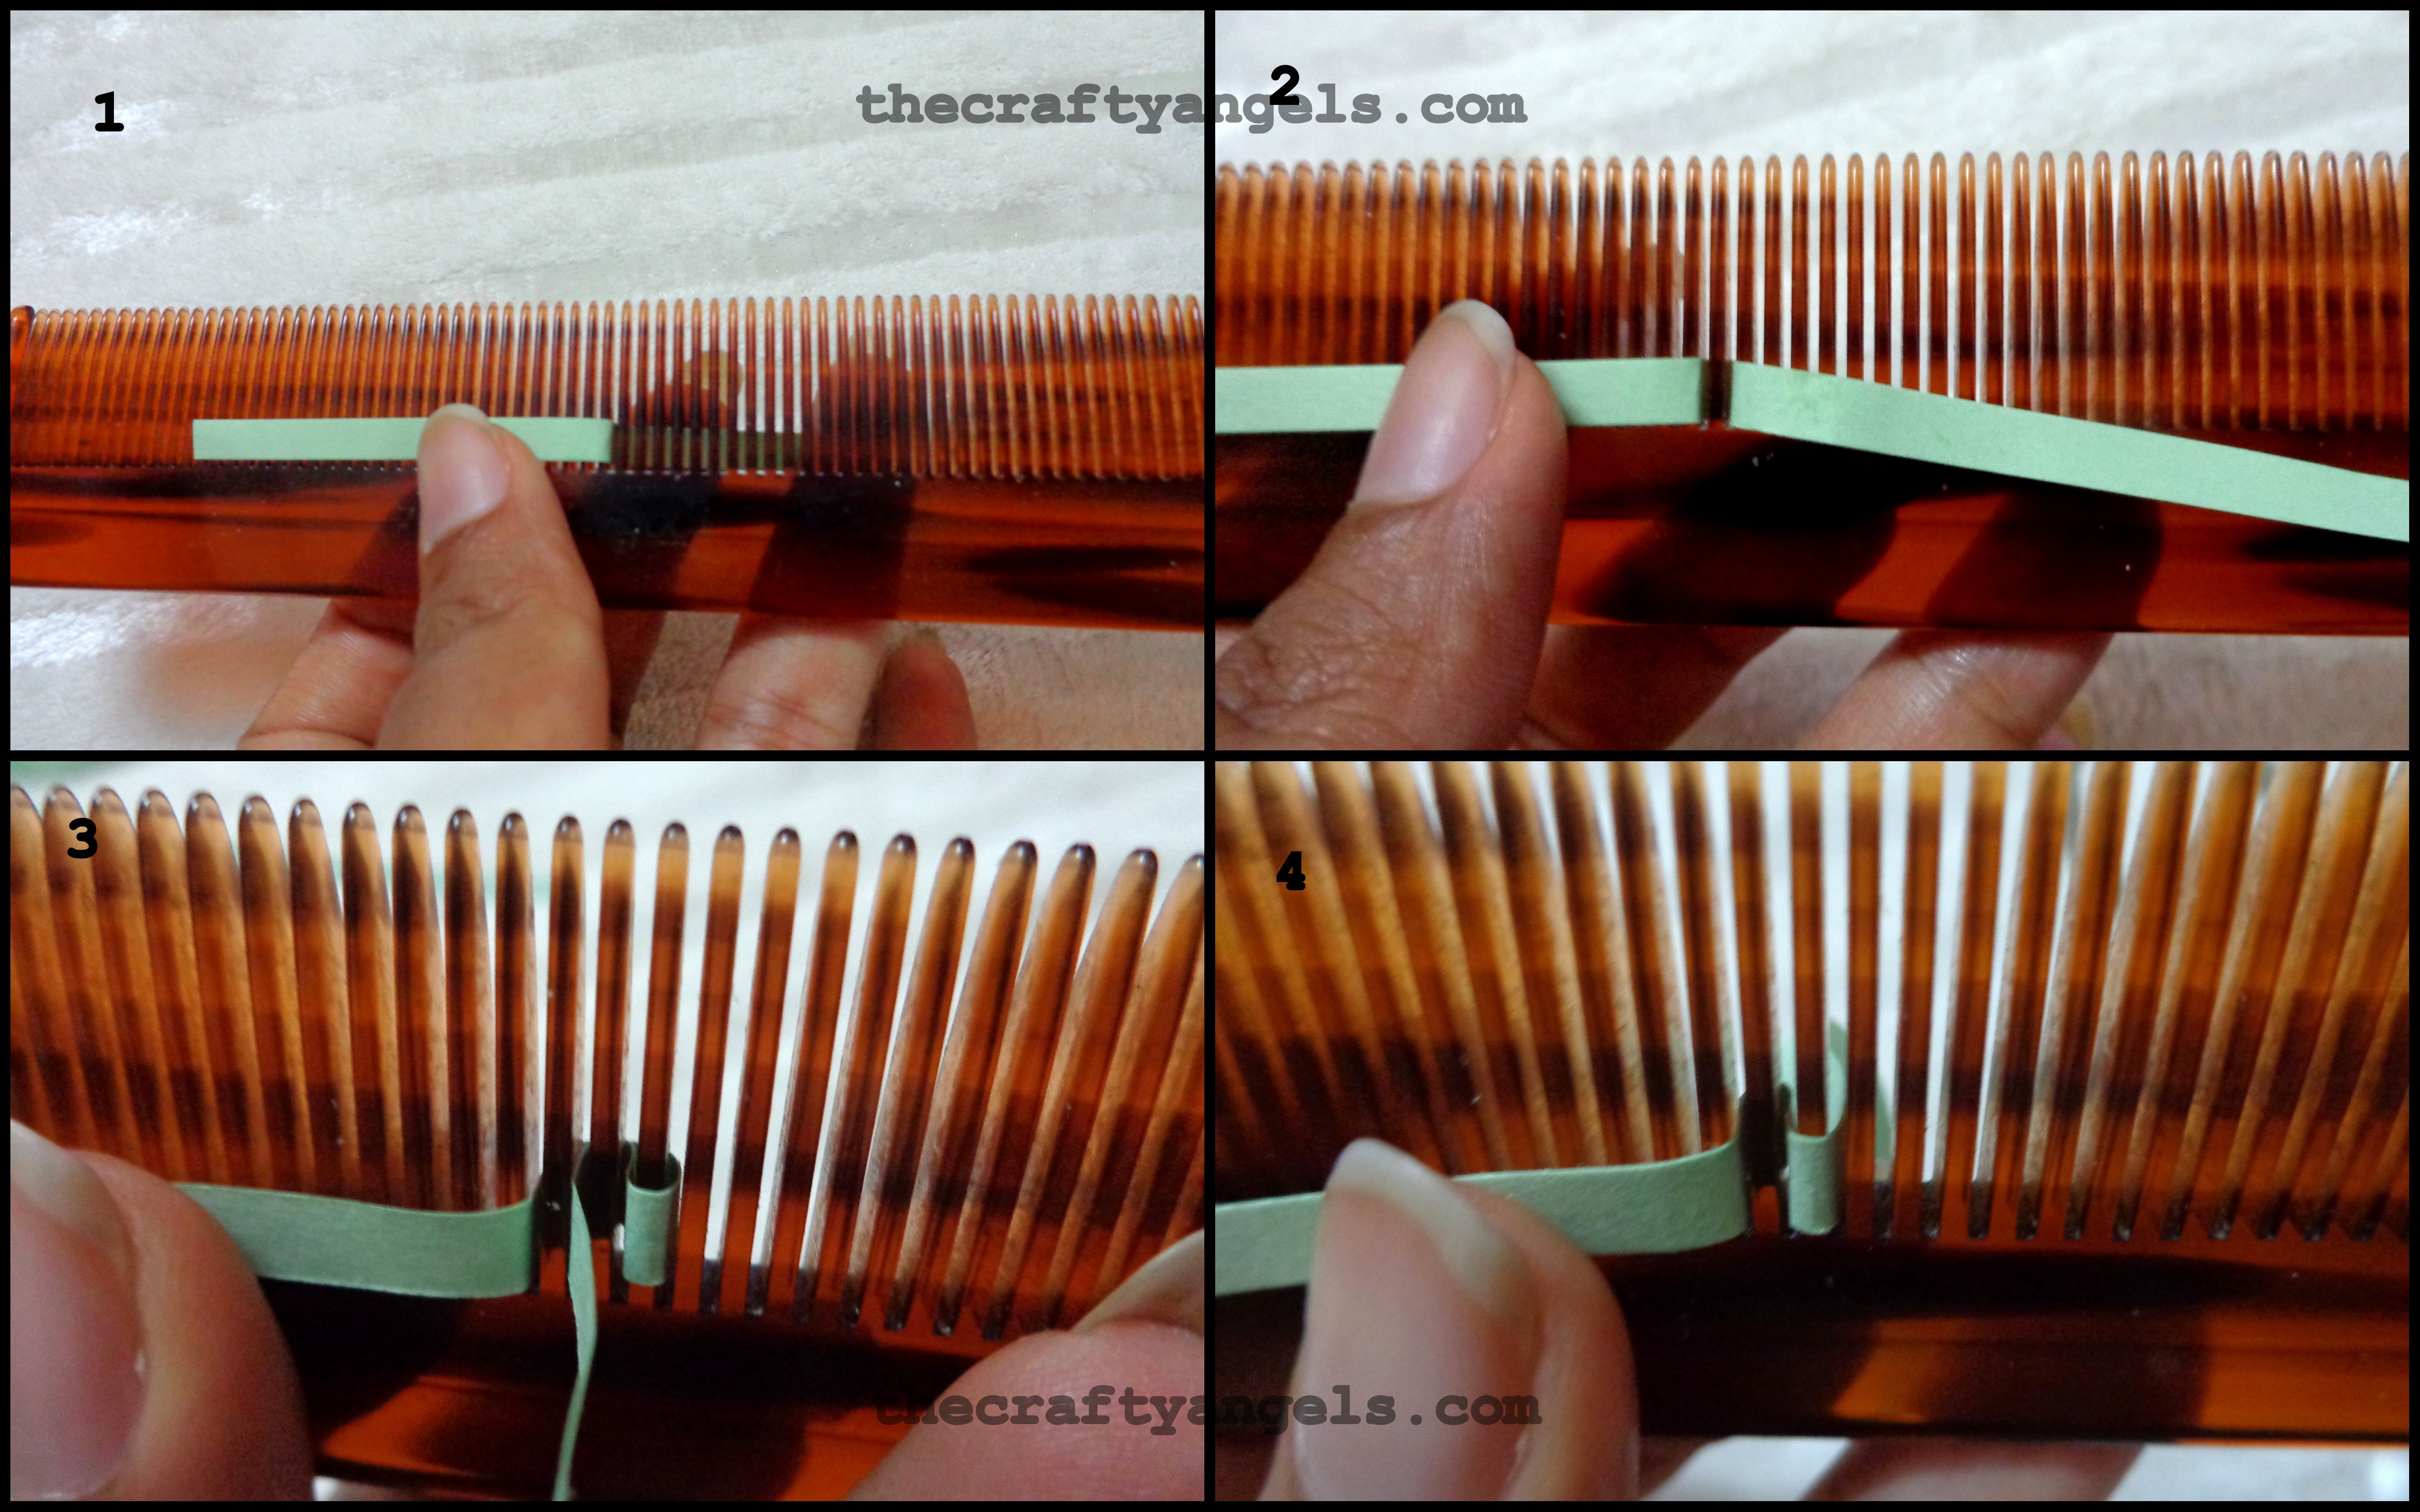
[irp posts=”1925″ name=”Double Sided Quilling Comb review & Tutorial”]
Once you select your starting point, insert your quilling strip through the comb (leave a tail long enough to be the leave center vein) and pass it through the next tooth of the comb to left and to right and continue. Check the backside pattern in the above photo I think this will give an idea on how to pull out the quilling strip properly.  You can continue the step till the end of your quilling trip and secure it with glue at the back.
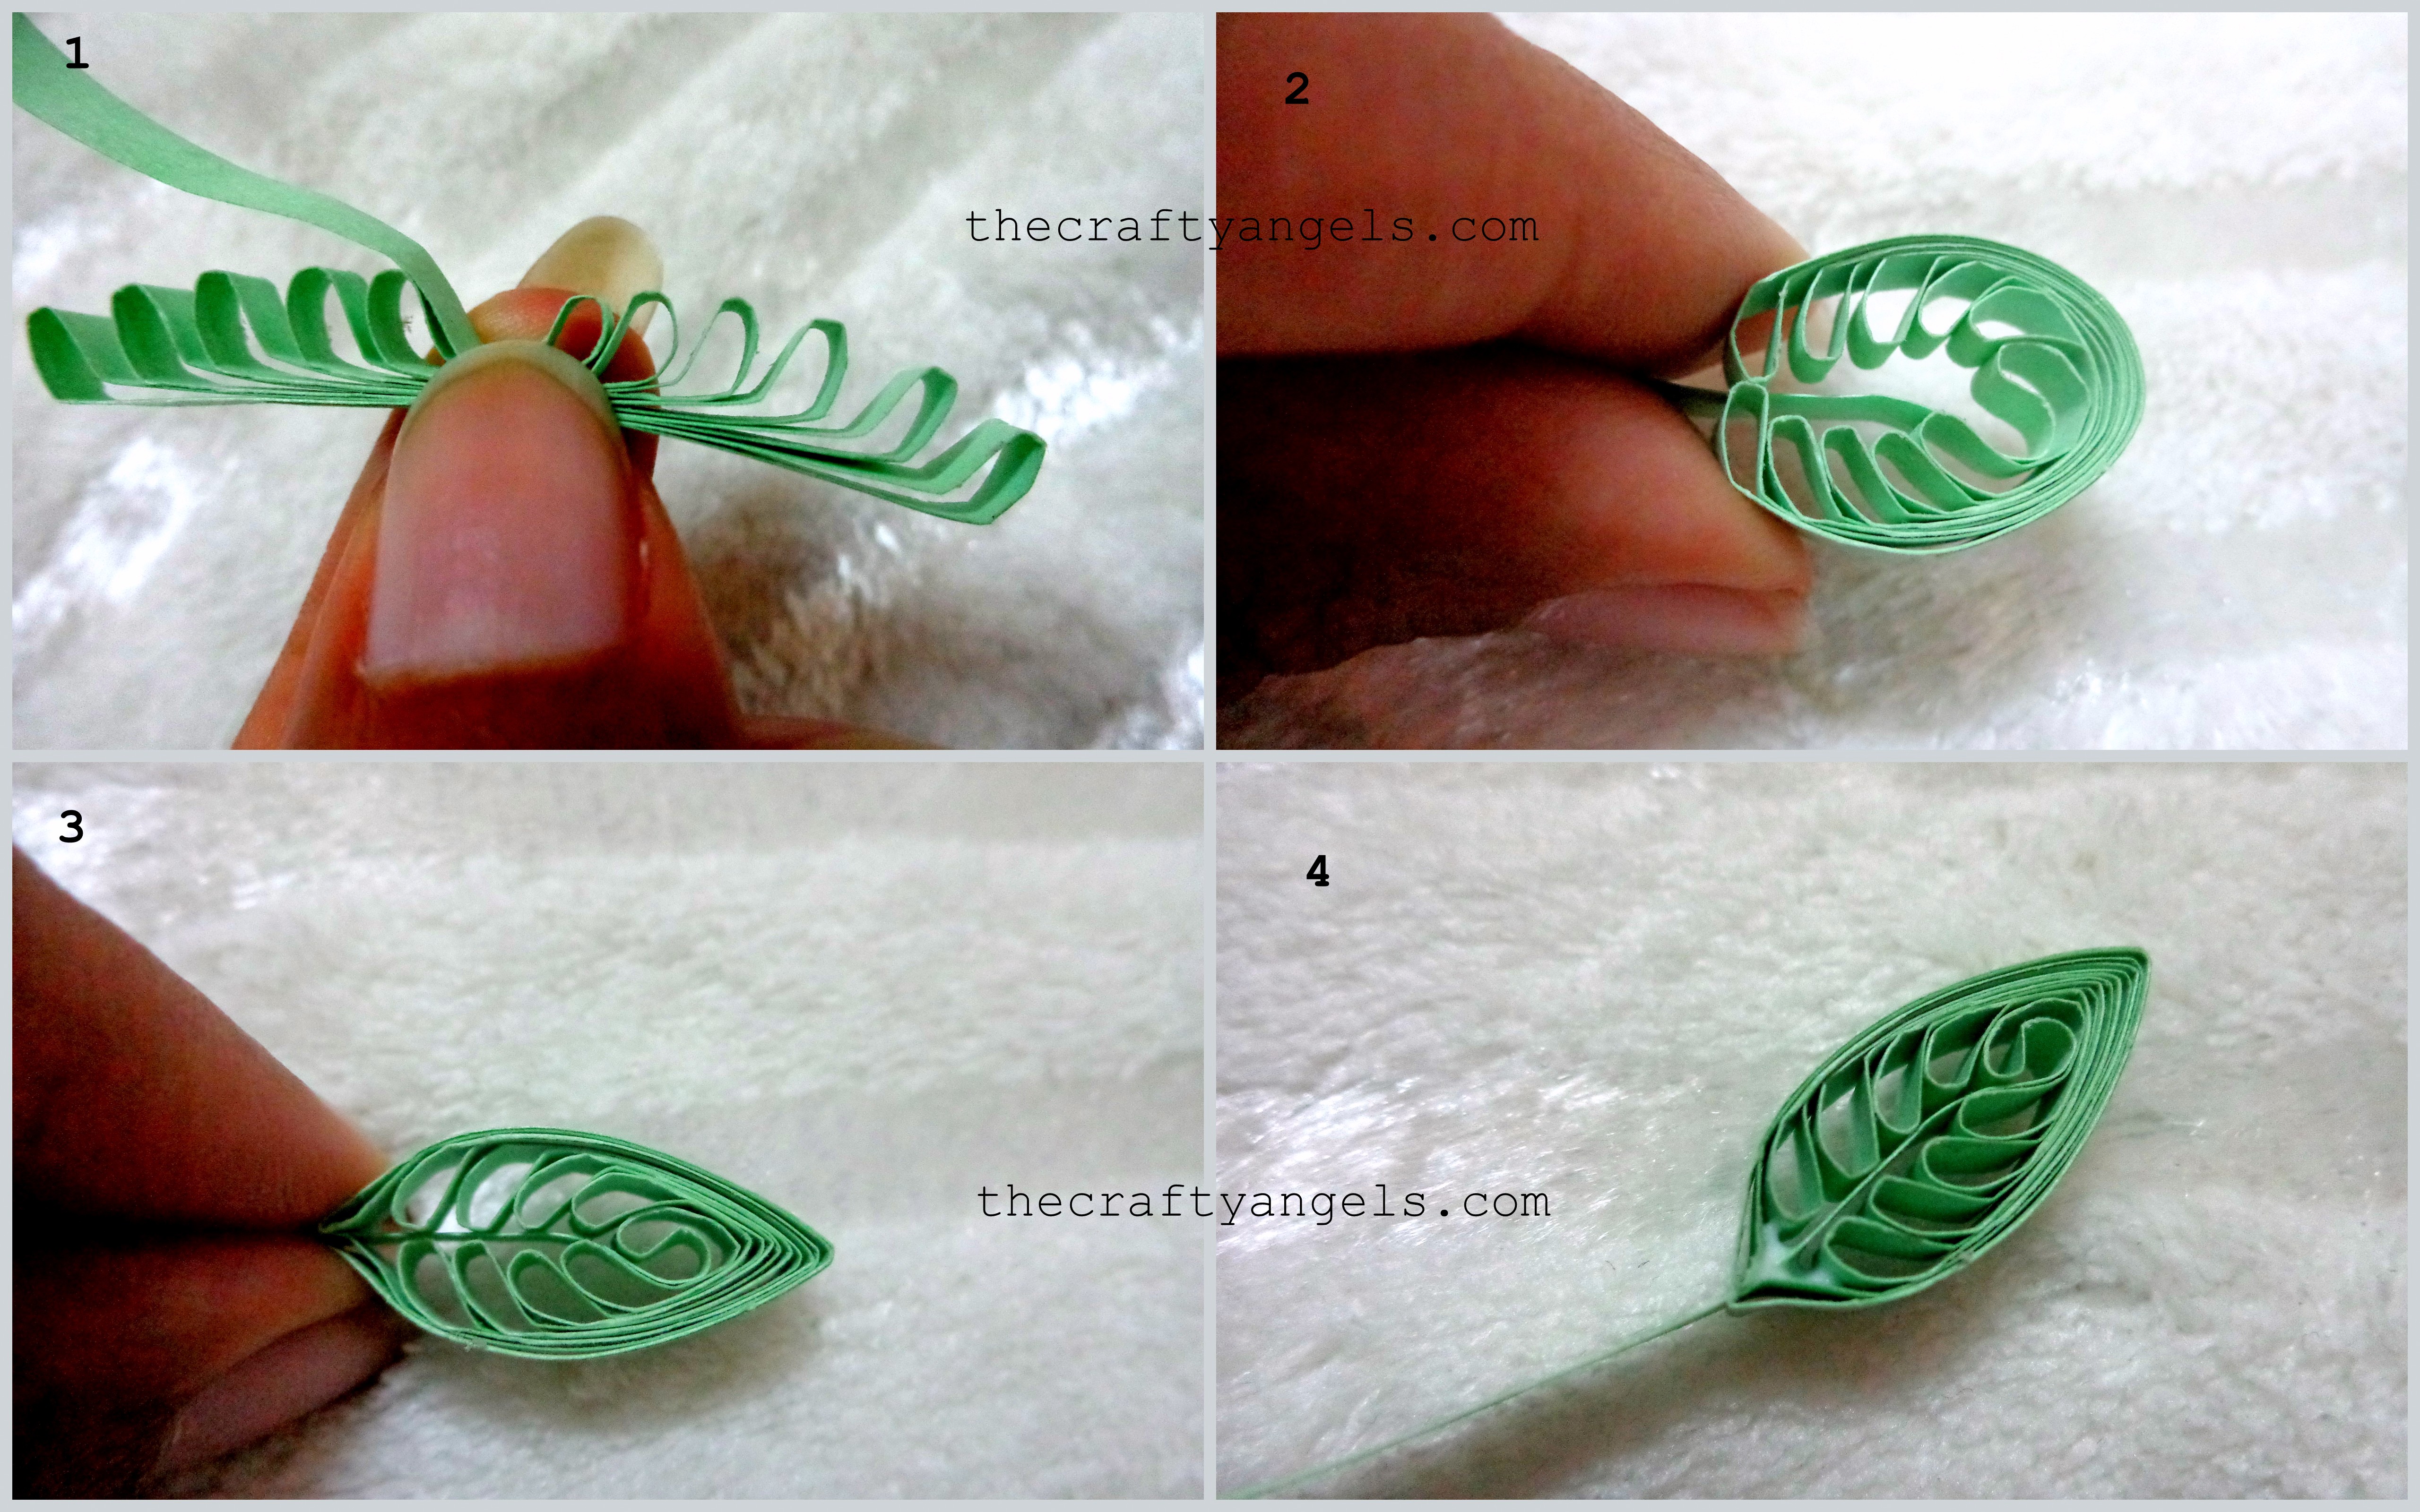
Pulling out the quilling pattern from the comb will be a little difficult the first time but the key is to slowly pull it out together. Try pushing the quilling paper from the closed ends of the comb to the open ends while holding the center part of the pattern between your thumb and index finger as you pull it out. You will have the pattern intact in your hand and all you have to do now is to bring together the two ends together with the frills towards the inner side. You will have a stupid looking leaf now ( haha!) thats going to turn into a beautiful one!
[irp posts=”1406″ name=”Beehive technique Quilled flower tutorial”]
Try to adjust the center vein ( tail of the quilling strip) such that the frills look symmetric on both of its sides. Once you have that done, pinch the center portion so that the tapered end of the leaf is made. Tada! Dont you have a simple easy quick quilling leaves? Wait till you start jumping around 😛 You can alter the leaf pattern by loosening the layers of quilling strips at the tapered end. Now that the leaf is almost over i know its tough having more patience but this one is very important. I used by eyebrow tweezers ( only because I hadn’t yet invested in crafting tools) to hold the ends to the center vein ( quilling strip tail) after applying glue on them. Once it is dry ( in few seconds), you have your quilling leaves ready to use 🙂

Tips and tricks in making Quilling Leaves :
- Choose a comb that has little gap between the teeth and also has a little wide teeth ( else the leaf is going to be very thin!)
- Leave a longer quilling strip tail ( you can always cut if excess) else your leaf might end up with no stem by the time you finish the project.
- Be carefull while taking out the completed pattern from the comb. Take it out all together else the pattern will have a skewed look that might be difficult to work with.
- Use a tweezer/holder to hold it after applying glue.
[irp posts=”1166″ name=”Basic Quilling Tools & Supplies : Beginners must read!”]
Hope you guys enjoyed this tutorial 🙂 It took me so long to come up with this one. Its so easy to just post pictures of my works but the whole idea of me struggling with this blog is to share my knowledge with people like you. Do leave your sweet comments and suggestions in the comments box below and also give a thought on sharing this on the social media so that this tutorial reaches everybody in need of it 🙂 (Check out all my quilling tutorials here ) Will be coming up with a sunflower quilling tutorial soon.
Untill then its bbye! xoxo Angela
Good tutorial! thanks to share!
Greetings from Chile
http://www.creaquilling.blogspot.com
Hey pily! such a pleasure that you could leave a comment 🙂 thanks a lot 🙂
Good tutorial. I am new to quilling. I really like your work.
Thankyou Patricia 🙂 Do subscribe to the blog through the option given on top left corner of this page so that you dont miss out on any of the tutorials 🙂 Im right now drafting a tutorial for quilled malaysian flower btw 🙂
Dear angela,
very nice work & tutorial…m new to quilling & this actually inspired me.
thanks for sharing .
keep it up 🙂
Thankyou shipra for your kind words. Im more than happy to share my knowledge on quilling. Hopefully i get more time in coming months to share more photo &video tutorials 🙂 keep coming back shipra and also do email me your works when you finish them 🙂
I´m sorry but I quite didn´t understand it according to photos. Any chance for a video tutorial? Many thanks!
Hello Mia,
Shall try to come up with a video tutorial and link up in here for your understanding 🙂
Good tutorial. Easy to understand