
Quilling tutorial : Quilled Malaysian flowers
Quilling tutorial : Quilled Malaysian flowers
Hope you all found use with my basic quilling tutorials for quilled tight coil HERE and quilled teardrop shape HERE. I have been making these shapes to fill in my quilled wall hanging which is finally over 😀 and this time its malaysian flower 🙂 Well Malaysian quilled flower was apparently a quilling design first made by Solehah Muhammad of My Quilling Soul (HERE) The Quilled Malaysian flower looks very simple but getting the right symmetry on either sides of the petal is a little tough job. Honey in her blog at Honey’s quilling has done a very well explained tutorial on making Quilled Malaysian flowers (HERE) and also has shared some interesting tips and techniques (HERE). When I tried to make these flowers I had to keep repeating the petals again and again because I just couldnt get the symmetry on either sides of the petal and so I devised a way of my own. So shall we get right into the tutorial?
Be sure to also check out all the quilling tutorials covered :
- Beginners quilling tools & supplies
- Basic Quilling tutorial : Making Flat Tight Quilled Coils
- Basic Quilling instructions : Quilled Teardrop Shape
- How to make Quilled Flower Petals without tools
- How to make Quilling Leaves without tools
- Quilling Butterfly Tutorial
- Tight Quilled Flower Tutorial
- Beehive technique Quilled flower tutorial
- Quilled Wall Hanging Tutorial
- Quilled Hearts Card Tutorial
- Quilled Malaysian flowers Tutorial
- Quilling Comb Flower Tutorial with Video
- Double Sided Quilling Comb review & Tutorial
- Quilling Combing technique : Quilled bird
Materials required to make Quilled Malaysian Flowers:
- Quilling strips- two colors
- Slotted quilling tool
- Quilling board
- tweezers
- Glue
Step by Step procedure to make Quilled Malaysian Flower
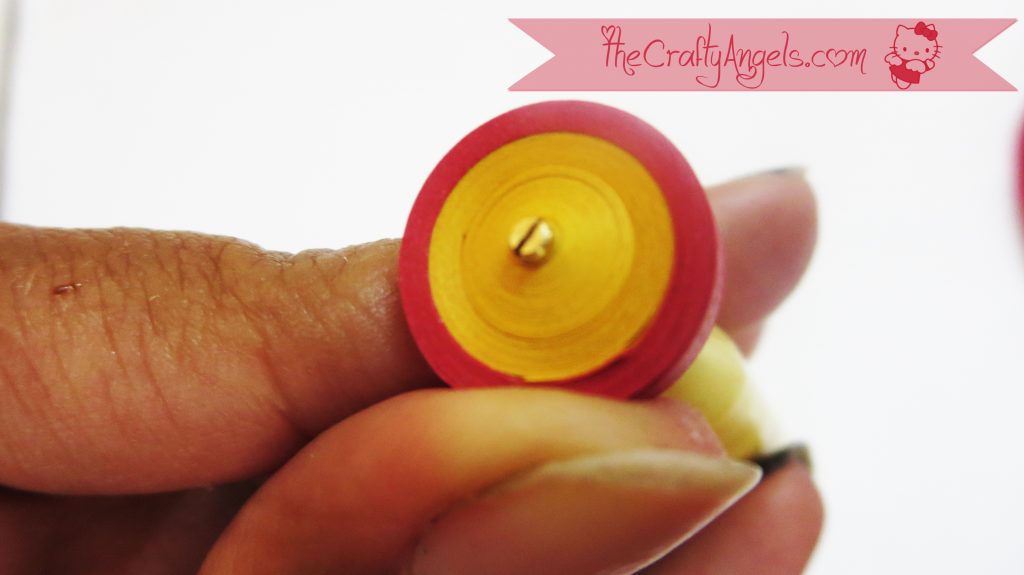
- Join your strips of various colours to get a longer continuous strip. The color of strip with which you start making the coil will be the inner petal colour so choose the order accordingly. It would be preferable to have inner coil paper strip to outer coil paper strip length ratio as 2:1
- Now start making a tight coil from the quilling strip you just made. You may want to refer to my previous tutorial on How to make tight quilled coils (HERE) to get it right 🙂
- Allow the quilled coil to uncoil on its own by placing it in a circular slot of your quilling board. The perfect size of the quilling circle on your board will be the one which is 1/2-3/4 size of your quilled tight coil.
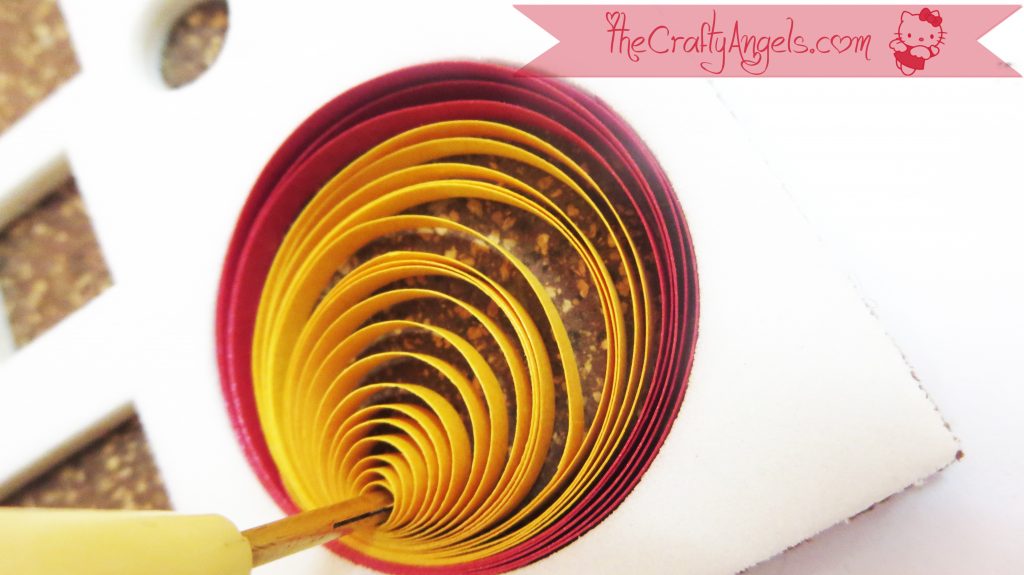
- You may use the technique described in my previous tutorial (HERE) to get an even distribution of loops in your loose coil.
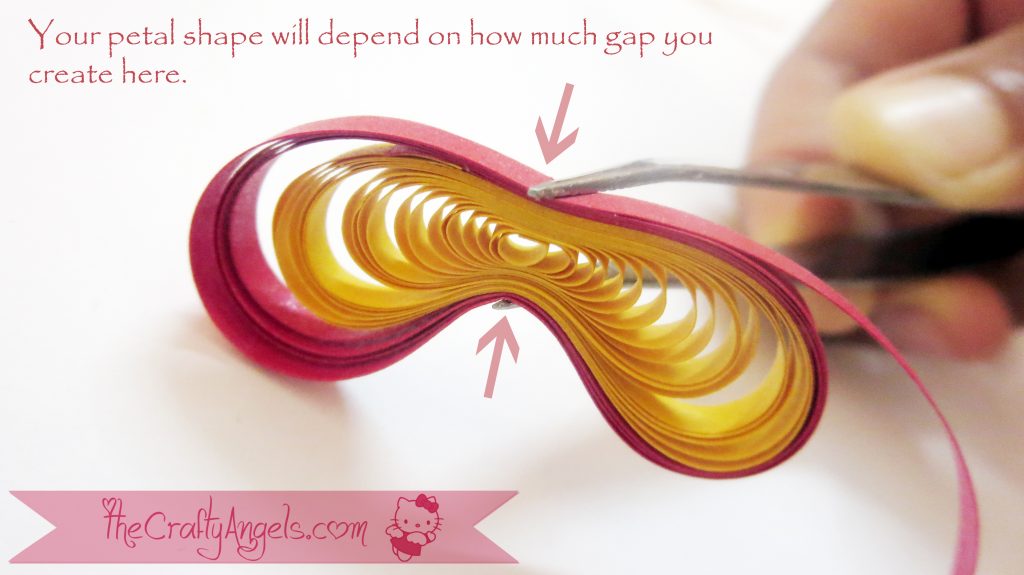
- Place your tweezer/holder on your loose coil in such a way that it has the full coil between its ends like in photo below. Make sure that the tweezers ends are lying in straight line with the slotted tool as well. or just look at the photo below and hold just like that!
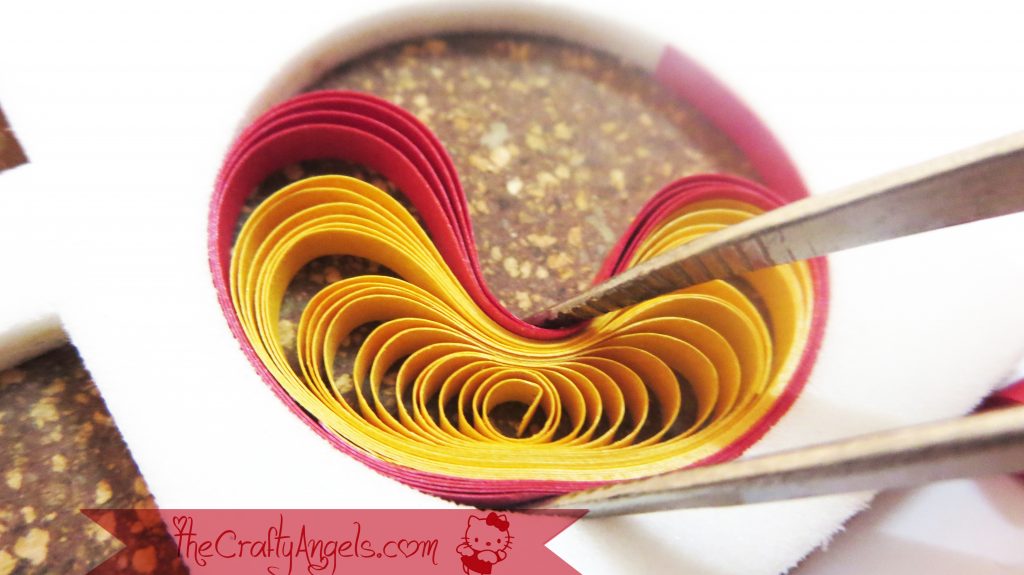
- Now pinch the coil with the help of your tweezers that are already placed in required position and pull out the coil from the board.
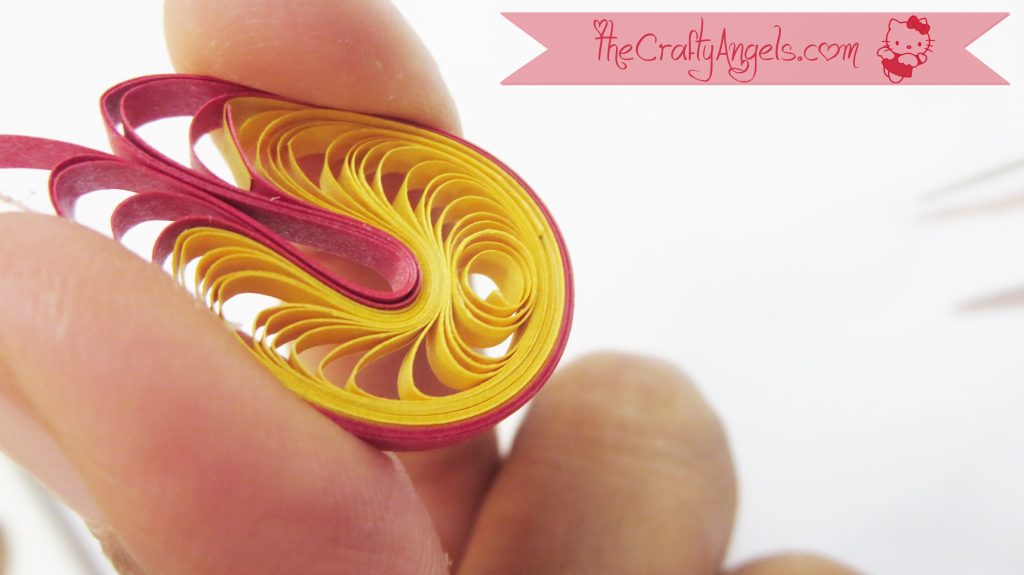
- If you had made the loops of loose coil evenly distributed, your petal now will have symmetric shape on either sides with the coil center at the center where you have holded. You can go ahead and bring the hanging edges towards the center and pinch it down like in photo below.
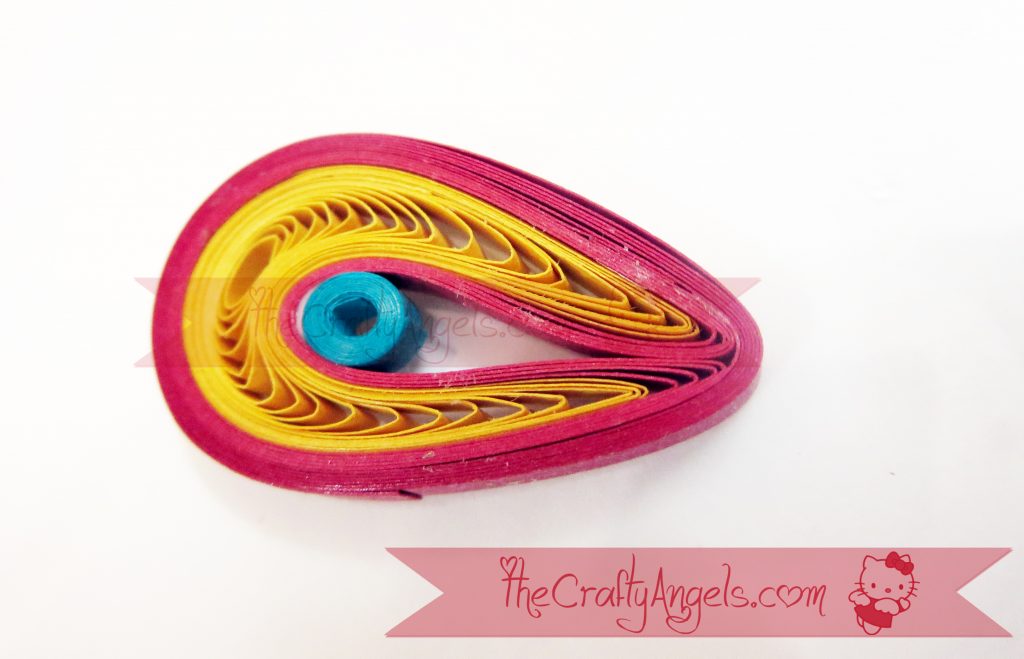
- You can no wrap the quilled malaysian flower petal with same color strip as your outer coil and seal the petal.
- The important factor affecting how your flower looks like are based on two factors :
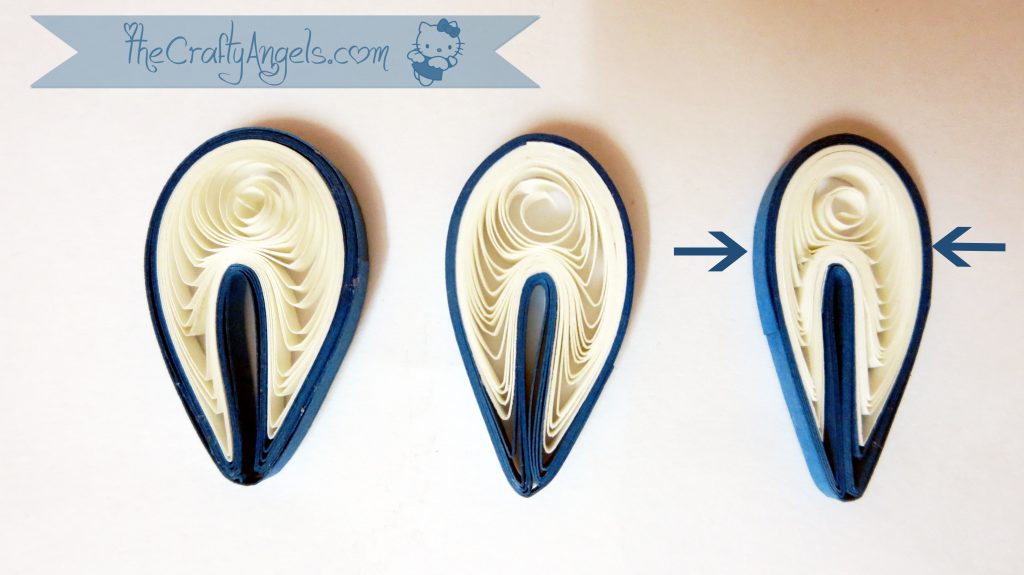
- how much you pinch the loose coil towards the center : The below photo shows quilled malaysian flower petals of various styles depending on how much in depth the coil is pinched to center (L-R : pinched more)
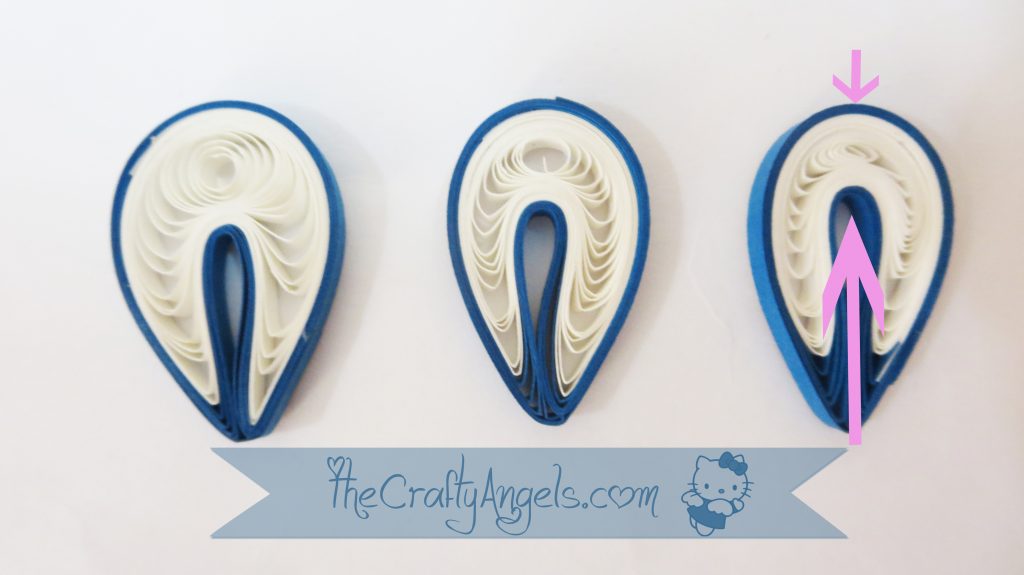
- how much you pinch the sides of the petals after you bring the hanging edges together : The below photo shows quilled malaysian flower petal styles depending on how much petal is pinched before sealing the shape. (L-R: pinched more)
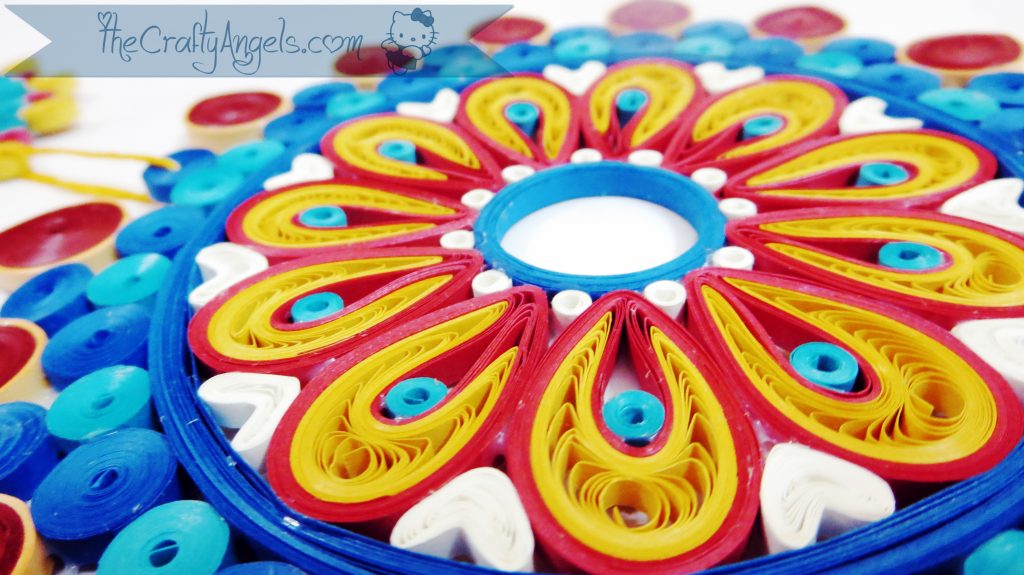
Some more pictures of my Quilled Malaysian flower here. I inserted a very small tight coil round shape inside my quilled petals to match to the rest of the design.
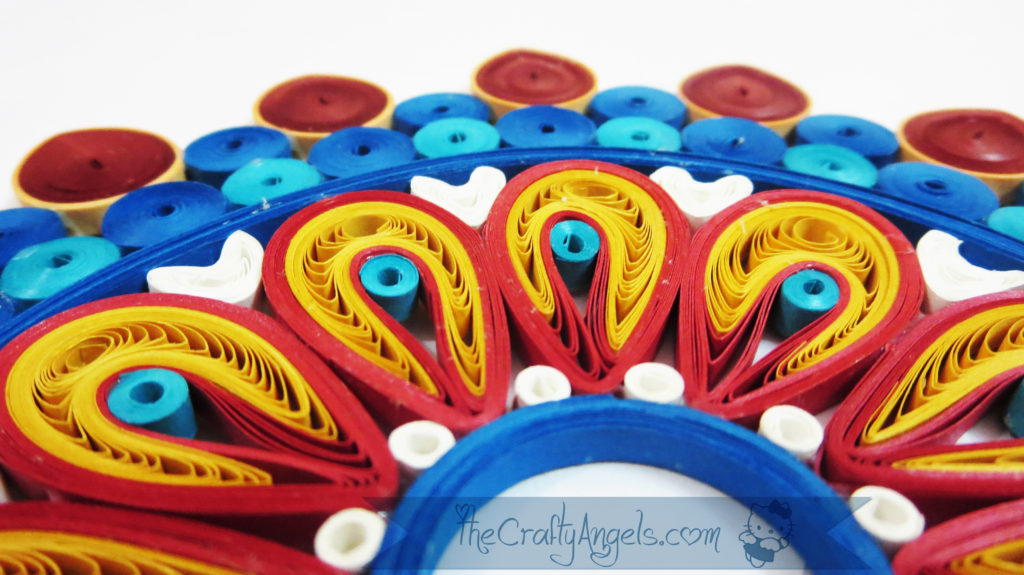
This is the main part of my quilled wall hanging and you might have seen the other parts in previous quilling tutorials that I shared.
Tips and tricks for making Quilled Malaysian Flower :
- If you did read word by word of the above tutorial you would know there is no secret tips right now!
- The beauty of Quilled Malaysian flower lies in two colours of petal so make sure you join quilling papers of different colours for making the flower.
- Also, if you are making the flower to be fixed on a flat area.with back support, you can make ones with looser structure.
- If the quilled malaysian flower is for some 3D display/bulk dispatch , its recommended that you follow the tightest petal ( pinching both ways!) so that it doesn on uncoil in between.
Hope you guys had a wonderful time reading about my technique of making Quilled Malaysian Flowers 🙂 Do not forget to subscribe using the top right corner side option to fill in you e-mail ID so that you dont miss any post 🙂 Also below are a collection of various other quilling tutorials shared on my blog 🙂
- Basic Quilling tutorial : Making Flat Tight Quilled Coils
- Basic Quilling instructions : Quilled Teardrop Shape
- Quilling Technique Tutorial :How to make Quilling Leaves without tools #11
- Quilling Technique Tutorial : How to make Quilled Flower Petals without tools #14
- Quilling Butterfly Tutorial #4
xoxo Angela
Hey.. It was nice to read the tutorial.. Especially when u explain the look of petal with lose or tight hold and coils!! N extra tips on flat back or 3D structure.. Not many tutorials offer such info.. ?
Thank you so much Aakriti for the kind words 🙂 I had gone through so many quilling tutorials to learn the malaysian flower but none of them gave me the perfect petal shape and finally I got it done although the procedure isn’t that friendly! If it helps somebody its good right! Happy quilling and be around here for more tutorials 🙂
I want to learn more about paper quilling. I need to know the best book for beginners. I need to know what tools to use. Please send me any information you have about how to purchase the instructions I need to learn how to do this.
Thank you
Hello Lois,
I havent learnt quilling from books as I couldnt find any comprehensive book that covers all the basics properly. I learnt from blogs and pinterest and they surely are good places to learn from. I have covered a few basic quilling tutorials based on which, you can start working and gradually move to advanced quilling. Will compile those posts and put up a basic quilling guide 🙂 (if that could help)