
Basic Quilling tutorial : Making Flat Tight Quilled Coils
Hello angels!
Basic Quilling tutorial : Making Flat Tight Quilled Coils
I’ve been seeing a lot of quilling related activities in the blogosphere and also on Facebook and I’m sure there are a lot of people out there who are beginning to learn the art of quilling. For those who are beginners and for those who want to revise their basics, here is a basic quilling tutorial on how to make flat tight quilled coils. Flat tight quilled coils are a basic shape that come handy in a lot of quilled projects and many a times it so happens that the coil turns out bumpy and looks odd. Read on to know how I manage to make flat tight quilled coils for my projects 🙂
Be sure to also check out all the quilling tutorials covered :
- Beginners quilling tools & supplies
- Basic Quilling tutorial : Making Flat Tight Quilled Coils
- Basic Quilling instructions : Quilled Teardrop Shape
- How to make Quilled Flower Petals without tools
- How to make Quilling Leaves without tools
- Quilling Butterfly Tutorial
- Tight Quilled Flower Tutorial
- Beehive technique Quilled flower tutorial
- Quilled Wall Hanging Tutorial
- Quilled Hearts Card Tutorial
- Quilled Malaysian flowers Tutorial
- Quilling Comb Flower Tutorial with Video
- Double Sided Quilling Comb review & Tutorial
- Quilling Combing technique : Quilled bird
Materials required to make Flat Tight Quilled Coils – A Basic Quilling Tutorial :
- Quilling strips
- Quilling slotted tool
- Glue
Step by step Tutorial on how to make Flat Tight Quilled Coils – A Basic Quilling Tutorial :
Its a very simple trick that i follow while making flat tight quilled coils for my various projects. The idea is to roll the coil between your thumb and index finger. Now that sounds so cliche and you have tried it a number of times and proved it wrong! But do see the pictures and try to follow them – I have clicked step by step photos to show you how I hold the coil and the slotted tool while making the tight coils.
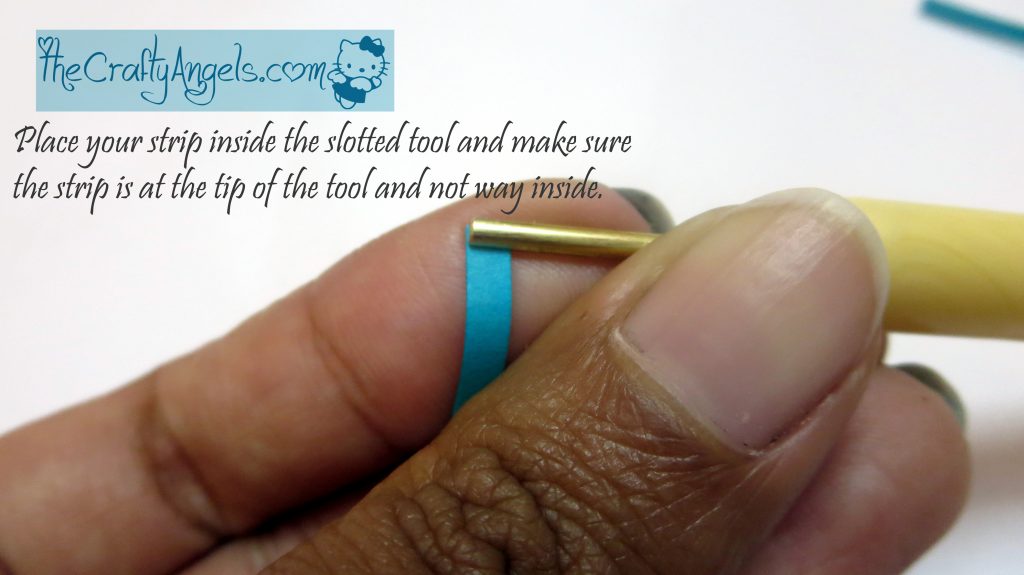
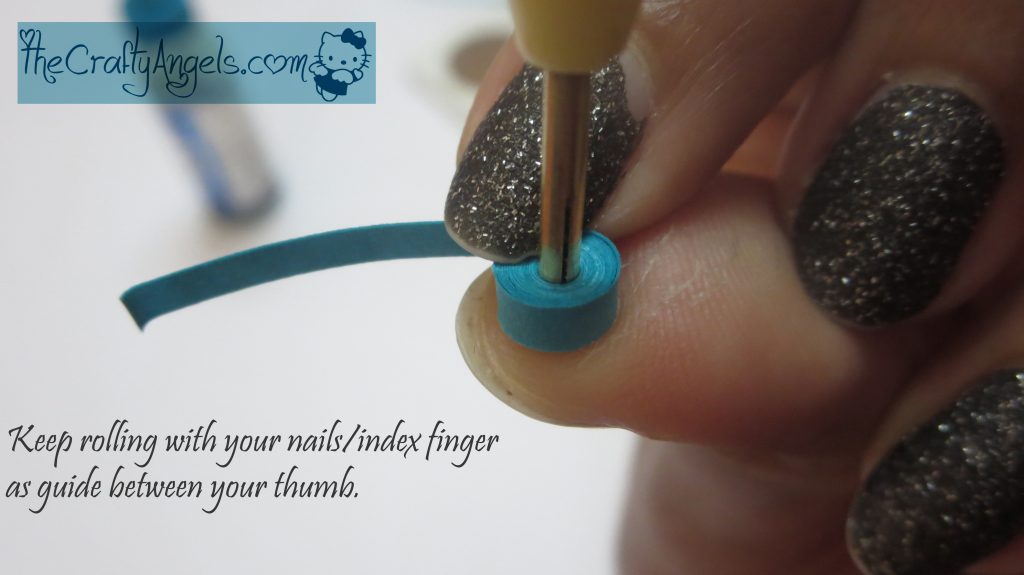
- Place your quilling strip at the edge of the slot of the quilling tool before you start rolling into a coil.
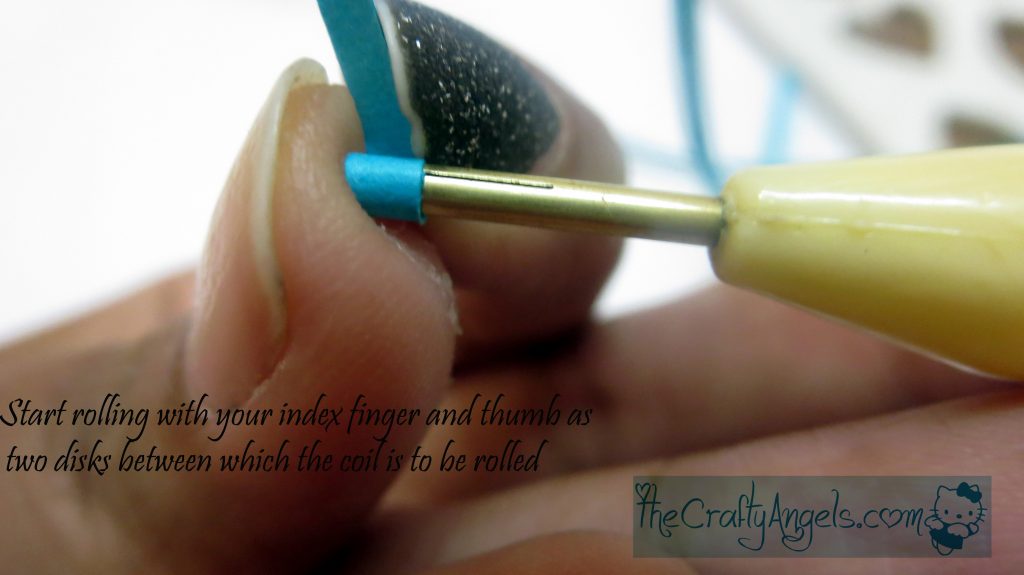
- Start rolling by keeping your thumb as a flat surface on which its going to roll and using the nails of your index finger to keep the rolling coil as close to thumb as possible. You would need to use the nails till you roll 5-6 times and get a small coil after which you can use your finger as such.
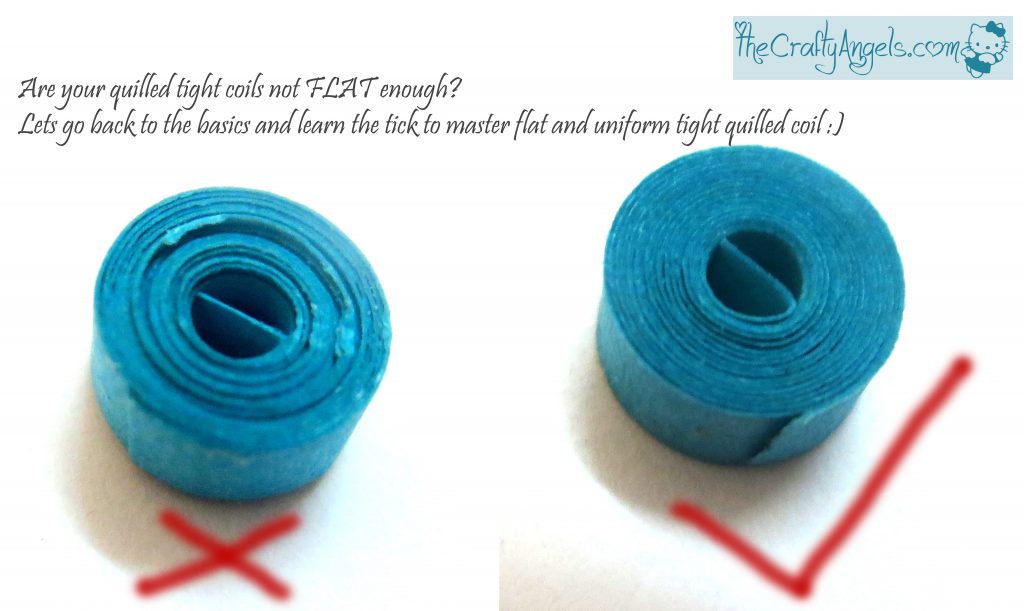
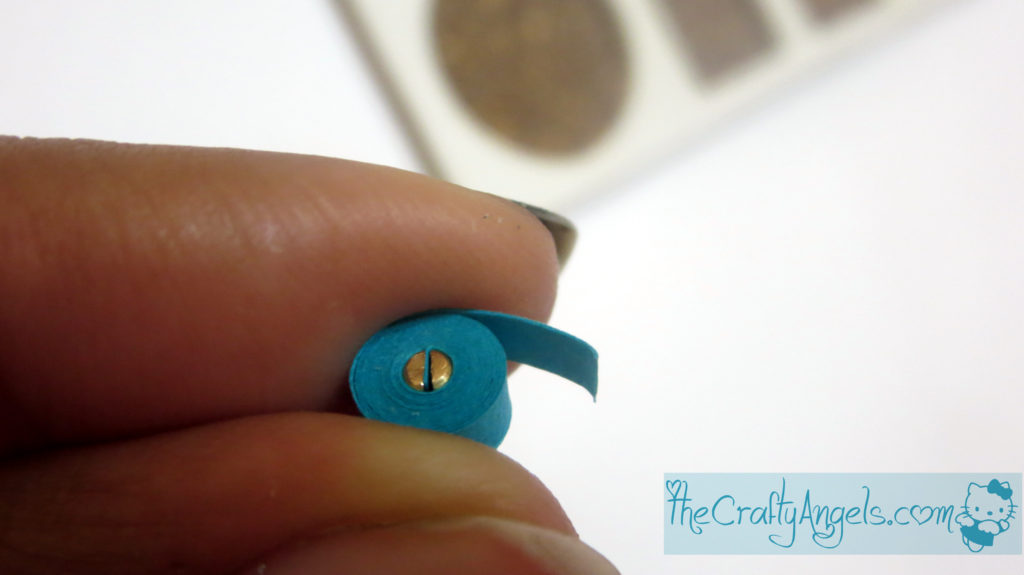
- See how flat the coil has turned out to be. The tight quilled coil is uniformly flat everywhere and doesnt have bumps or rolls popping out.
- One you finish the roll, you can slightly pull the strip end to tighten the coil a bit. Just a slight pull else your coil will be so tight that while you remove it from the slot, it comes out as a cone! 😛
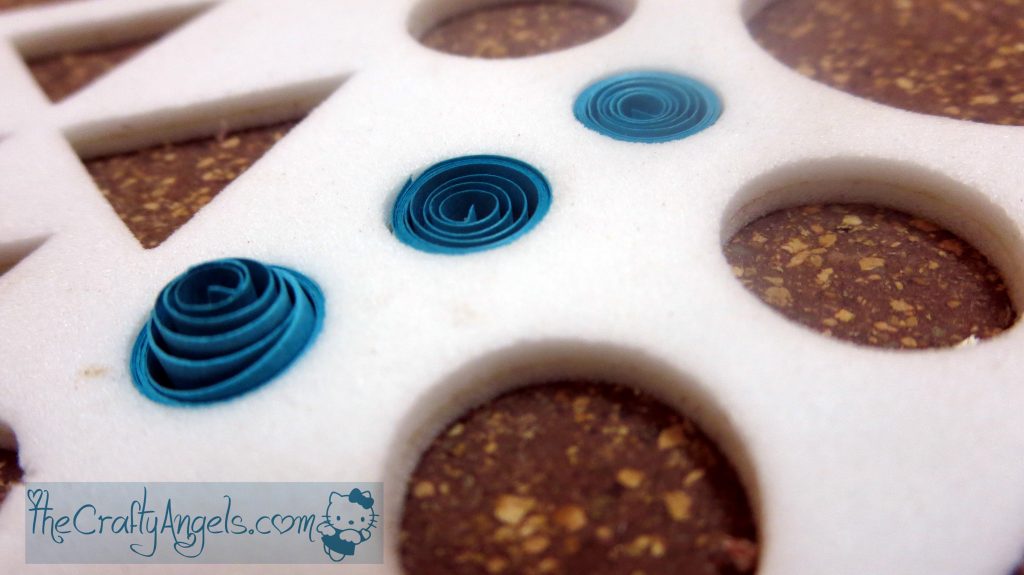
- You can stick the end of the strip to your tight quilled coil with the help of glue. Getting your quilled coil as flat as possible plays an important role in any loose coil work you are planning to do. Look at the below picture – the coil was not evenly flat hence when I loosened into a quilling board, its popping out like a cone shape! You can follow my tips to get the coil the right way 🙂
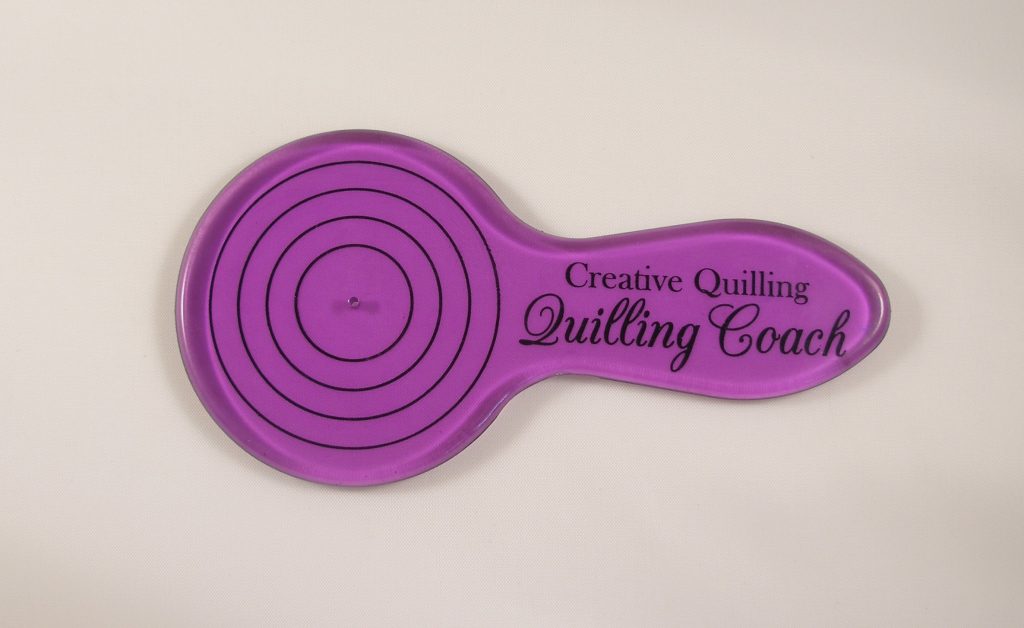
- If you are into making bigger tight cols say for making jhumkis etc, you may want to use a quilling curling coach. Quilling coach serves the same purpose as your thumb while making your tight coils but the advantage is bigger area and also markings ( circles) based on which you can standardise your coil sizes. Ritika has used these quilling coaches to make some beautiful rainbow jhumkis (HERE) in her blog.
Hope you all like this informative post on Basic Quilling techniques. I know that these are very basic and that some of you are looking for more advanced quilling techniques,works and inspirations but I am sharing these for the sake of all those beginners who want to learn from rock bottom 🙂 All quillers out there who feel that this Basic quilling tutorial for making flat tight coil is very difficult and have your own ways of getting it done the right way, please do share your ideas in the comment box below 🙂
And yes before I leave let me remind you about the FREE Indian Antique flower vase giveaway from Zupiterg which ends on 17th Feb 2015 🙂 Do enter HERE.
Linking to

Angela
More Quilling Stuffs HERE.
Nice post,thanks for sharing.
Thanks Ruby 🙂 Will share more of my simple learnings here on my blog 🙂 Keep checking !
New to quilling. Have difficult time gluing swirls on flat surfaces without them coming undone. Any suggestions?
hello, I would suggest you to make coils with templates so that all swirls are of similar size. Let the coil open up within the template and then glue the tail to the last coil. Then take out the swirl along with the needle at centre and glue to the surface you are working on. I hope this helps.