Quilling Butterfly Tutorial #4
Hello angels!!!
What am I up to today? Something everyone is crazy about these days quilling 🙂 Dont you feel bored because I’m not going to use any complicated tools or anything for this one. In fact the first quilled flower I made ( of course I was testing if quilling was meant for me or not 😛 ) I didnt purchase anything at all! So here is a simple tutorial for quilled butterfly – meant [only] for amateur crafter who just want to try their hands on quilling with just minimal investment 🙂
Be sure to also check out all the quilling tutorials covered :
- Beginners quilling tools & supplies
- Basic Quilling tutorial : Making Flat Tight Quilled Coils
- Basic Quilling instructions : Quilled Teardrop Shape
- How to make Quilled Flower Petals without tools
- How to make Quilling Leaves without tools
- Quilling Butterfly Tutorial
- Tight Quilled Flower Tutorial
- Beehive technique Quilled flower tutorial
- Quilled Wall Hanging Tutorial
- Quilled Hearts Card Tutorial
- Quilled Malaysian flowers Tutorial
- Quilling Comb Flower Tutorial with Video
- Double Sided Quilling Comb review & Tutorial
- Quilling Combing technique : Quilled bird
Materials required for making quilling butterfly :
- Paper sheets – coloured of course unless you want a white moth 😛
- Paper knife
- Glue
- Toothpick
- Cardboard/thermocol
Supplies links for making quilled butterfly :
Craft supplies for making quilling butterfly :
- First of all you need quilling
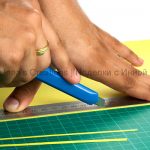 paper for making any quilled stuff. You get readymade quilled paper for less than Rs.25 (100strips) at any craft shop ( I purchased mine from craftadda.com and itsybitsy.in). Else, if you dont think you are going to keep quilling till u run out of the 100 strips, you can cut out your own strips (3mm or 5mm wide) at no additional cost.
  Next very basic too that you need is a slotted needle or if u dont want to invest in it, again there is a cheap alternative – toothpicks 🙂
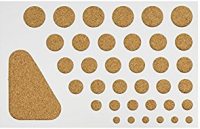
- You can very well go ahead with just these two but in case you need lil more of perfection in your end product, I recommend making a quilling board out of cardboard or thermocol. You can trace out different sized circles with the help of bottle caps/pen caps/coins etc and cut them out with a paper knife.
Instruction tutorial for making quilling butterfly :
So here we get started with project – quilled butterfly 🙂
- Take your paper strip , insert into your slot/wrap around your toothpick to make a tight coil. Slowly and carefully remove it from your toothpick and place it inside your board. Allow it to loosen up and after a while take it out but make sure not to let it loose up further.
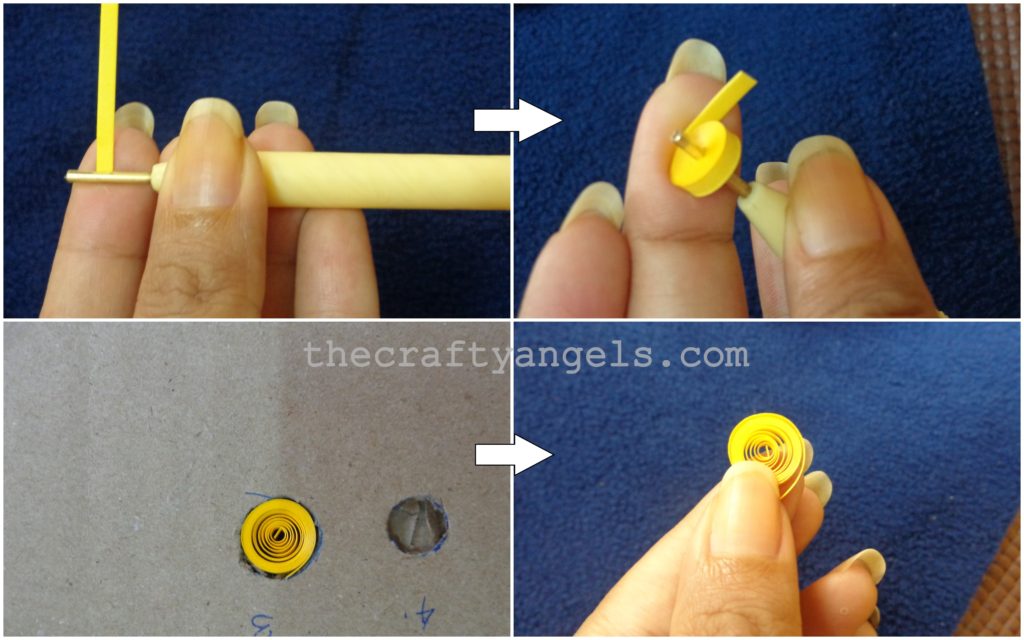
- Pinch your coil at an end to make a waterdrop shape. Now time to glue up the ends to get your first block for quilled butterfly ! As you can see in my butterfly, I have used 4 different sized waterdrop blocks for which i made different sized slots on my board. Get ready with all your block to glue them into a butterfly.
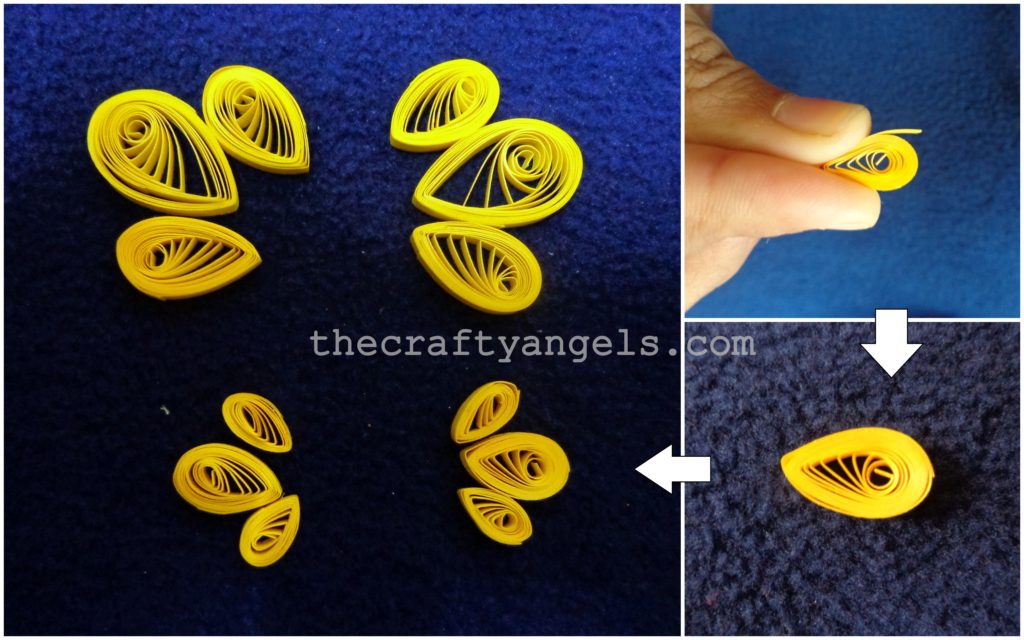
- You will have to be making 4 different sizes of coils (named S1-4), like shown in below picture. Can you picturise the quilled butterfly already? ( I have used 2 strips for S1, 1 n 1/2 for S2, 1 for S4 and 1/2 for S3).
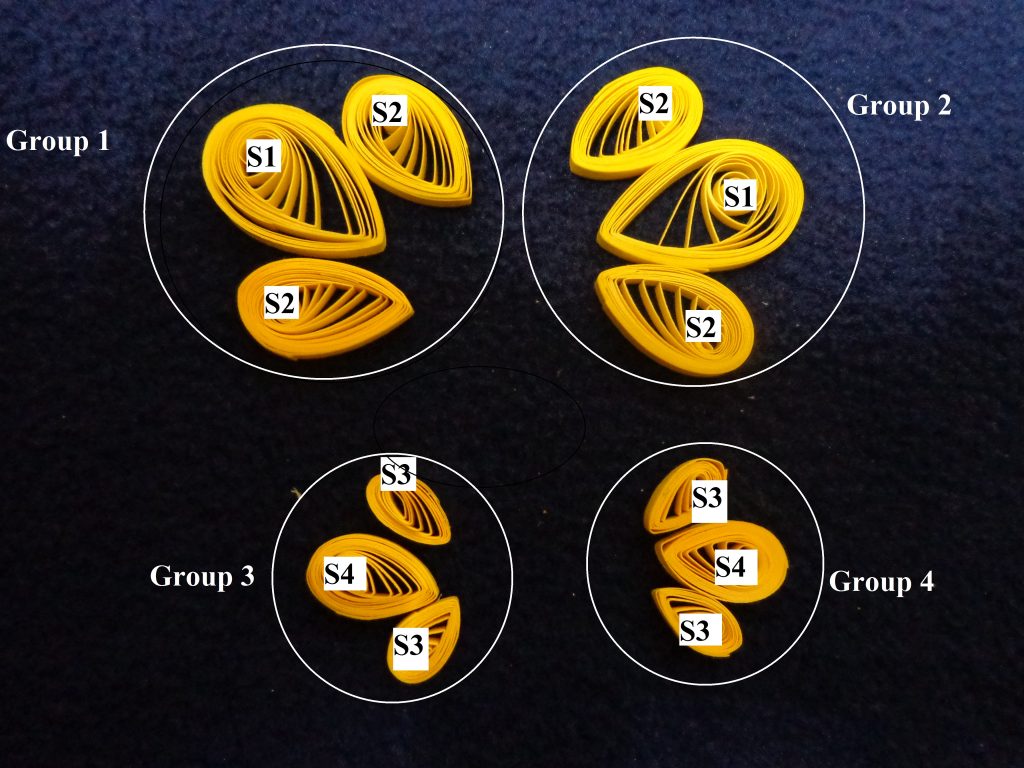
- Take another strip preferebly a contrast colored one and make an outline wrap around each of the groups. This part is a bit tricky since the coils tend to jump out or slip off :P. I managed by gluing them up before itself side to side.
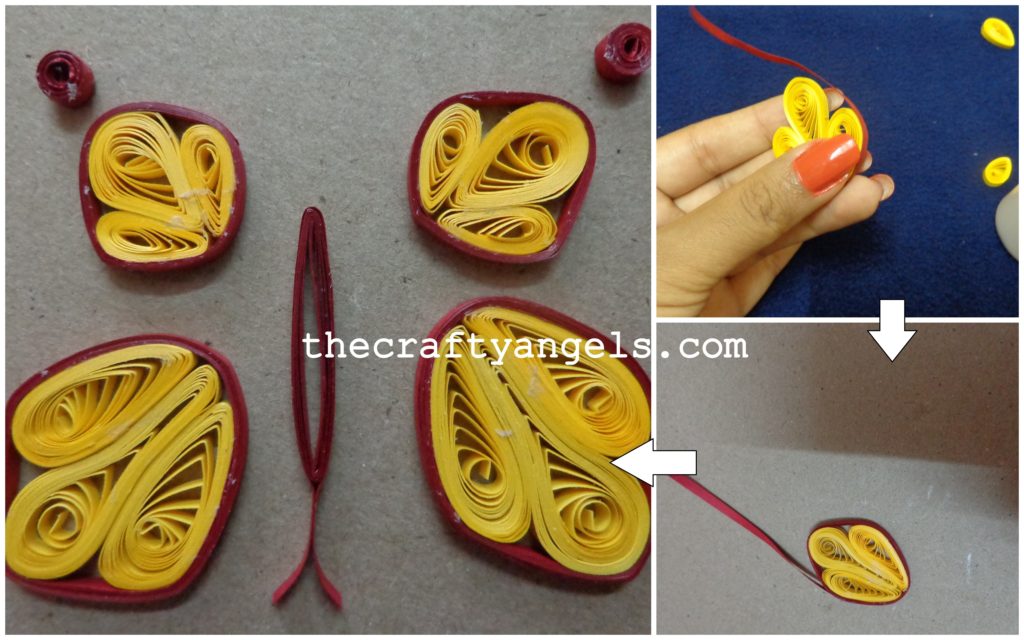
- There you go!! I made some extra round lil coils o make tail kinda figure 🙂 and also a middle body by simply folding the strips. Stick them up and you are done 🙂
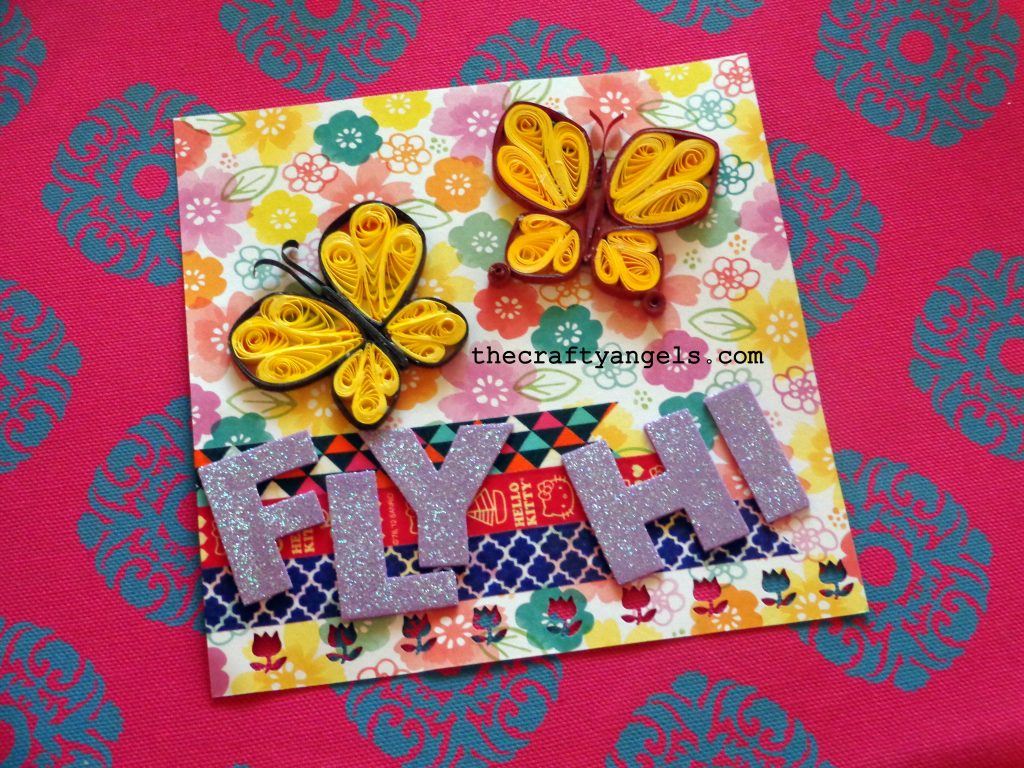
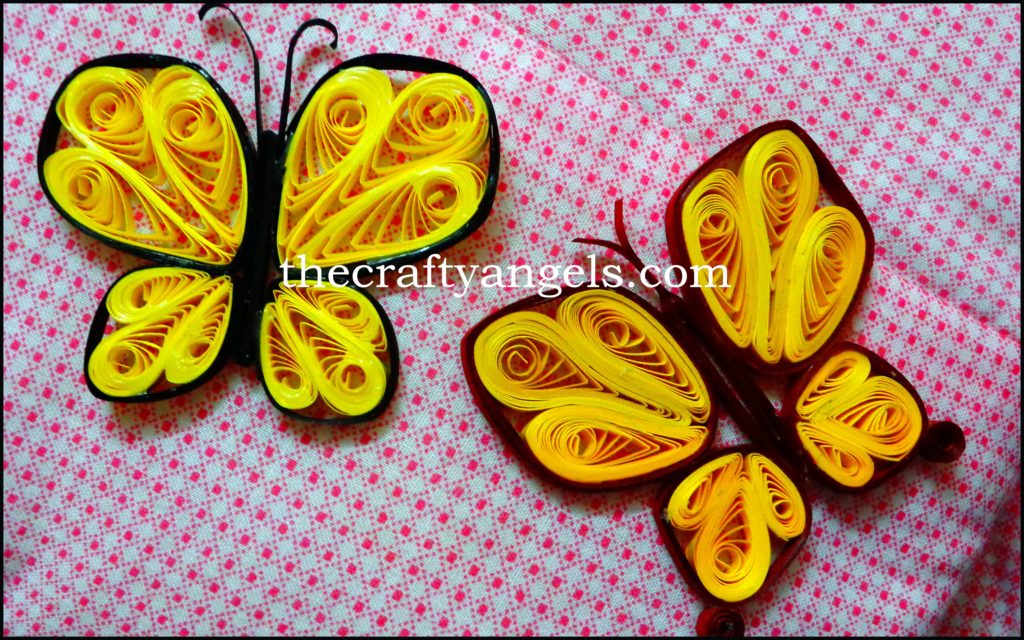
Here s my quilled butterflies 🙂 Did you finish up yours ?
Did you like this tutorial on quilled butterfly? If you did like it, do hit the like button and also share it with your friends. If you have similar ideas on quilling, or if you have tried out this tutorial, do e-mail us and share you joy ![]() We shall be more than happy to feature your works in our blog.
We shall be more than happy to feature your works in our blog.
P.S : Idea for the above content has been taken from honey.Thank you honey 🙂
Edit : Here is a simple pinup board layout with these quilled butterflies 🙂
Ive used my quilling butterflies on a cardstock with garden pattern. Ive used darker shaded washi tapes along the layout so that my alphabet stamps stating “FLY HI” stands out 🙂
Entering my pin up board layout to the following challenges :
Kraftzone challenge #4 – anything goes with washi and stamps
Colour conceptions challenge #10- anythin but cards
xoxo Angela








Hi Angela. Thanks so much for linking back to my site. It’s great to see your interpretation of my butterflies, very cute! I like the extra detail of the tight roll at the bottom of the wing.
thank you Honey! Your blog has always been my inspiration when it comes to quilling 🙂 will try out more of your designs 🙂
Angela plz show us how to make quilled flowers to go wid the butterflies!
N yeah, the butterflies tht u made r really pretty! ^_^
Hey Priya! Im so glad you likes the quilled butterflies 🙂 Do try them out and send me pictures 😀 and yeah will be coming up with more quilled stuffs but yes flowers are next in queue 🙂 so watch out!
Ahh, Angela! Very very pretty!!
Thank you Surya!!! I’ve been a silent admirer of your wonderful cookies &cakes and your awesome travel tales too 🙂