
Beehive technique Quilled flower tutorial
Beehive technique Quilled flower tutorial
Hello girls!
This is again a quilling tutorial and this is one from the basic series. No quilling is complete without Beehive technique and so here is a very easy and well explained tutorial for beehive technique in quilling.I also had promised a series of quilled flowers tutorial and this is one in the same. You can read about my quilling comb flower tutorial HERE and yes you can also watch a video tutorial for the beehive technique HERE.
Be sure to also check out all the quilling tutorials covered :
- Beginners quilling tools & supplies
- Basic Quilling tutorial : Making Flat Tight Quilled Coils
- Basic Quilling instructions : Quilled Teardrop Shape
- How to make Quilled Flower Petals without tools
- How to make Quilling Leaves without tools
- Quilling Butterfly Tutorial
- Tight Quilled Flower Tutorial
- Beehive technique Quilled flower tutorial
- Quilled Wall Hanging Tutorial
- Quilled Hearts Card Tutorial
- Quilled Malaysian flowers Tutorial
- Quilling Comb Flower Tutorial with Video
- Double Sided Quilling Comb review & Tutorial
- Quilling Combing technique : Quilled bird
History of Beehive Technique in quilling :
It was Susan from Susan’s quilling (HERE) who apparently first came up with beehive technique for making flowers ( Please correct me if I am wrong!) You can read about her post on the new Beehive Technique HERE where she says she was inspired by our own quilling queen Pritesh to create a new technique in quilling.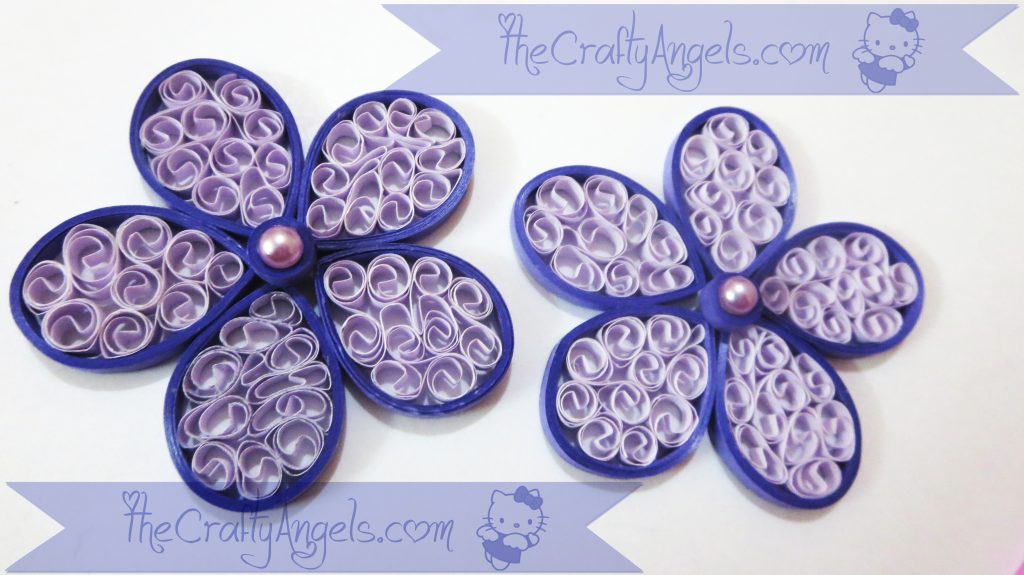
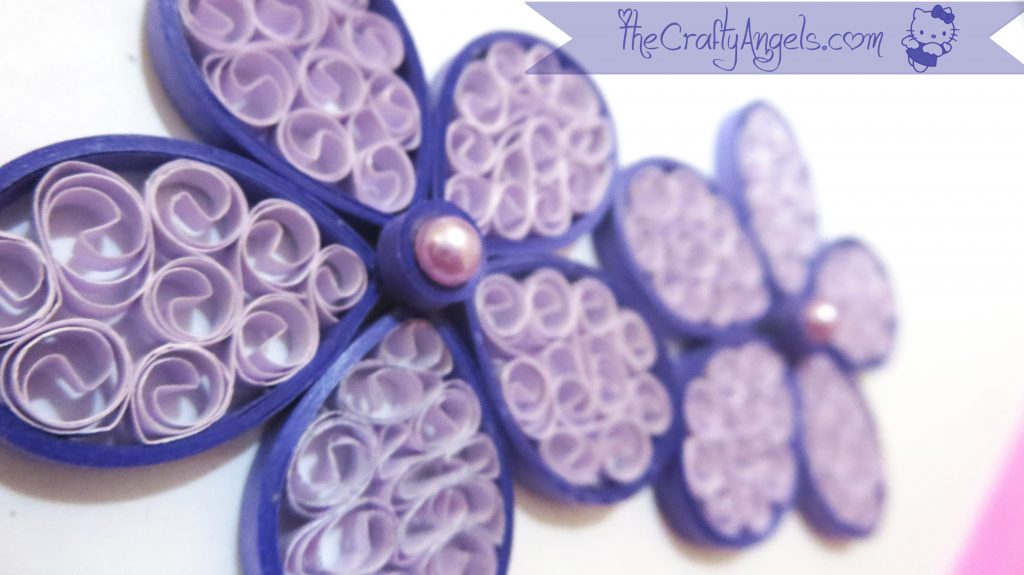
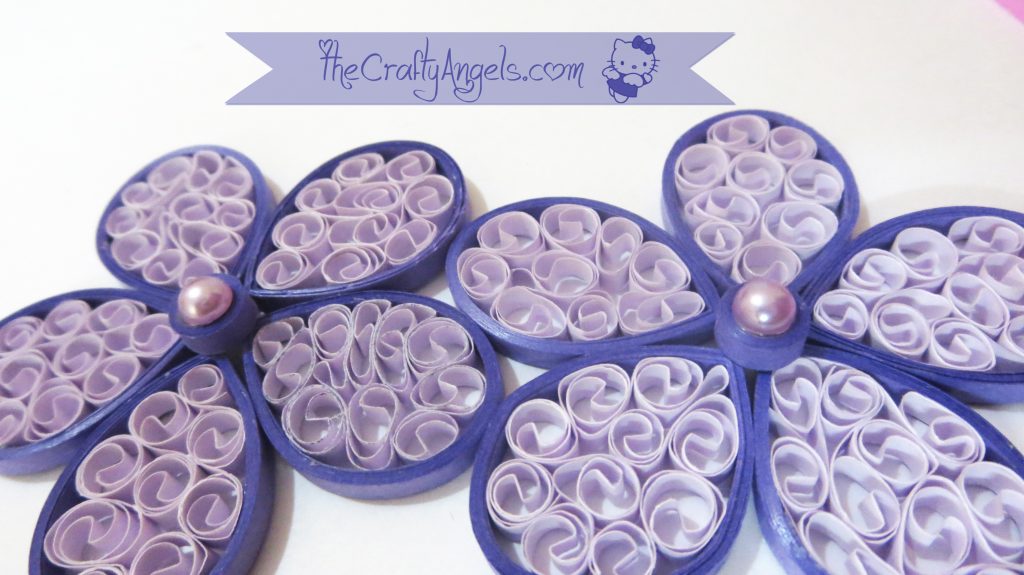
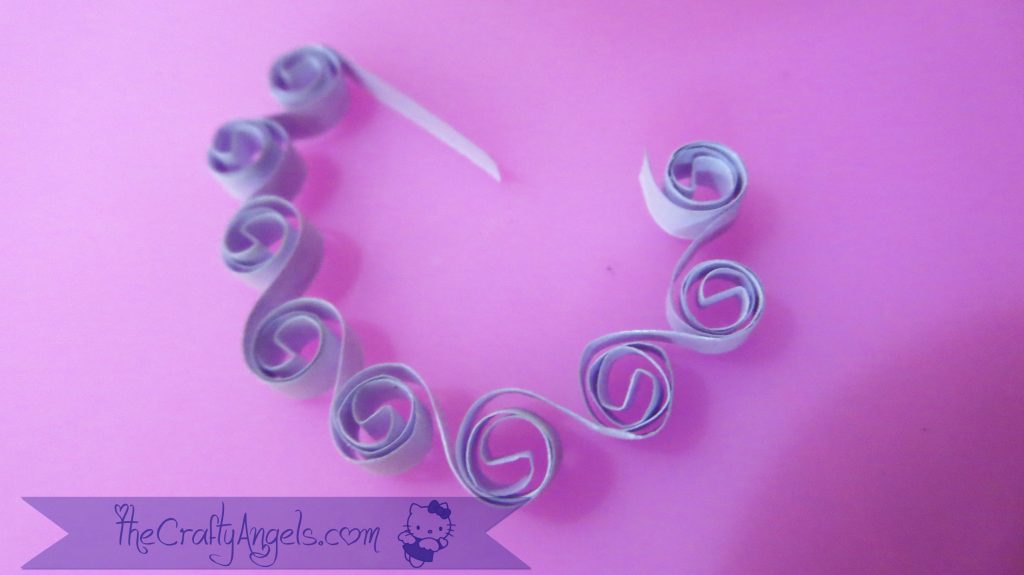
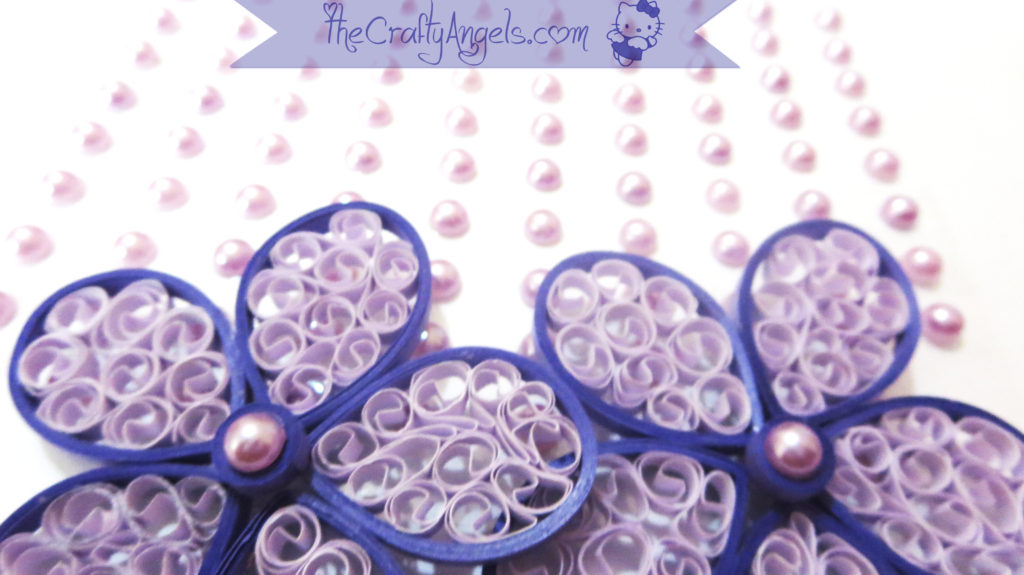
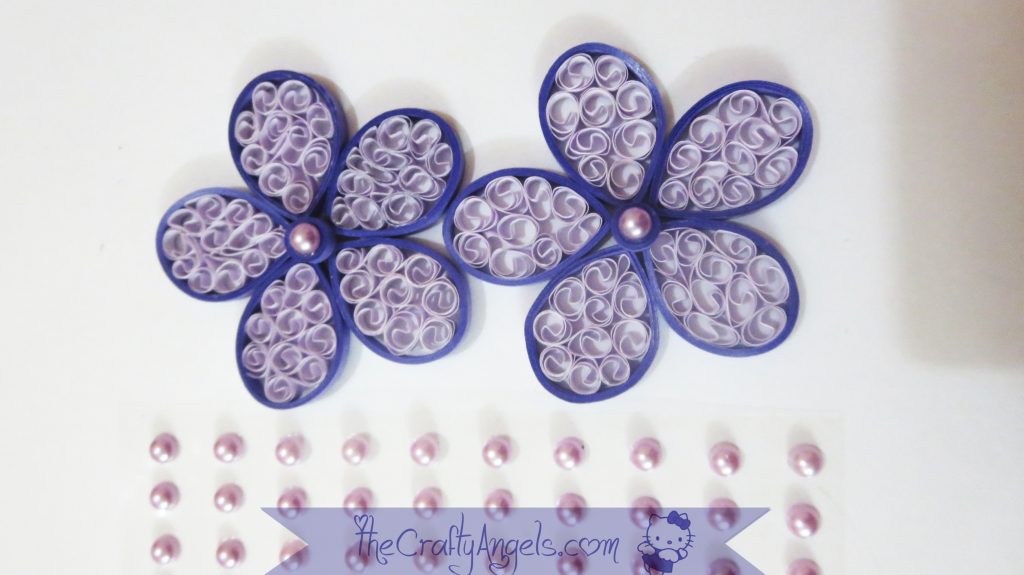
The beehive technique eventually doesn’t end up with hexagonal shape beehives but it almost resembles a beehive with continuous loops of tiny swirls as you can see in the photos. The most useful use of this technique as I feel is to fill in gaps in any projects – this is like a life saver then!
Materials used in Beehive Technique tutorial
- Quilling strips
- Slotted needle
- Glue
- Any circular template for petal size approximation
Step by step tutorial for Beehive Technique in quilling :
Okay so first let me tell you there are two variations in beehive technique and I have explained only one of them because I just don’t get the other one properly 😛 I shall still explain the difference between the two at the end.
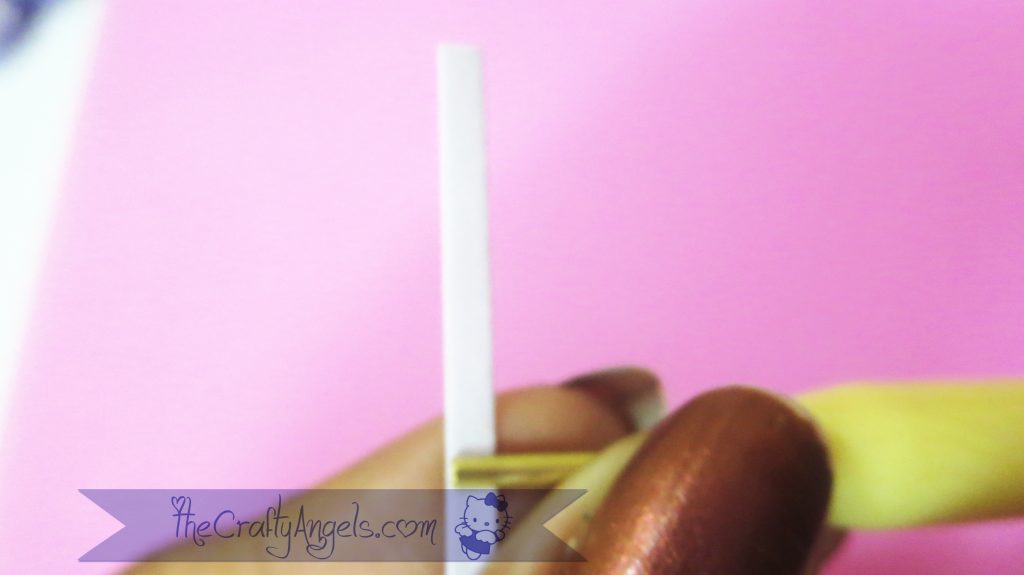
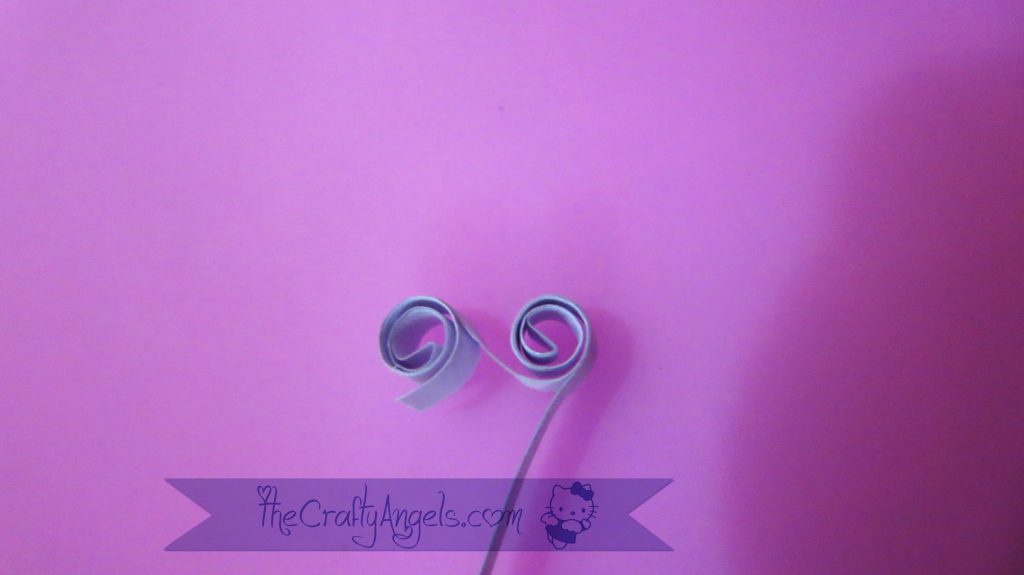
First take your quilling strip and measure about an inch from the top and insert your slotted needle. Next you need to twist the slotted needle in the upward direction till you cover the one inch strip you left on the top. Hold it in this position tightly so that your swirls sets in tight and doesn’t uncoil fast.
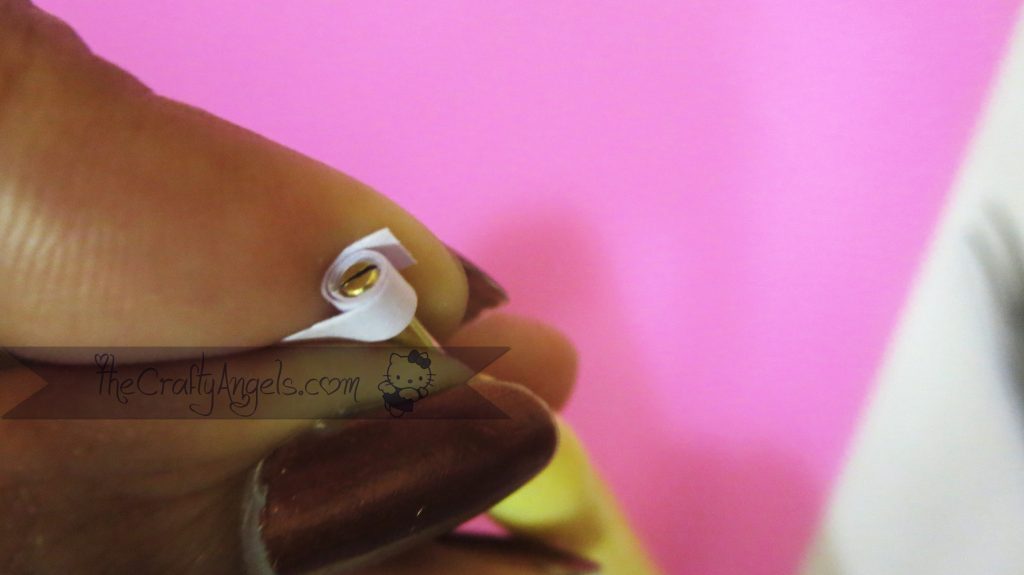
Now why the one inch? I tried with many lengths in the beginning and I felt one inch works the best. If you notice, your swirl will have a complete circle, inside which there is one more or half of another circle. This way, your swirls do not open up easily and its easy for you to work with them. If you use a lesser length say half-inch, your swirl will not form a complete circle and will open up into a semicircle by the time you finish the beehive on entire strip. And next if you use a longer length, it’s just going to look like mini loose coils that really doesn’t serve the purpose. I suggest you take time to experiment with various lengths for your project- who knows you might end up with a new technique!
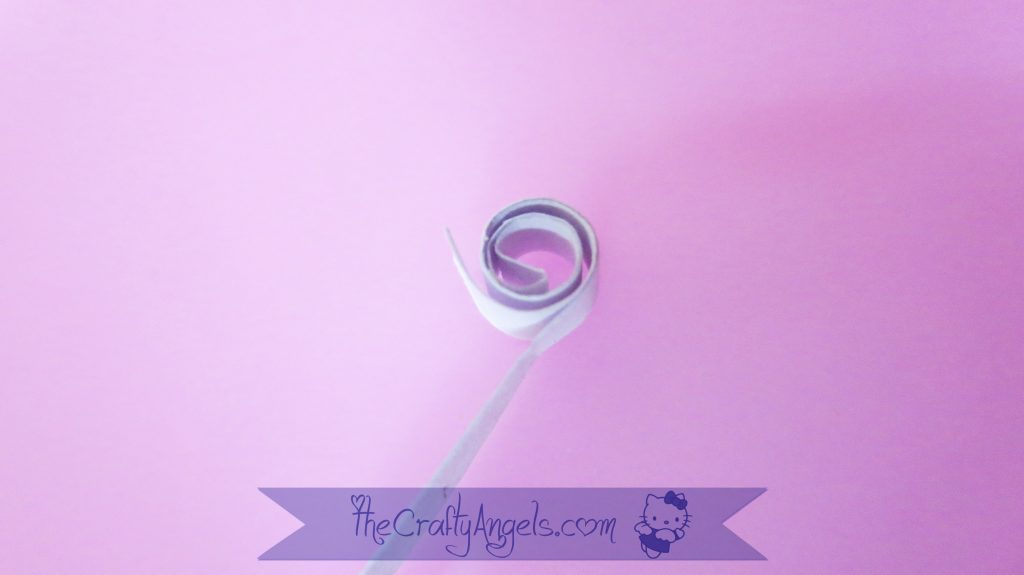
So now that your first swirl is over, you can remove the slotted tool carefully without opening it up. Again measure an inch from the end of first swirl and insert your tool.
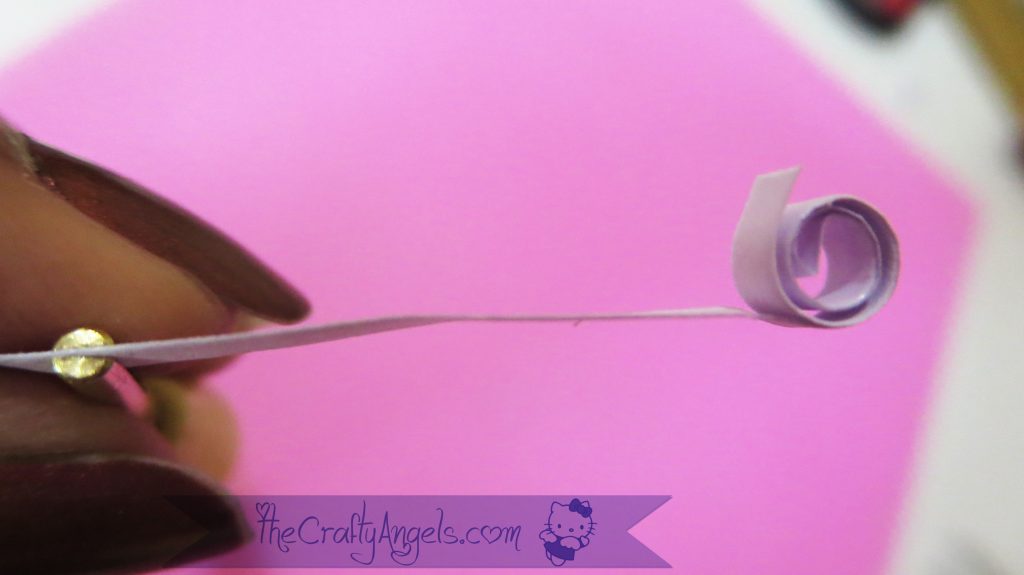
Next there are two options – twist the needle in the same direction as before or twist in the opposite direction. I have followed the first method and made swirls in the same direction for the entire strip. If you are following the other method, you will end up with sets of swirls alternating in opposite directions which again is okay and gives same end result when you use it for making these flowers.
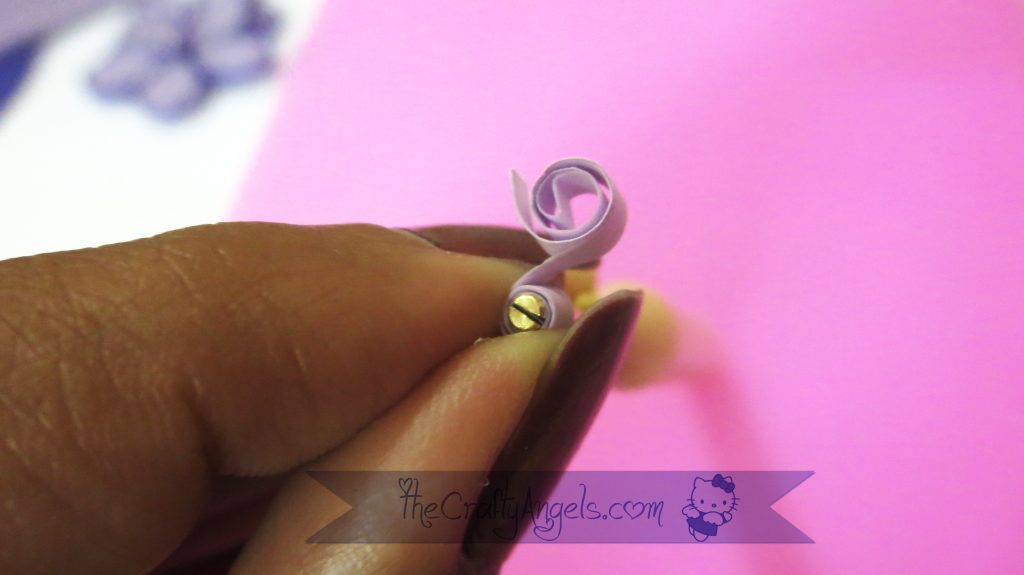
Complete the entire strip and keep them aside. You have finished the most time-consuming part of this tutorial !
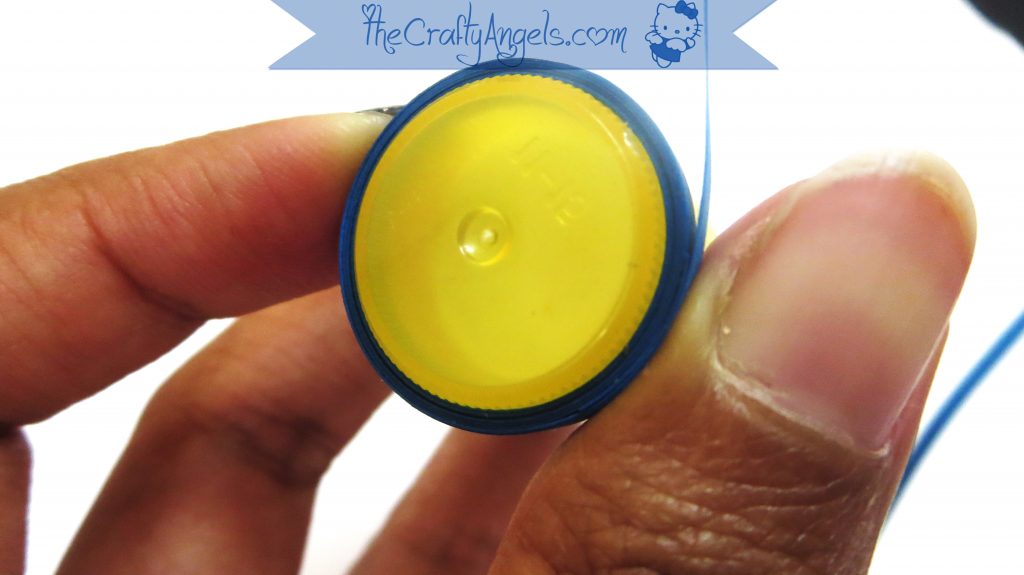
Next, take your template and wrap around your quilling strip to make a sturdy hollow circle. If you remember I had made similar hollow circles for my quilled wall hanging tutorial HERE using the same template! You can use more than one quilling strip to make the circle more sturdy.
Pinch on one end to create a hollow teardrop shape and this is going to be your petal shape. Depending on the size of the petal, you can decide how many petals you need for a flower.
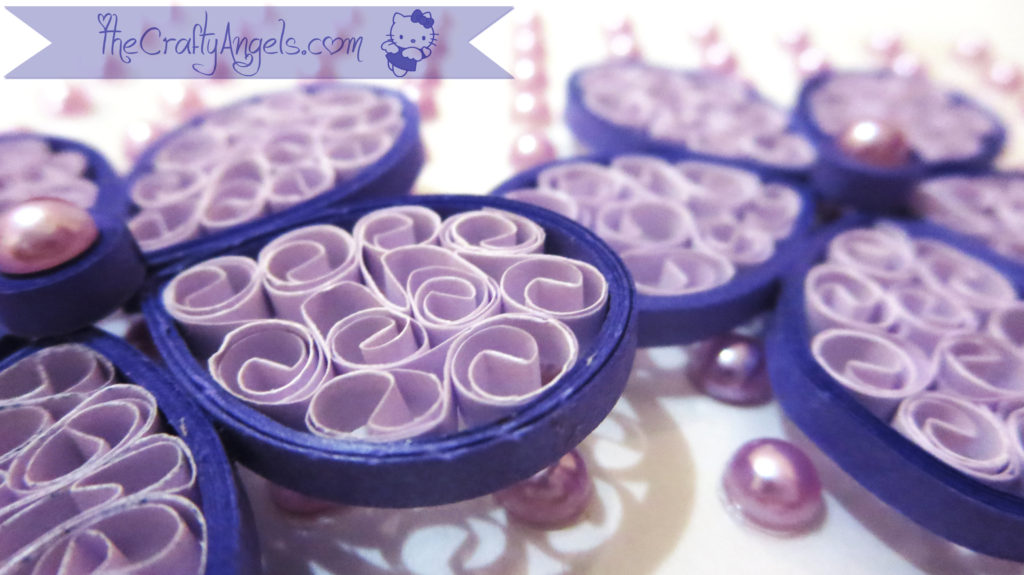
Next is the most challenging job for me – to fill in the beehive swirls into the petal template. Oh boy its like some “fit myself into fridge” kinda work! The first half-length of the strip will get in very easily but inserting the rest half requires some patience and skill – the risk of opening the coils being a major hurdle!. So somehow just push the coils here and there and make room for the entire beehive strip. If you feel that there is no way you can fill in the rest without squishing flat the rest swirls, you can cut out the rest part.
You have finally finished the petals but they look very fragile and if you push your finger a little hard, your beehive swirls are going to pop out! If you are going to use it for cards as a flat flower, you needn’t do anything more to the petals because you are anyways going to have a base for it. But if you are using them as 3d flowers or jewellery etc, do remember to apply a coat of glue to entire petal followed by varnish. Or if you can invest more, go for PPA matte/glossy whichever you like.
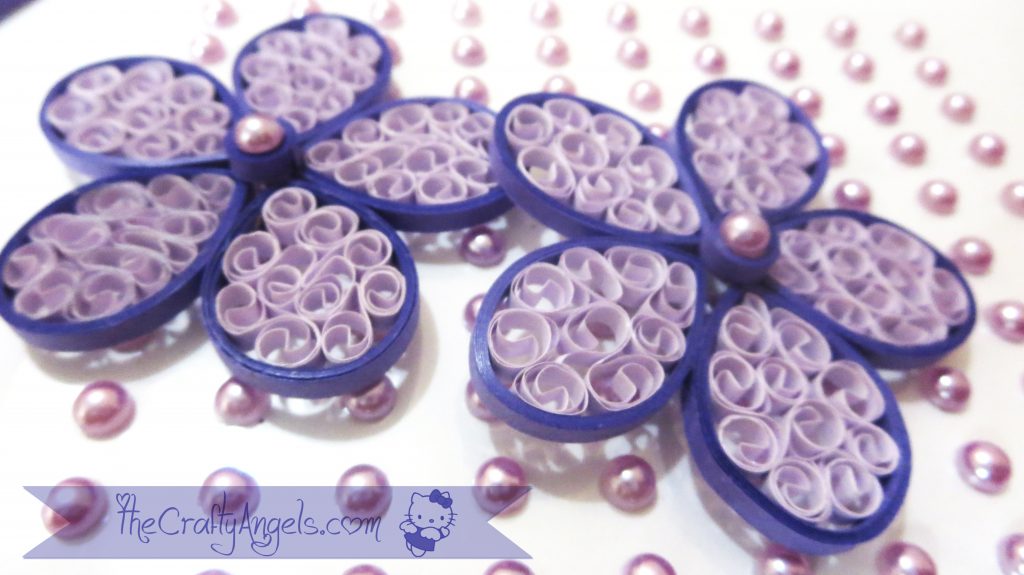
The final step will be to arrange the petals. This is a flat flower tutorial so just apply glue on the petal edges and stick besides each other to make a flower. I adorned the center of the flower with a small tight coil and a flat pearl over it.
Tips and tricks in Beehive Technique :
- As explained in the tutorial, do a trial and error method to estimate the length to be used for one swirl or if not, as a thumb rule take near to an inch.
- You can use two methods – swirls in same directions or swirls in alternating opposite directions. The alternate directions swirls can only be used for filling in gaps while the same direction swirls can be used for filling in gaps as well as making borders lines etc.
- Once you have made swirls, make sure to hold on to it for a while tightly so that the swirls set into shape.
- It would be better if you can make the frames first and then the swirls because that was you will be giving lesser time for the swirls to open up and change shape.
- Unfortunately I have no tips to fill in the frames with the swirls because I felt its a matter of luck for me! Sometime they fit in so easy but sometimes I have a hard time trying to fit in! Sometimes filling in the petal by placing outside to inside in a circular motion works but sometimes placing them in zigzag motion works! Watch the video to see me struggle with it 😛
Hope you guys loved the video and this tutorial 🙂 Will be doing a layered 3d tutorial for the same beehive flower soon so keep watching! Do not forget to subscribe to my YouTube channel and my blog to receive new posts in your email 🙂
xoxo
Angela
Superb quilling
Thankyou malathi for the appreciation on my quilling. Quilling takes patience but it is easy once you start practising. 🙂