
How to Make a Stunning Paper Shadow Box (Free Template)
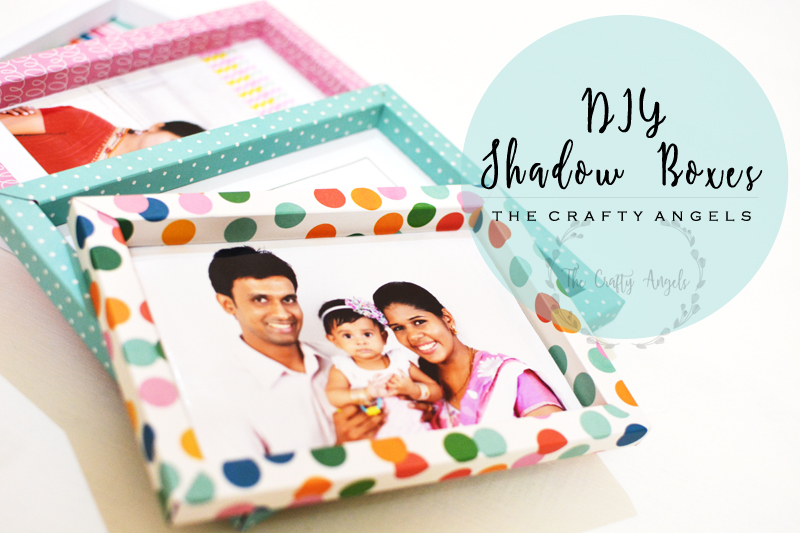
If you love paper crafts that look elegant but are surprisingly simple to make, this paper shadow box tutorial is one you’ll want to try.
A paper shadow box is a beautiful way to display photos, handmade flowers, layered paper art, quotes, tiny keepsakes, or even special memories from holidays and celebrations. What I love most about this project is that it looks detailed and impressive once finished, but it can be made using just cardstock, glue, and a few simple scoring lines.
This updated paper shadow box tutorial includes:
- A free printable template
- Easy scoring measurements for common sizes
- Step-by-step instructions
- Tips for making sturdier shadow boxes
- Ideas to personalise your design
Whether you’re making home decor, a handmade gift, or simply trying a relaxing paper craft project, this DIY paper shadow box is such a satisfying craft to make.
What Is a Paper Shadow Box?
A paper shadow box is a deep paper frame that creates space between the front and back layers of a design. Unlike a flat photo frame, a shadow box adds depth and dimension, making the contents feel more artistic and layered.
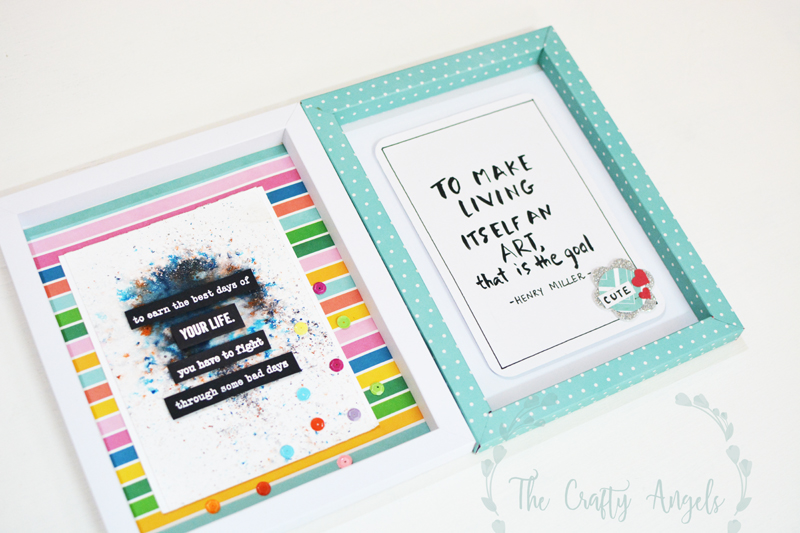
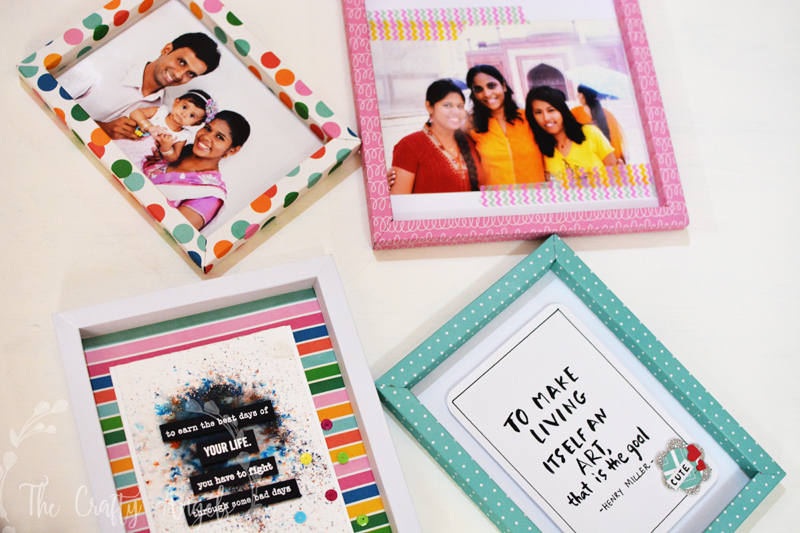
You can use a paper shadow box for photos, layered paper art, quotes & typography, dried flower displays, handmade cards, wedding & baby keepsakes, and the options are really endless!
Edit (May 2020) : A video on these frames has been put on my Youtube channel and the same is also provided at end of this post. Be sure to check it out 🙂
Materials Needed for a DIY Paper Shadow Box
To make this DIY paper shadow box, you will need:
- Heavy cardstock or patterned paper
- Score board or ruler + scoring tool
- Craft glue
- Scissors or craft knife
- Bone folder (optional, but helpful)
- Pencil and ruler
Optional:
- Foam tape for raised layers
- Acetate sheet for a clear front cover
- Chipboard for extra sturdiness
I recommend using thicker cardstock if you plan to place heavier embellishments inside the shadow box.
Free Paper Shadow Box Template Sizes
One thing I noticed from reader feedback over the years is that many people wanted easier sizing options without needing to calculate measurements themselves.
I’ve included measurements for some of the most useful and beginner-friendly paper shadow box sizes that work well with standard cardstock and patterned paper.
- 4×4 shadow box – perfect for mini floral art and small gifts
- 5×5 shadow box – great for layered paper art and quotes
- 5×7 shadow box – the original tutorial size, ideal for photos and handmade gifts
- 6×6 shadow box – beautiful for mandalas and home decor pieces
The full scoring measurements and printable template are available further down in this post, along with the original downloadable PDF template 💛
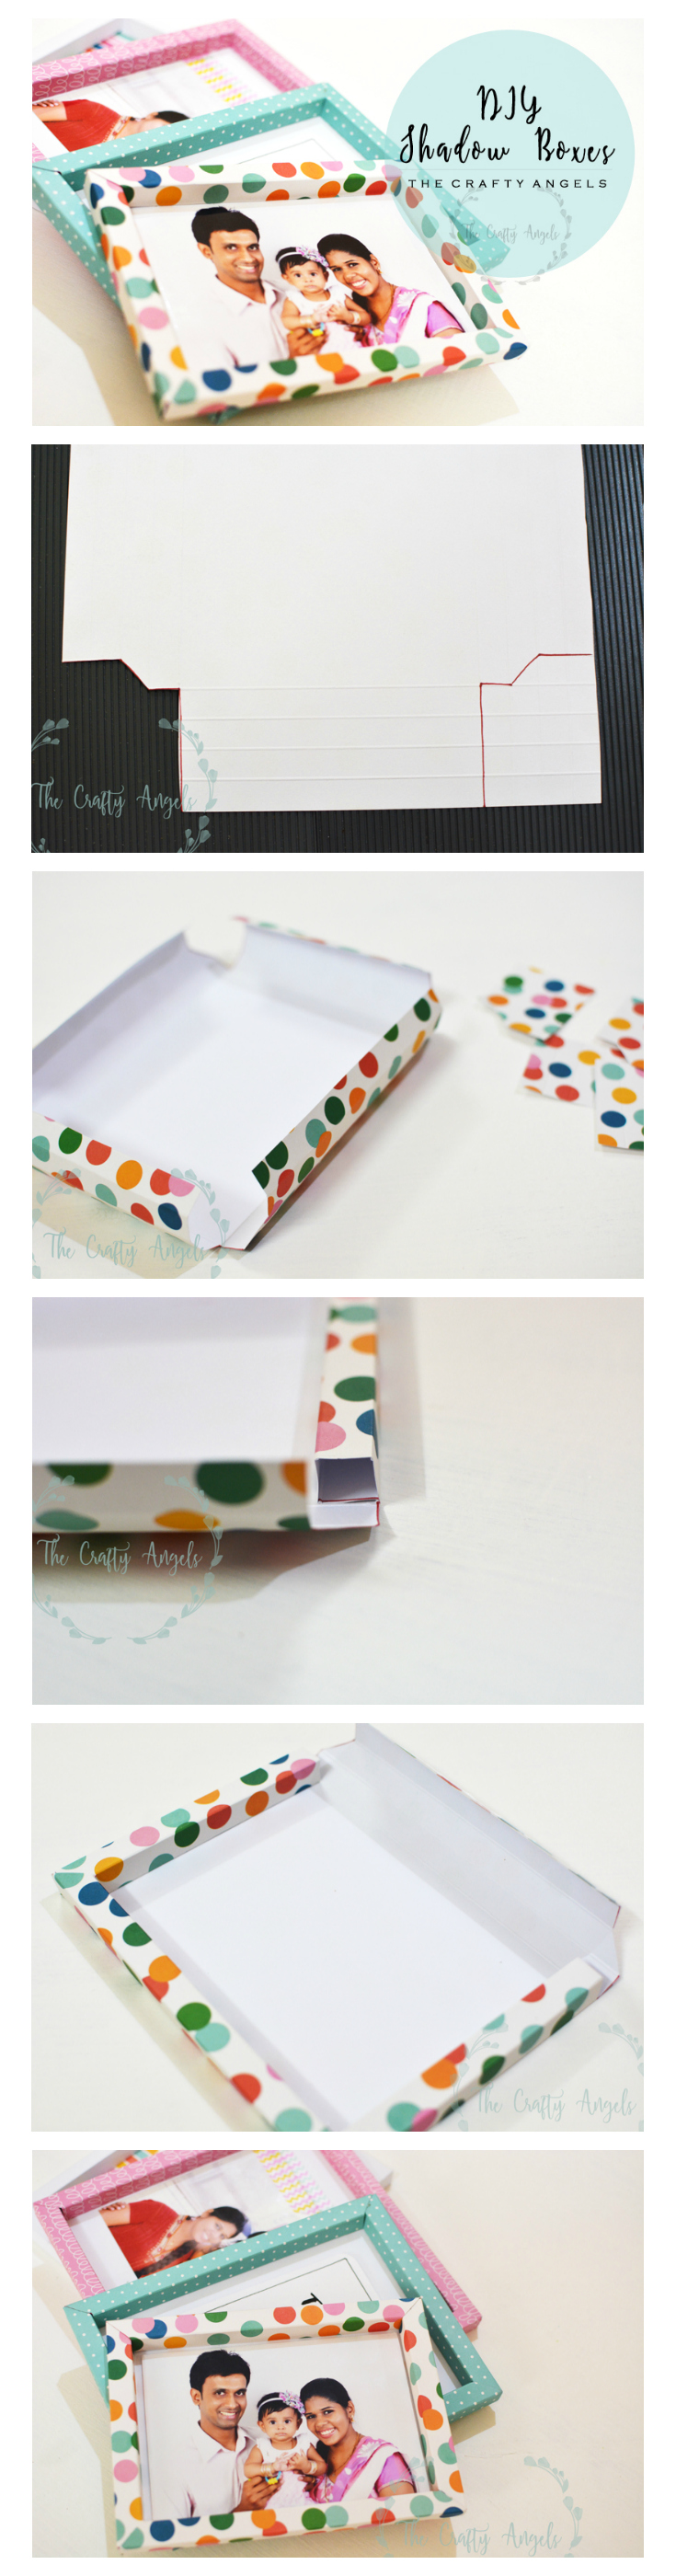
How to make these simple DIY shadow box :
As I told you, the math is a little confusing but otherwise, its a very simple craft. I advise you to blindly follow the measurements given here and try out a shadow box using any scrap paper that you have so that you can understand the exact math and create boxes of your own sizes.
For now, I have given the measurements for DIY shadow box of size 6″x 8″ and inner frame size 5″x 7″ and you can try these out. For variations in measurement of the boxes, keep reading and I tell you how to calculate.
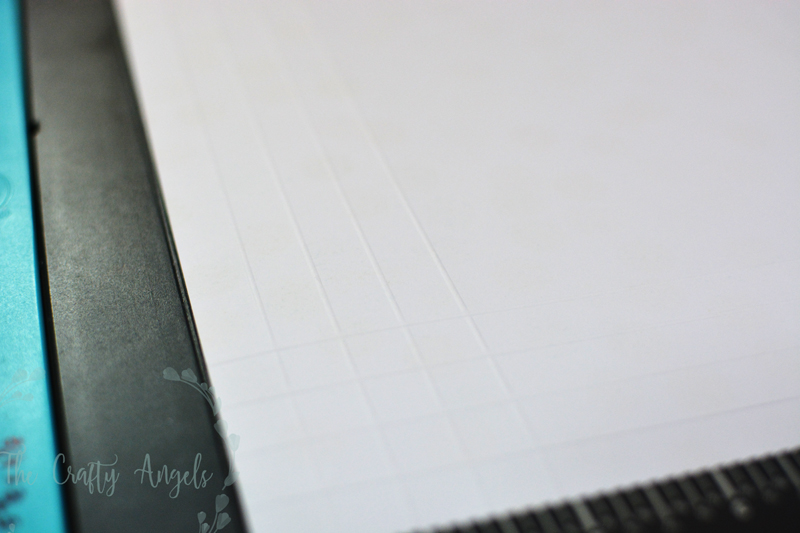
Place your paper and score at positions :0.5″, 1″,1.5″,2″ and at 10″,10.5″, 11″, 11.5″ . Turn your paper 90 degrees and score at measurements 0.5″, 1″,1.5″,2″ and at 8″, 8.5″, 9″, 9.5″ and 10″. You need one more scoring of length one inch at measurements 2.5″ and 9.5″. Rotate your paper 180 degrees and score one inch at measurement 2.5″ and 9.5″
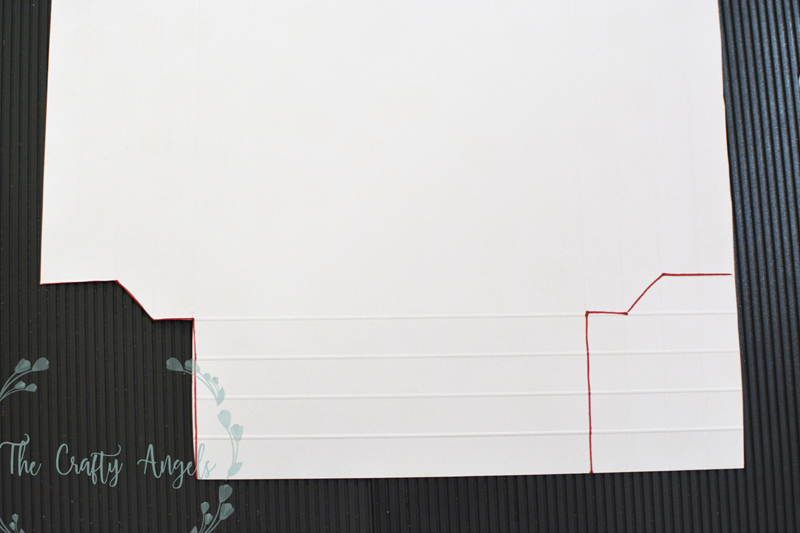
Now that you are done with the scoring, lets start marking out the cutout. Follow the image and mark with a pencil for all four corners and then cut them out with your scissors. ( Doesn’t look like its understandable as to where to mark! Scroll down to the bottom of this post for a link for pdf file from where measurement template can be downloaded).

Next fold along all of the score lines and lets get started with sticking them. I tried sticking with red tacky tape but I couldn’t realign once pasted and that was a major drawback so I used glue which was easier.
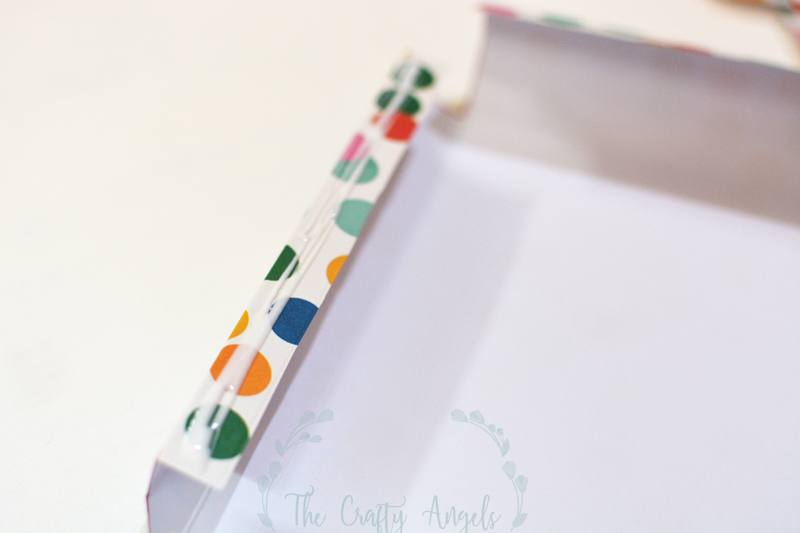
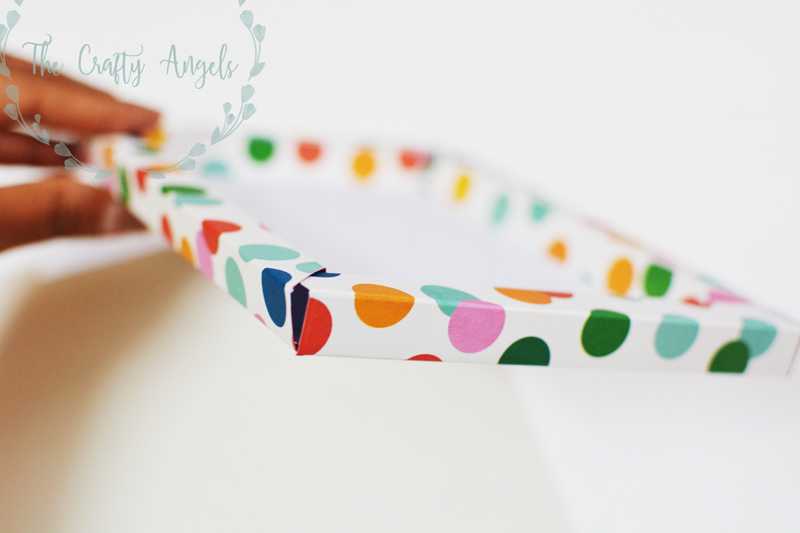
Start with the side where the scored portion has straight cut. Apply glue to the edge of the folded panel as seen in the picture. Make sure you apply glue all over the strip especially towards the score/fold so that the frame stays well. Fold the sheet and hold it tight for 1 minute so that the glue sets right. Make sure your fold looks like a perfect square shape like in below photograph when seen from the side. If your alignment is wrong your frame will end up wobbly and unsymmetrical so while you are doing, take utmost care- after all its just a matter of few minutes!
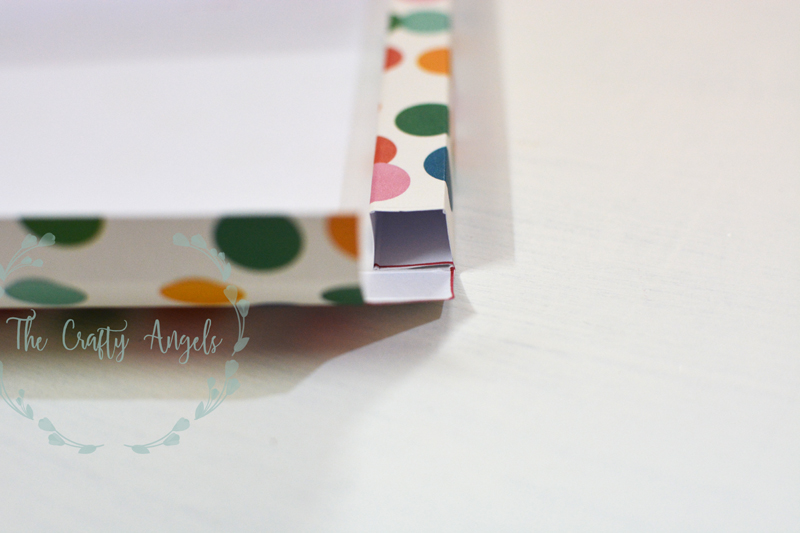
Once you have completed these two side, you can start the other two sides the same way. The only difference this time will be that the shape will be a bit different to add a small triangular portion. While applying glue this time, you can apply a tiny dot at the triangular area as well so that the frame on all sides stays together.
While I made the box first, I did not apply glue at the triangle area so this was the result. I could see gaps at the corners because the shadow box frame of all sides weren’t holding together.
I used tacky tape pieces at the triangle are to hold them together but alternately, while you are sticking the frame itself, you can apply glue at the triangle area.

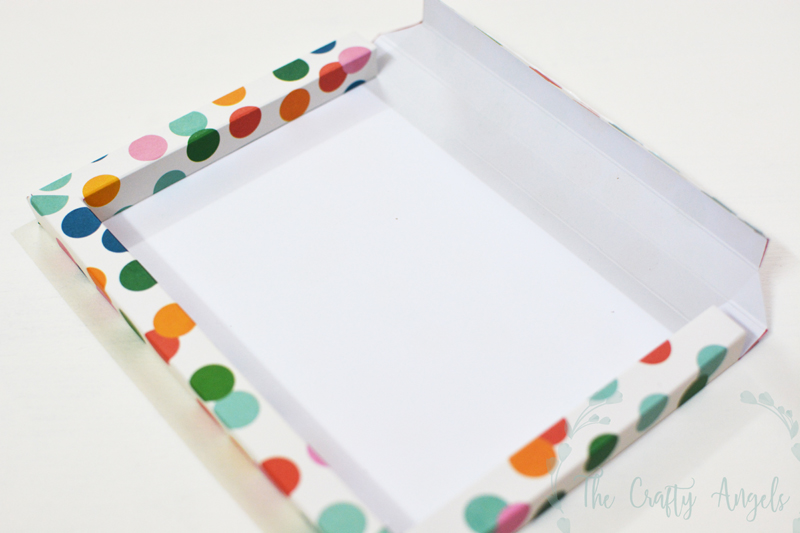
So thats it. If you have the measurements in hand, making these DIY shadow box is a cakewalk. Lets get into the math behind these DIY shadow box then 😀
Measurements to make DIY shadow box
Paper size = 12″x12″
Maximum inner frame size of shadow box = 7″x7″ which means your W& L shouldn’t be more than 7 inches. If you have understood the math, you can extend it to any measurement of pattern paper and any frame size.
Say width of your proposed frame = W and length = L then your score lines will be at :
1/2″, 1″, 1 1/2″, 2″ and (3+W)”, (3+W) 1/2″, (4+W)”, (4+W)1/2″, (5+W)” , (5+W)1/2
rotate paper 90 degree and score at
1/2″, 1″, 1 1/2″, 2″ and (3+L)”, (3+L) 1/2″, (4+L)”, (4+L)1/2″, (5+L)”, (5+L)1/2
Don’t forget to score a one inch line at 2 1/2″ and (2+L) 1/2″
If there is any extra paper beyond your last scored line, you should trim them out before starting to fold at the scored lines.If these are too confusing, don’t worry I have a prepared a standard chart for all measurements of shadow boxes that you can create from a 12″x 12″ paper. Click here to download the scoreline measurement format.
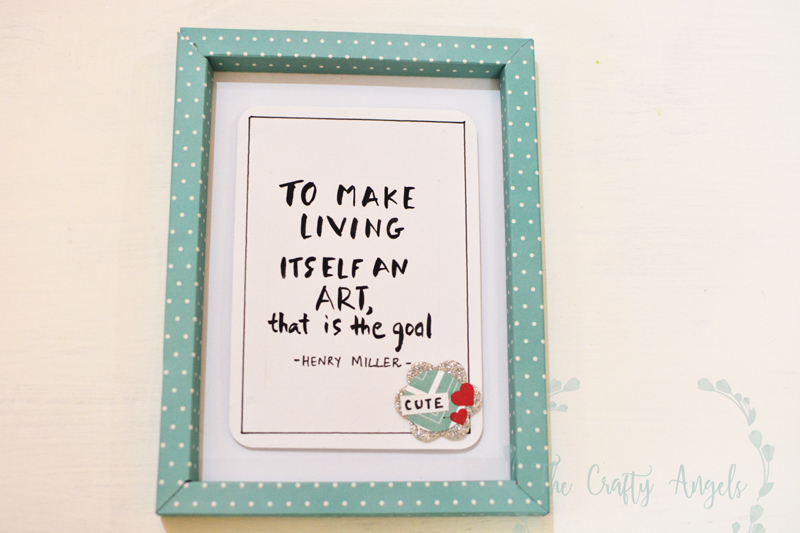
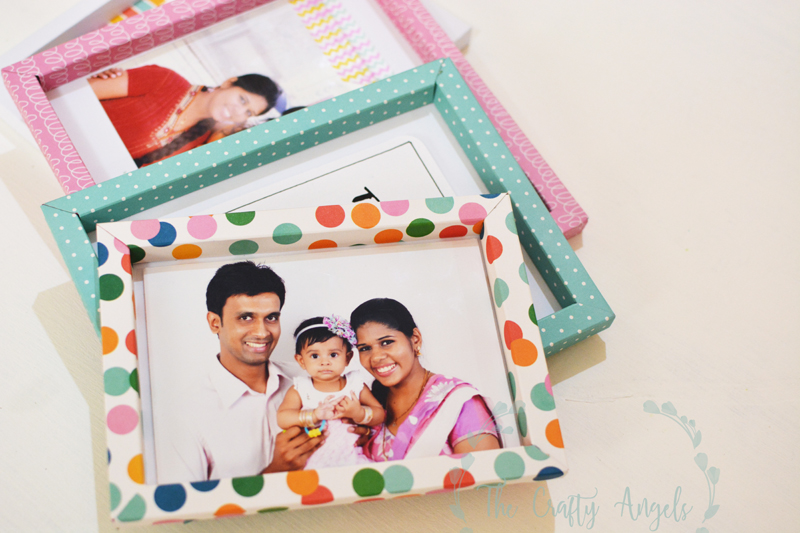
Hope you enjoyed watching the tutorial. I used these shadow boxes to hold few of my favorite photographs and also a few quotes. This pretty handwritten quote with handmade embellishment one was sent to me by my pen friend Piyu 🙂 Do check out few more simple crafts on my blog and let me know if you want to see any specific craft.
DOWNLOAD SHADOW BOX MEASUREMENT TEMPLATE HERE
Why I Still Love This Paper Shadow Box Project
This tutorial has been on The Crafty Angels for many years now, and it continues to be one of the most loved paper craft projects on the blog.
I think part of the reason is that shadow boxes feel special. They turn simple paper into something display-worthy and meaningful.
They’re also incredibly versatile:
- Christmas decor
- Wedding gifts
- Baby keepsakes
- Mother’s Day gifts
- Gallery wall decor
- Handmade frames
And once you understand the basic structure, you can adapt the design endlessly.
Want an Easier Option?
If the measurement calculations feel overwhelming, don’t worry.
I’ve kept the original printable measurement template in the post so you can simply download it and follow along visually instead of calculating everything manually.
That way beginners can still enjoy making a beautiful paper shadow box without getting stuck on the maths.
Tips for Making a Stronger Paper Shadow Box
Here are a few things I’ve learned after making many shadow boxes over the years:
- Use thicker cardstock – Thin paper tends to collapse once layers are added.
- Glue works better than tape – Especially for corners and dimensional projects.
- Add foam tape between layers – This creates beautiful depth and shadow effects.
- Use patterned paper inside – Even simple patterned backgrounds instantly elevate the final look.
- Add an acetate front- This protects delicate paper art from dust while still keeping the layered effect visible.
A handmade paper shadow box is one of those crafts that feels both creative and meaningful.
It’s relaxing to make, easy to personalise, and beautiful enough to display in your home or gift to someone special. Whether you use this project for layered paper art, keepsakes, or handmade decor, I hope this updated tutorial helps make the process simpler and more enjoyable.
And if you create your own version, I’d absolutely love to see it 💛
Edit : This post was created for ItsyBitsy as a Guest DT member. The original post has been published on their blog. Do have a visit and I am sure you would love browsing through all their projects 🙂
xoxo Angela

Hey angela how did you make the digital pattern it was soo helpful. Thank you:)
Hello Sarah, sorry for the very late response! I am not very good with making printables so I used excel to make the pattern. Might sound funny but my work has taught me to do anything and everything with microsoft excel 😛 In few of my other tutorials, I drew them with hand and then scanned them but this particular one was done in excel sheet 🙂