
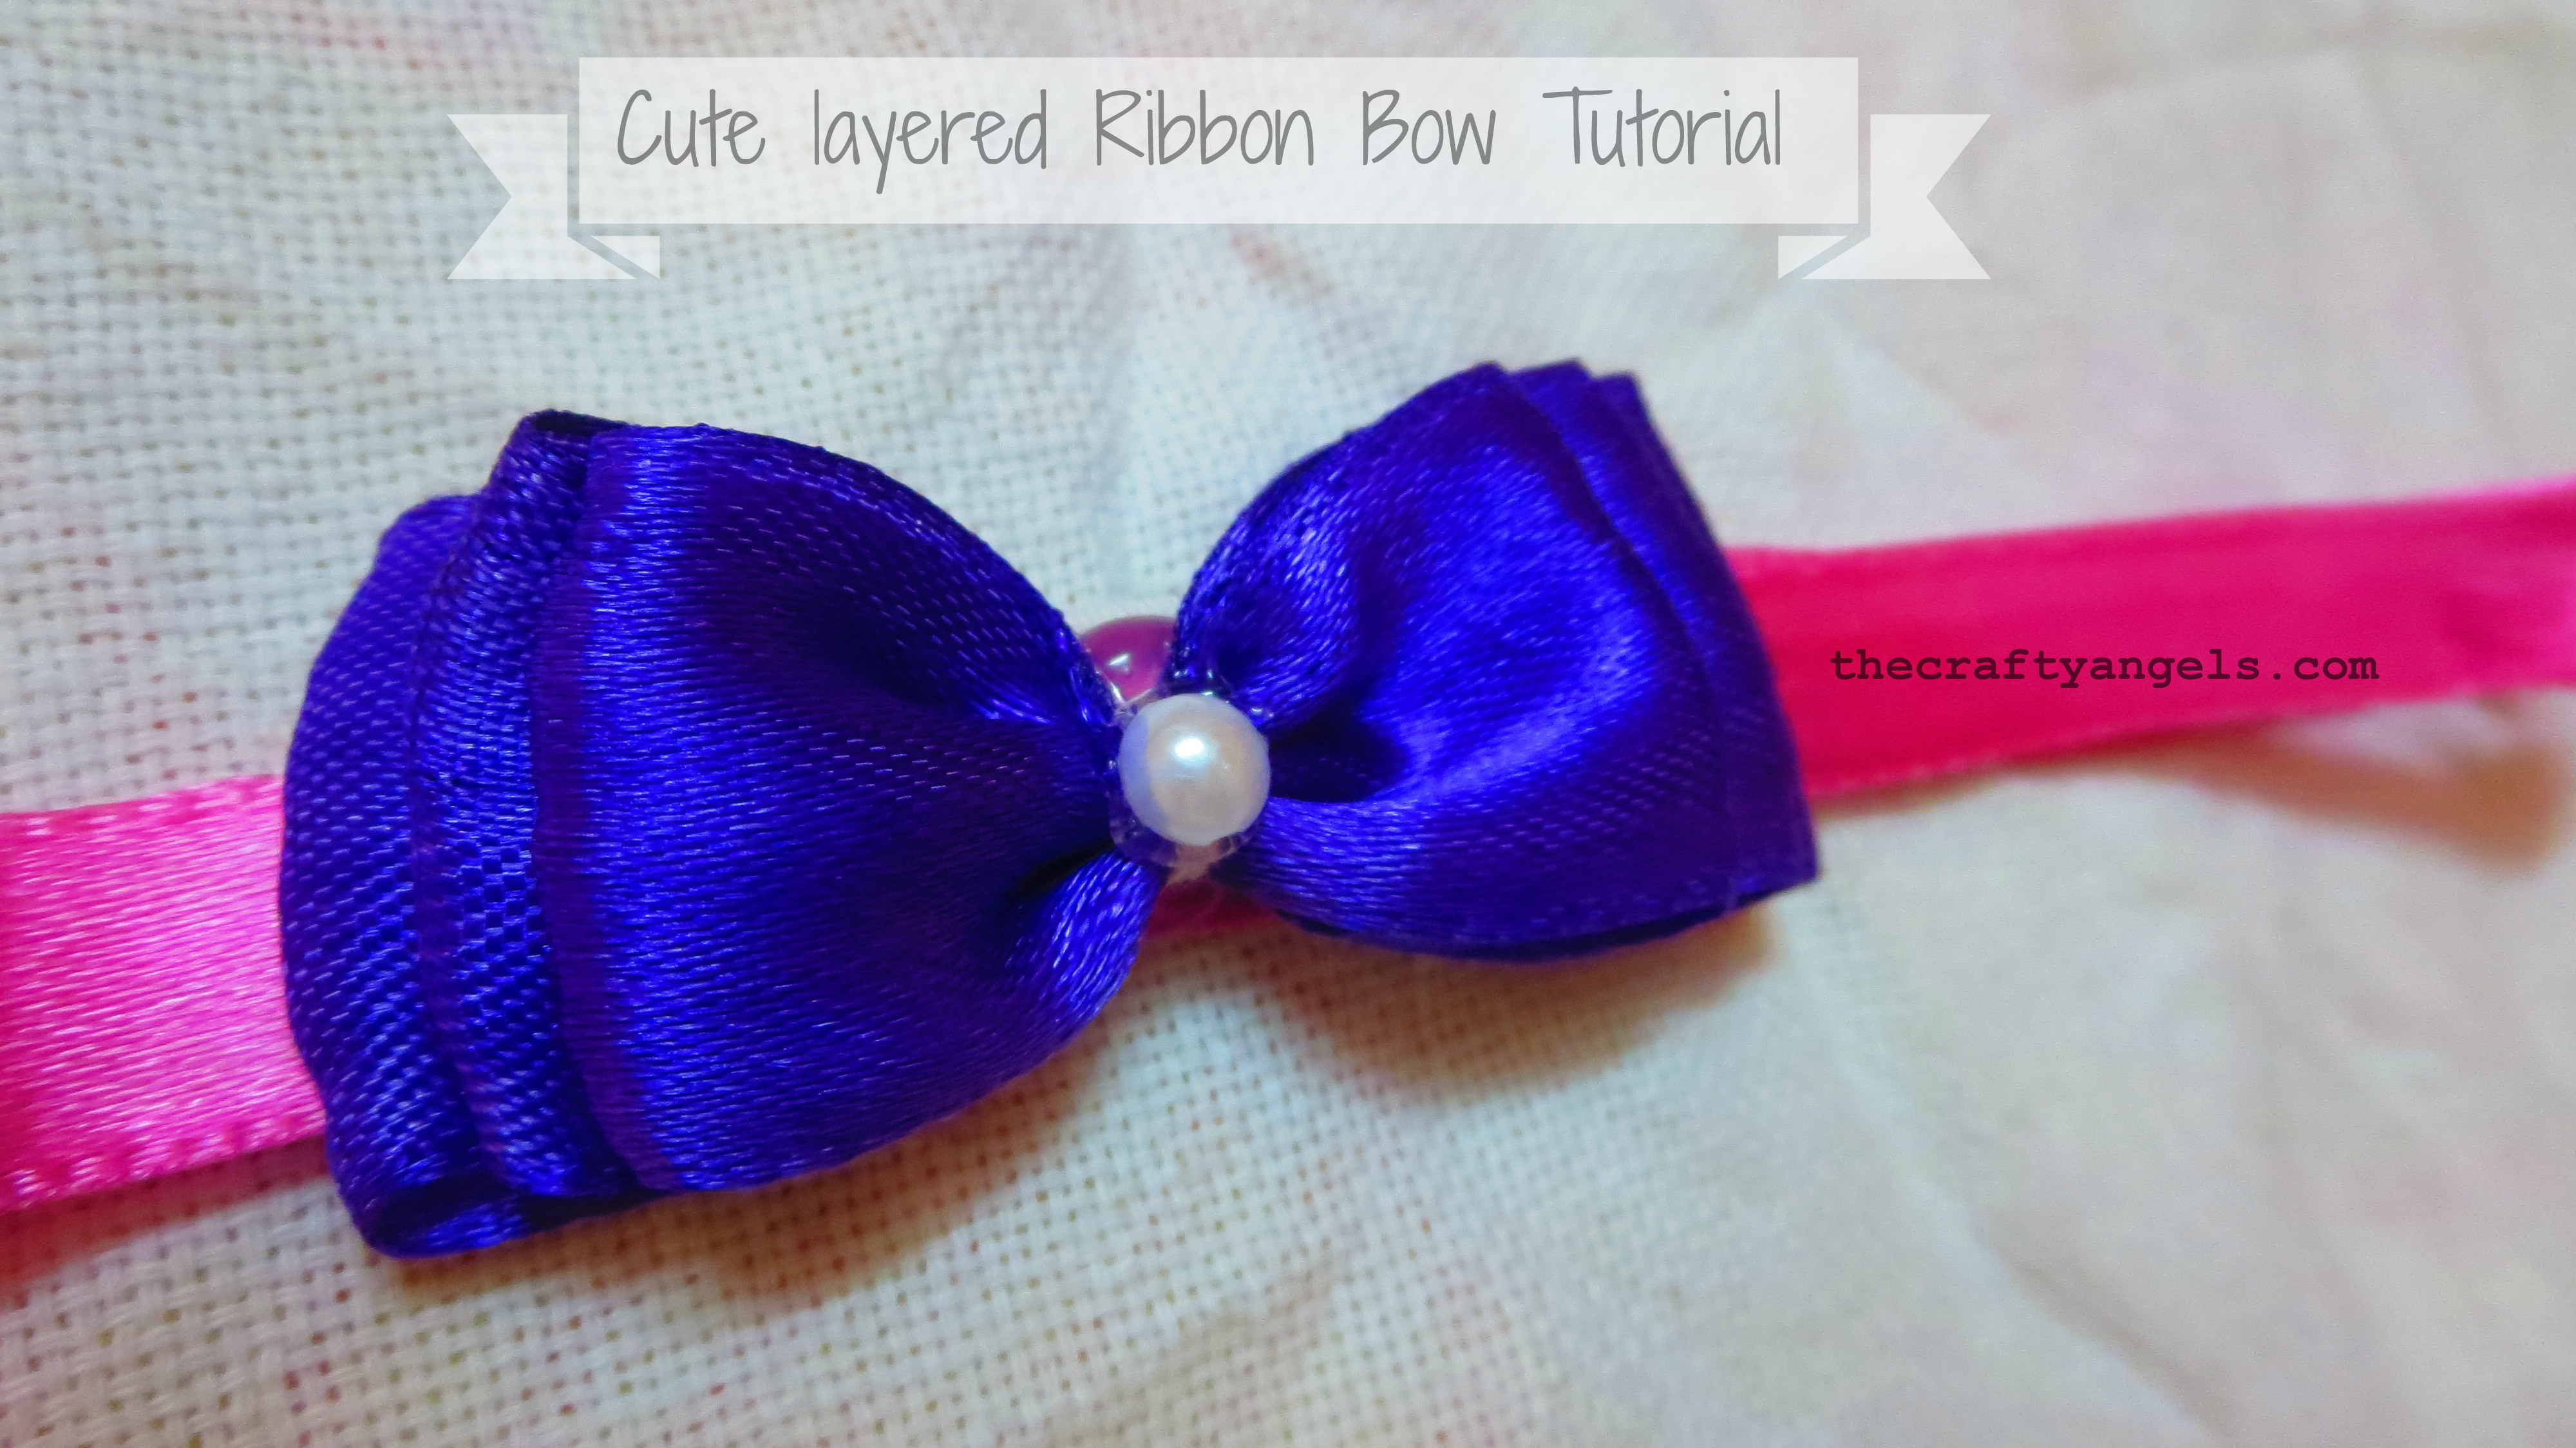
Cute Layered Ribbon Bows Tutorial #12
Hey Angels!!! A Photo tutorial to learn how to make simple layered ribbon bows. They can be used as ribbon bows for gift wrapping or headbands or dresses.
Cute Layered Ribbon Bows Tutorial
Todays is an easy craft – ribbon bows! I still remember the time when i was in school – thats when we had to tie up two separate pony/braids on either sides and secure with red ribbon and how much I used to try to make the bow if not cute symmetric at least! I wish I could go back in time and make these ready made cute bows for myself so that I could shine within my girls circle ( I wish!). So now that i cant go back in time, I have decided to be like those mums who hoard cute bows n hairbands for their little girls 😀 and since i find them too pricey and difficult to find the right design, I decided to DIY!
[irp posts=”413″ name=”DIY Ribbon bows tutorial #9″]
So for all those who have wishes like me, scroll down to know how to make these little cuties 🙂 I actually ended up doing something very wrong with my pictures while making a collage and its like so blurred and so bad. This one is a very easy one so i guess the bad pictures will be okay to get the hang of the procedure.
Materials required to make Ribbon Bows
- Ribbon
- Embellishment/button/beads
- Hot glue
Step by step Tutorial : How to make Cute Layered Ribbon Bows
This is a super easy tutorial – just follow the pics!
- Take your ribbon and fold it at the length that you prefer your bow to be. Just make sure that you have the starting end of the ribbon at the middle portion of the bow.
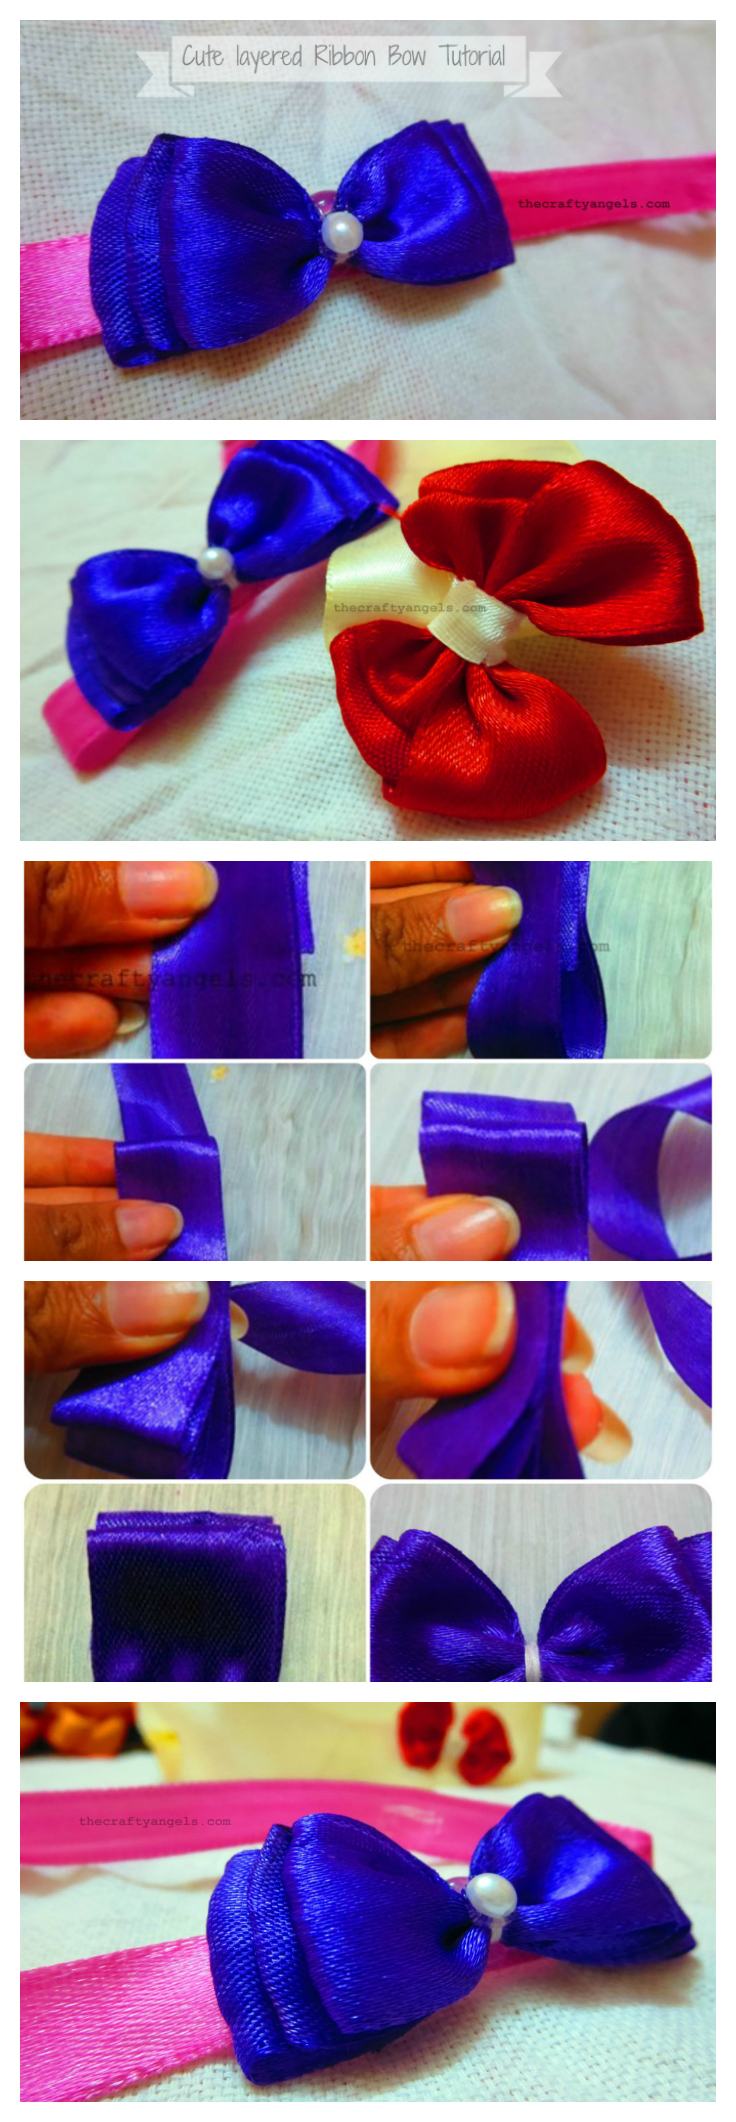
- Now, make two more zig zag folds just below the fold such that each fold below the first one is a little longer than the previous one. Okay that was totally non-understandable so lemme split the steps for you – After you have made your first fold perfectly ( hope that step was clear), fold the ribbon downwards and one corner making sure that the pleat above is smaller than this one. Now, bring the ribbon to the other corner and fold out again , bring it to next corner and fold again ( continue for how many ever layers you need – i made 3 )
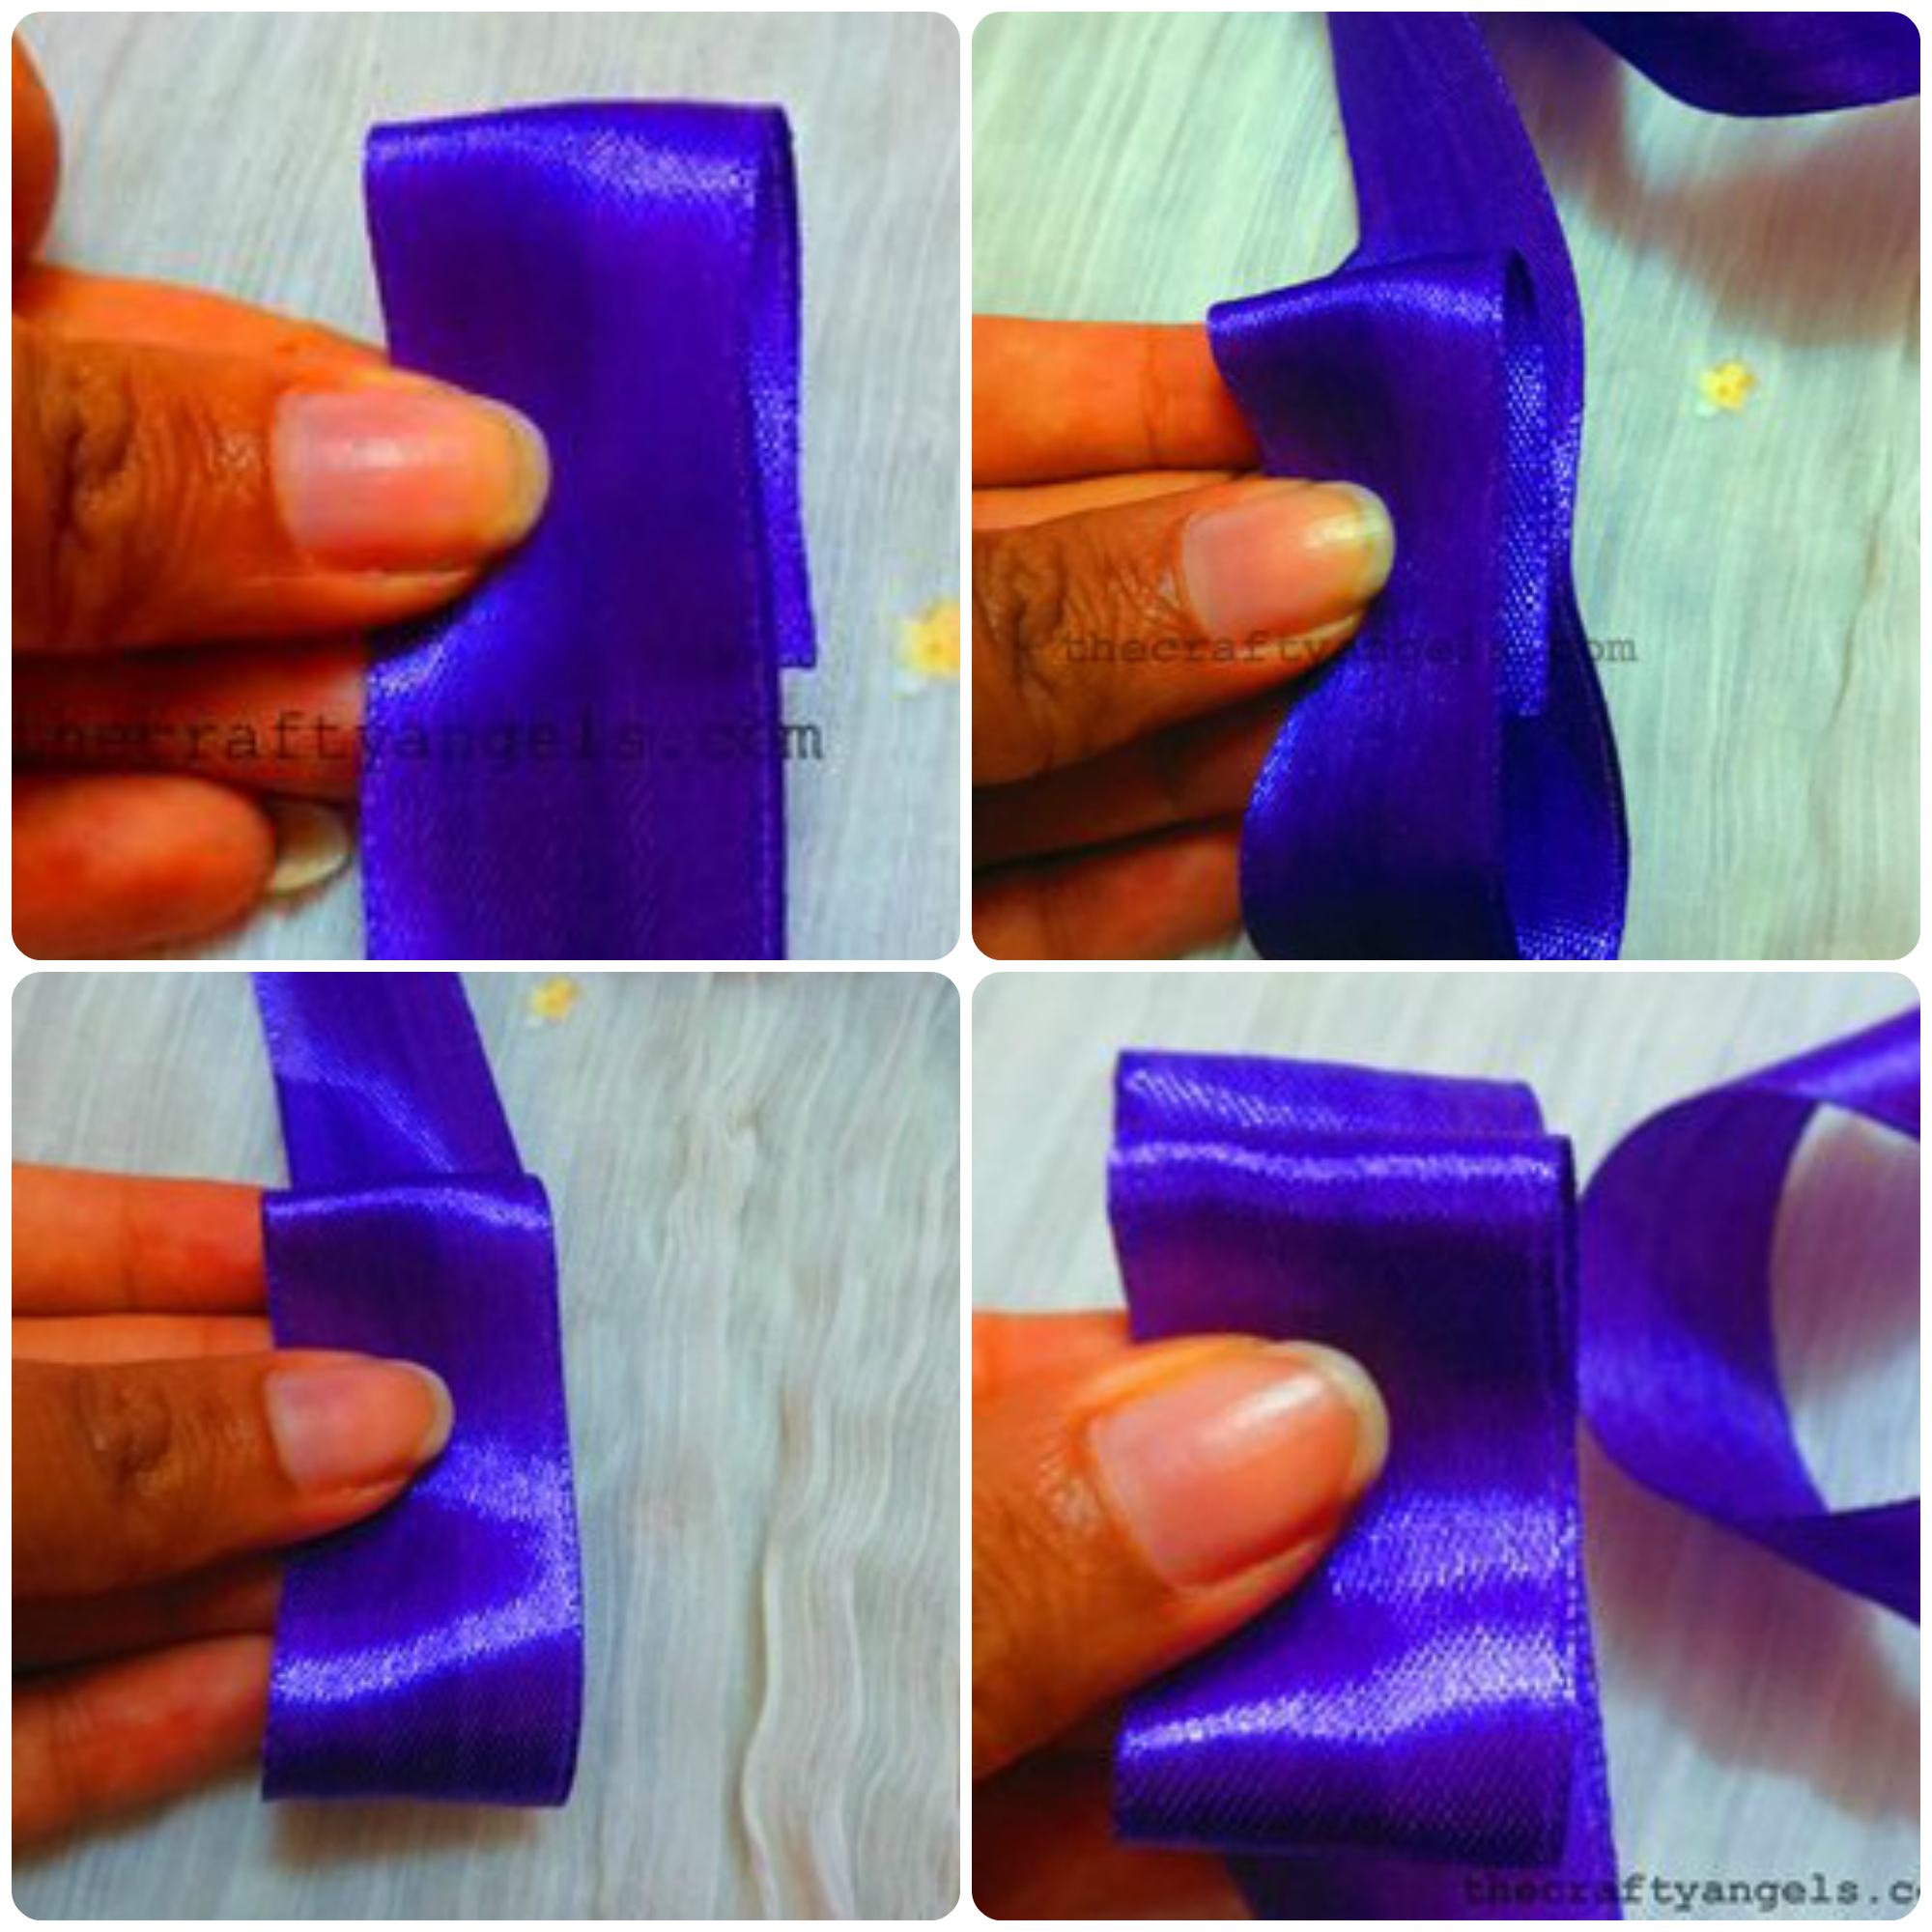
- Once you are ready with your pleats tight, its time to stitch it at the middle. For smaller width ribbon, just sew through the middle portion making sure both ends of the ribbon gets secured. For wider ribbons, its better to prefold it (along the length of the bow) in even number of folds so that the bow looks symmetric. Once you have stitched through, just pull it tight and tie it around.

Aint they simple enough? The prettiness of the bow make you feel like its going to be some very difficult one but its downright easy peasy!


So everyone do try them out till i come up with another tutorial for you 🙂 Do share your thoughts and suggestions & also share the tutorial with people who need them 🙂
And do not forget to check out more ribbon bows tutorial here and also baby stuffs diy tutorials here 🙂
xoxo Angela

One Comment