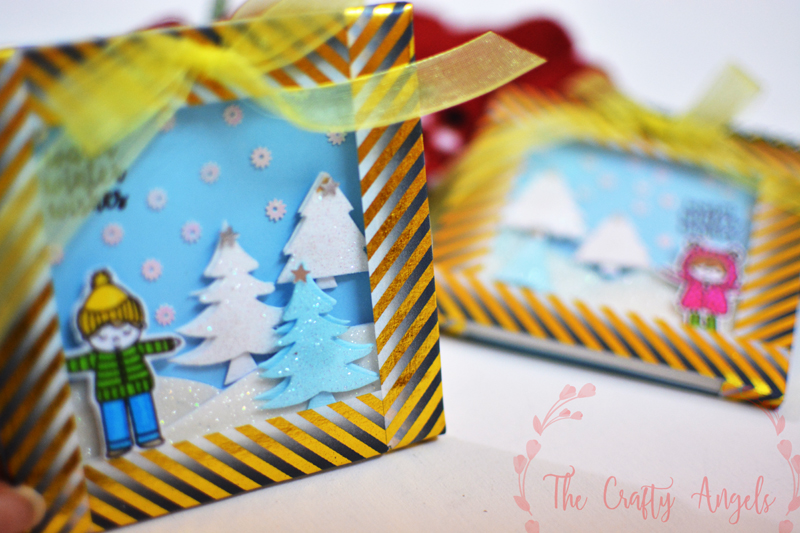
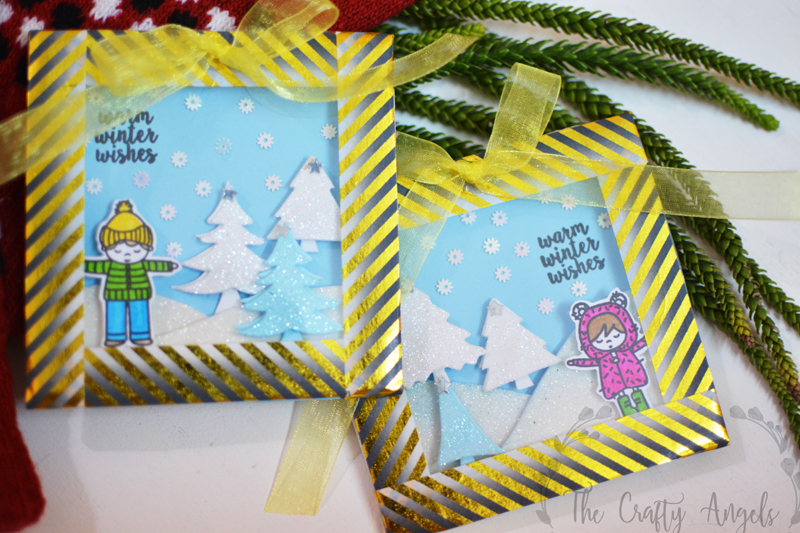
Snowy Shadow Box for Chistmas
Make these cute mini snowy shadow box as gift or as Christmas tree ornaments. A great way to add that handmade love to Christmas decor !
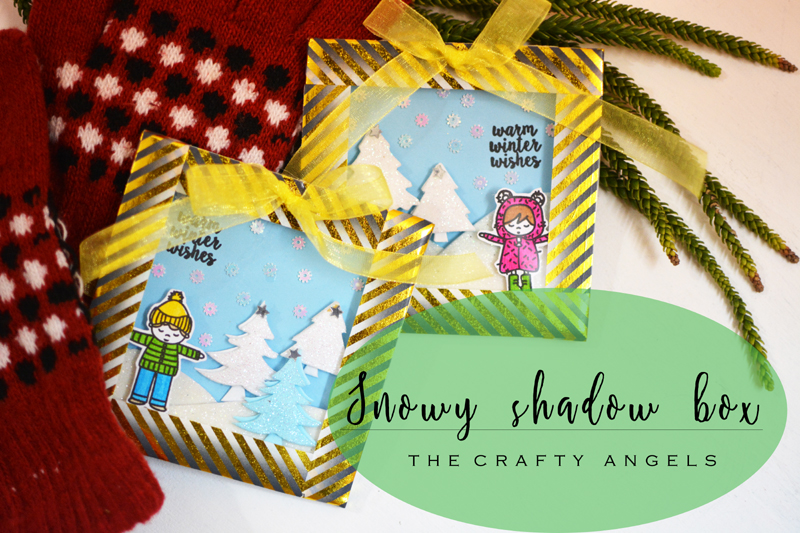
Taking a break from making christmas tree ornament, I made these adorable little snowy shadow box to be sent to my christmas swap partners ( hopefully they aren’t reading this!) They are really simple to make and I loved the final look. I had seen many crafters making such shaker cards and tags but I was reluctant of making these due to supply side constraint. Here I have made these using very basic supplies and am glad they are merry & bright for christmas gifting 🙂
Materials required to make snowy shadow box :
- Small cardboard/carton sheet
- glitter foam sheet for snow mounds
- blue cardstock/paper for sky
- doubkle sided foam tape
- OHP/. transparent plastic sheet
- handcut image of child
- christmas tree embellishments from itsybitsy
- sequins, sentiments stamp
How to make snowy shadow box for christmas :
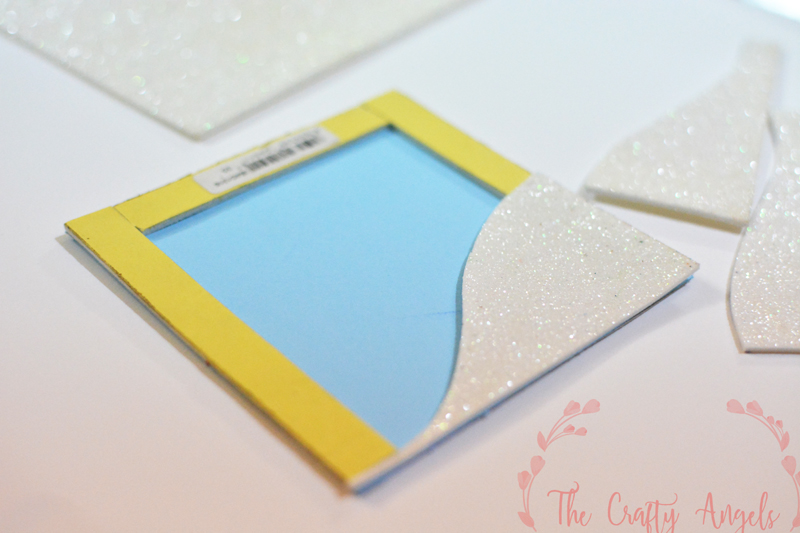
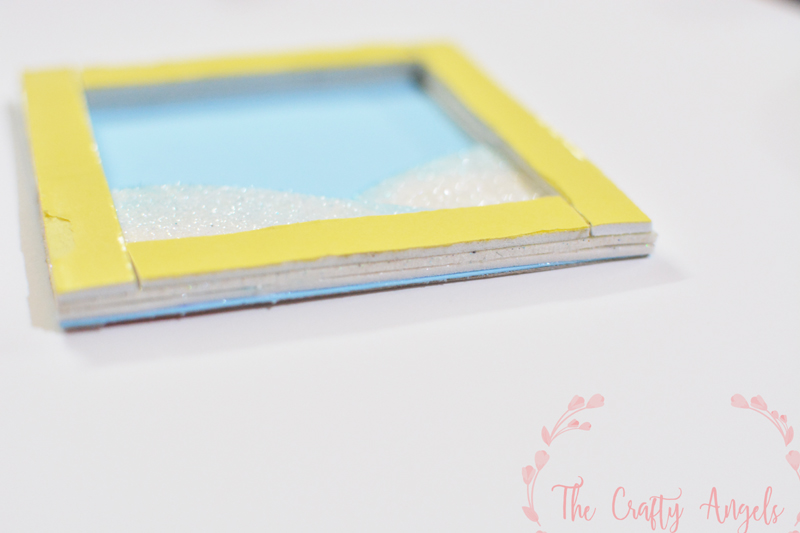
Start by deciding the size of the shadow box – mine is small 4″x4″ square shape. You will need to cut out a blue card-stock as background in the same size and also a carton/cardboard in the same size for back support. Stick your background on the support and keep it ready.
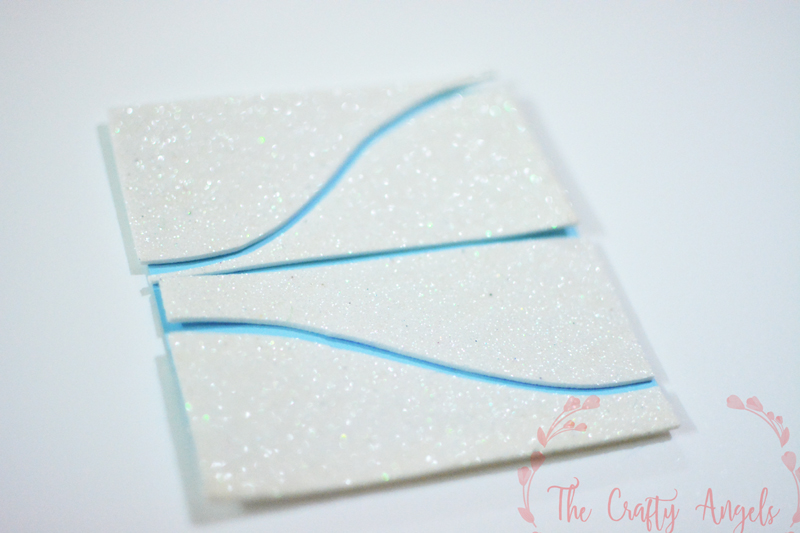
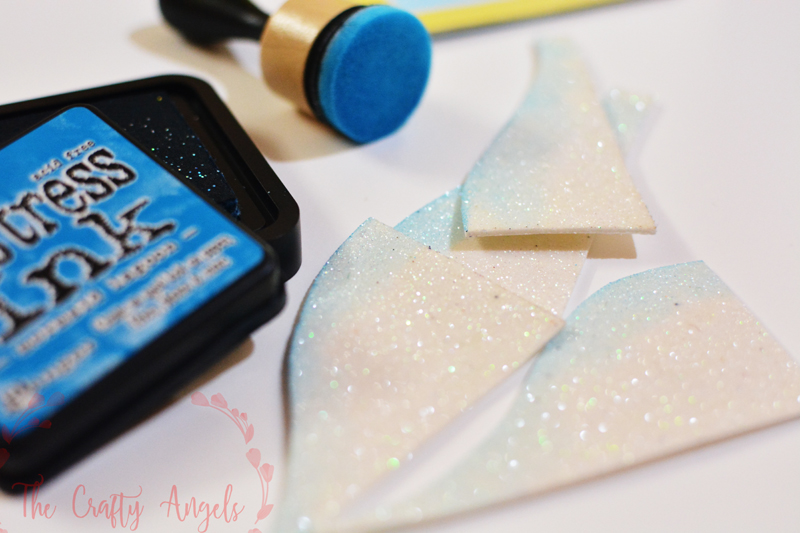
Next cut out wavy shapes for your snow mound. I cut out the waves like you can see in the above picture from a 4″x4″ foam sheet . It will look better if they are at different height and also if the peaks of the mounds are not parallel. For the small frame that I made, I used only two layers which means two glitter foam sheets cut into waves shape placed one over the other. Additionally ,I also applied a little blue using distress ink at the foam edges for a differenciation.
The snowy shadow box is really simple to make but just that you need make sure before putting a final cover that all four edges are at the same height. So start by pasting your higher snowy mount cutout on the base and add double sided foam tape on all the open edged areas.
Paste your second snowy mount and again cover all open edges using a foam tape. This is to ensure as I mentioned before, that the level remains same.
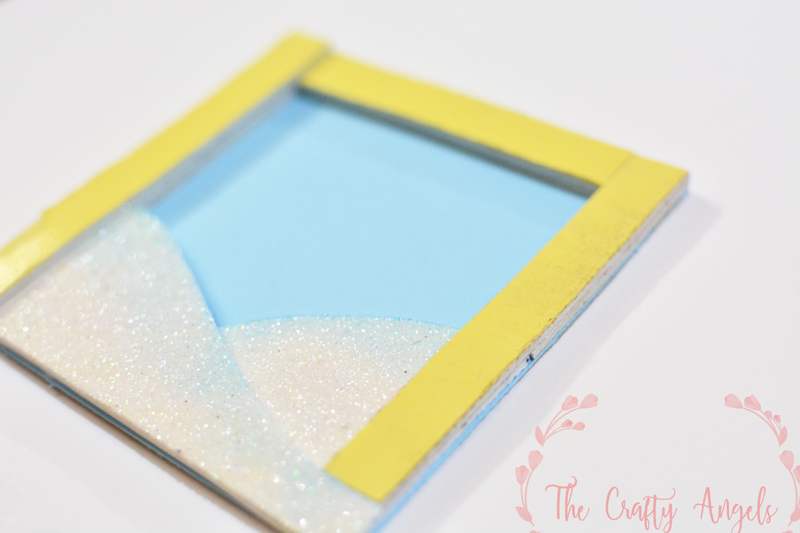
Here in the below picture you can see the three layers – 2 for foam snow mounds and one just for an added depth. You need to make sure that all your edges have such equal number of layers else your frame will be lopesided one!
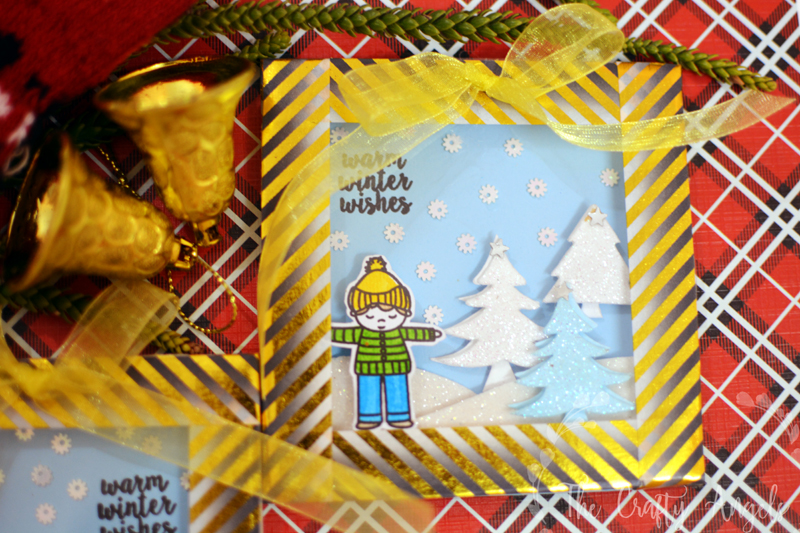
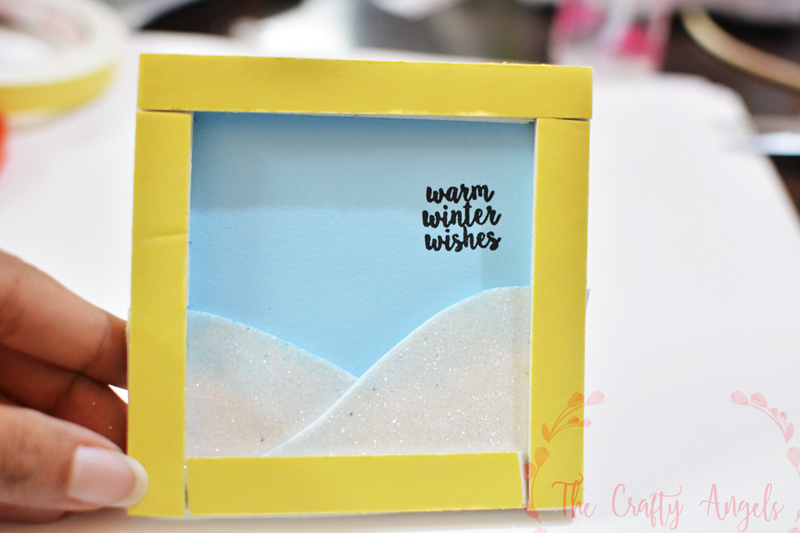
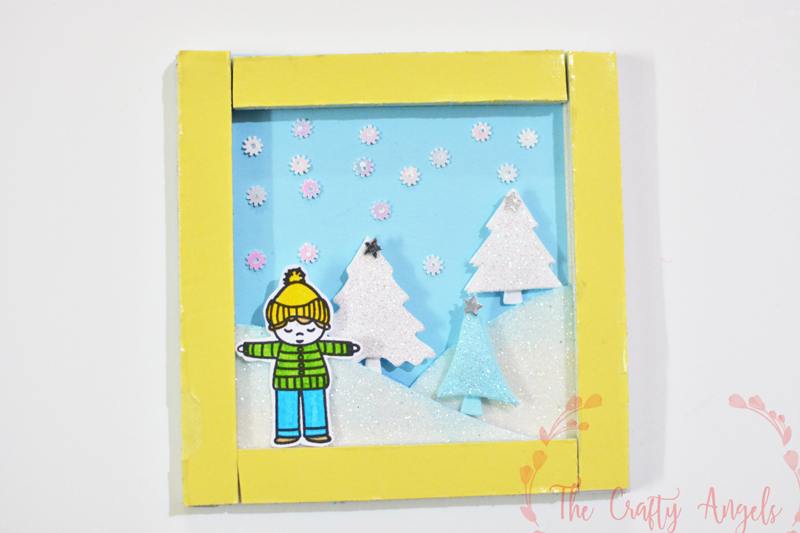
I chose a matching sentiment “warm winter wishes” on one corner of the background and filled the rest of area with white sequins supposed to resemble snow but actually now looks like starts 😛
You can add your elements now on the background. I chose to put a small cutout of a kid in the backdrop of some christmas tree. The snow covered christmas trees that I have used are from the recently launched holiday elements from Itsybitsy.
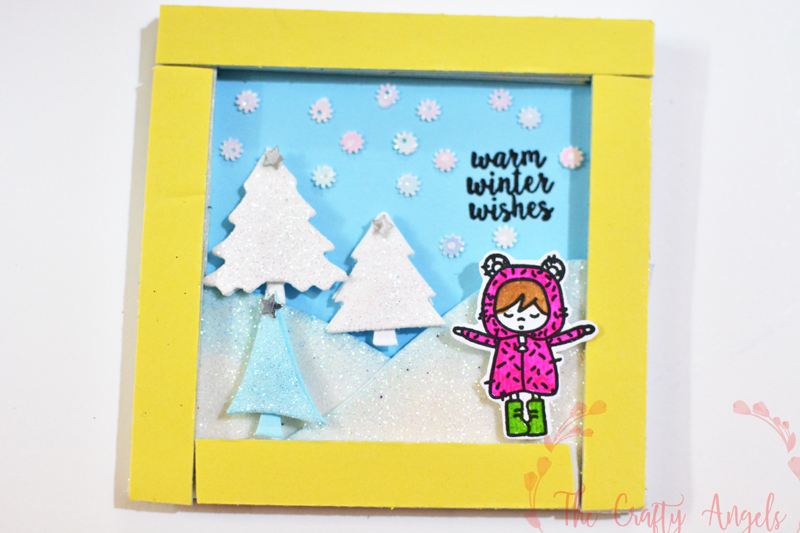
Once you are done with everything, you can adhere an OHP/transparent plastic sheet of size same as that of the base and seal the box. The foam tape will be visible at the edges which is a little odd looking. You can cover them up with washi tapes in christmas theme like I did.
To add that final something which was still missing, I added a gold ribbon bow and I feel its kinda complete now 🙂
If you have die cutting machine and dies for frames, these will be lot more easier. But as for me, this is the way! What are your christmas plans? Anything handmade on mind? Let me know 🙂 And yeah log in for more christmas crafts here 🙂
xoxo Angela