
Darling DIY Dollhouse with Cardboard boxes
Want to make a pretty dollhouse all by yourself ? Check out this awesome tutorial for DIY dollhouse, made from cardboard boxes! Danger zone ahead – Loads of pictures!
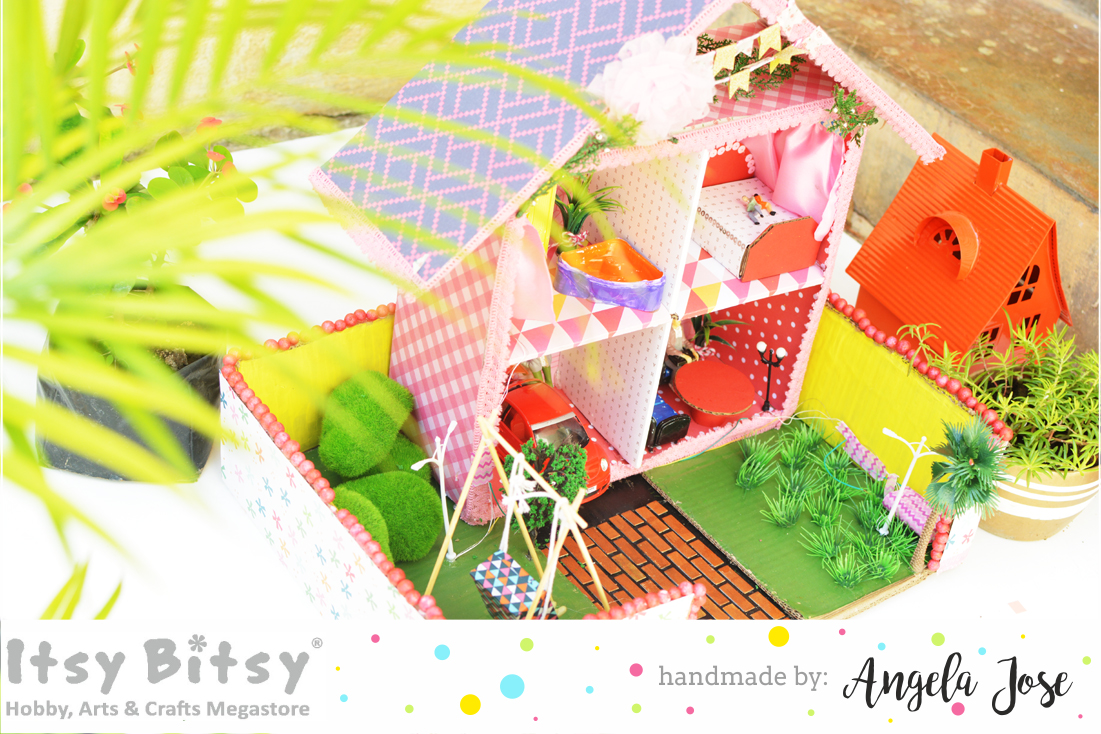
My daughter wanted me to do something purposeful with all the craft supplies that I had been hoarding. And thats when the idea of a DIY Dollhouse for her occurred to me. Well another one more reason to shop for more pretty papers and accessories but I loved the idea and there I took a bit of time to add so much details into her DIY Dollhouse. I hope you like it and of course its just an inspiration to start off with making your own dollhouses. I never had one when I was young and I think even if you don’t have a baby yet, just make it for the sake of all the good old times when you wished you had one!
This post was originally made by me for Itsybitsy as DT post and I am reproducing it here for you guys. Get a cup of coffee and enjoy the tiny beauty 🙂
As always, before starting, a few points to remember for making dollhouses :
- Your kid is going to love the doll house no matter how shabby or perfect it is. So, don’t be too anxious about details and perfection. Concentrate more on creating space to bring out creativity in your kid. Make sure you leave enough room for your child’s hands. They should be able to go inside easily for an enjoyable playtime.
- Nobody is going to judge the out of scale items in the dollhouse, except you. So, feel free to add whatever you think looks good, even if their sizes don’t match.
- Silicon glue is excellent for sticking anything together. Only in places, where I wanted quick sticking, I used hot glue. Be sure you use hot glue on heat resistant materials only.
- All the miniatures from Itsybitsy have a small protrusion at the bottom which helps attaching support to make them stand steady & straight. All I did was to poke a hole on the cardboard, insert the protrusion into it and add a dollop of silicon glue for support.
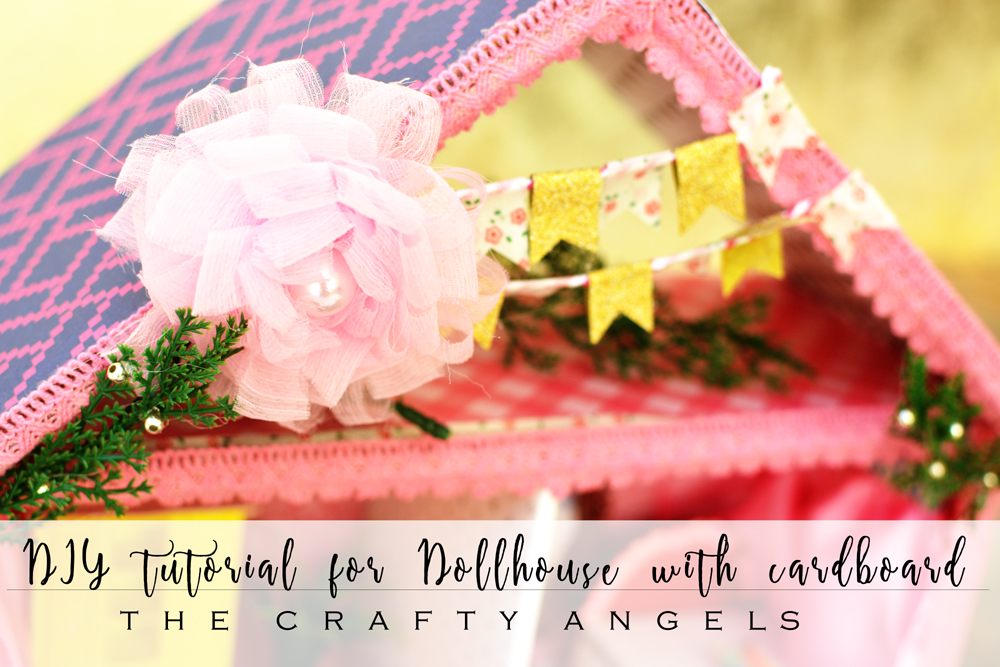
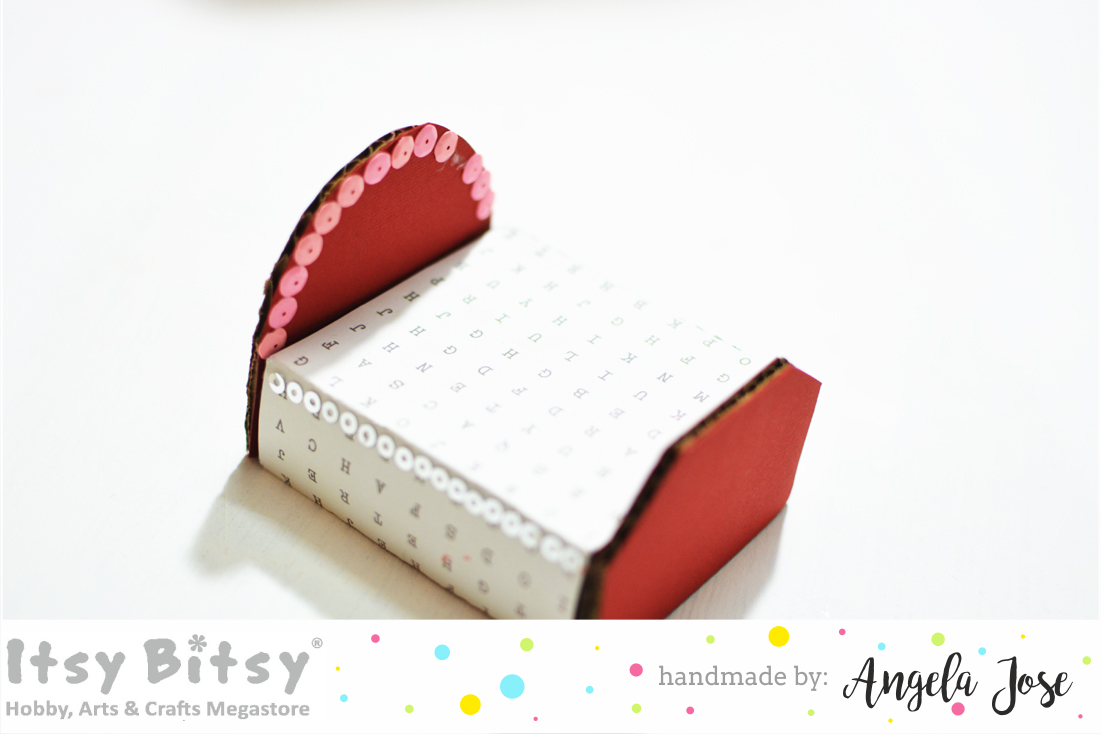
- Wherever you feel the edge isn’t pretty, use a lace, sequins trim, pearl sticker etc to cover up.
- How to work with the electrical circuit is explained separately at the end .
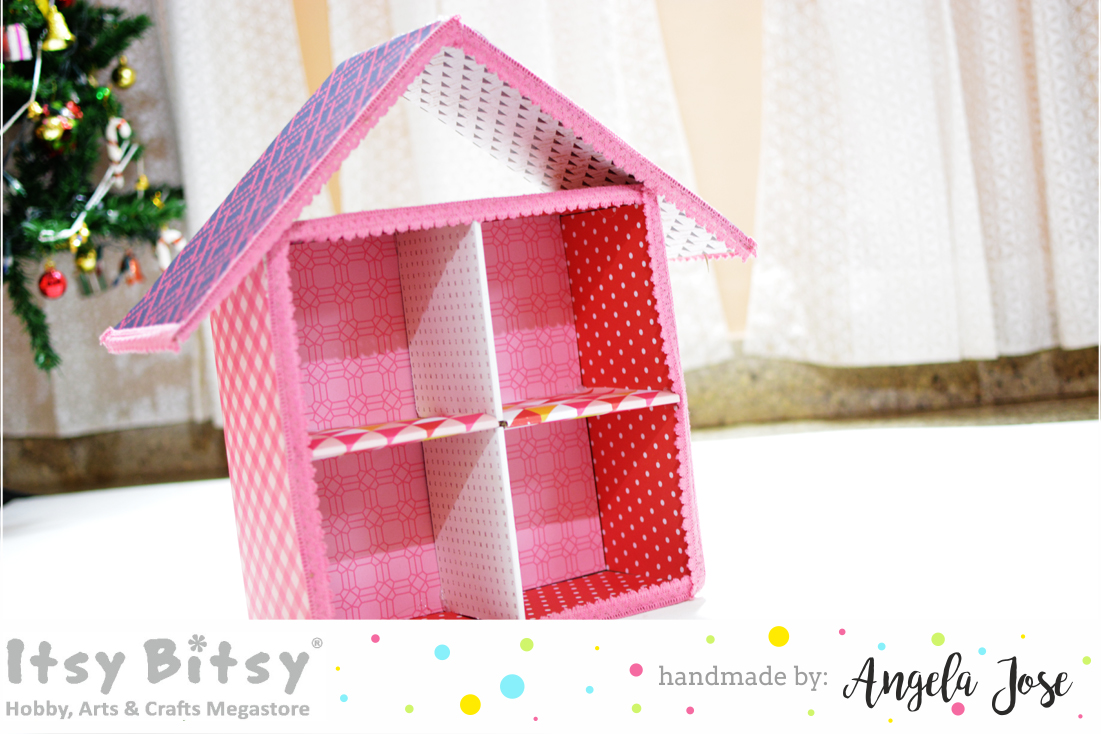
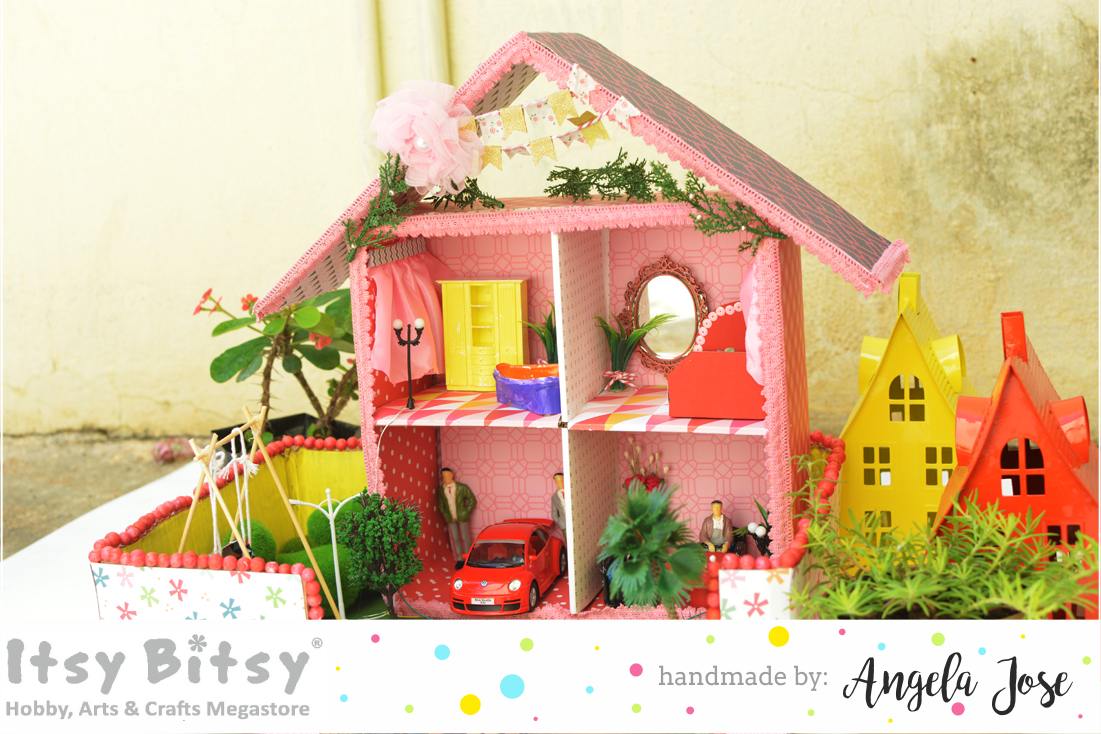
I started off with making the frame for the DIY Dollhouse. Remember in my previous post, I had shared a tutorial for making lampshades with foam boards? The same boards will do a wonderful job here too as a doll house frame. Since my daughter is too young, I wanted it to be really sturdy and be ready to withstand hurricane katrina everyday:) I chose a square packing box and cut out all the flaps. I covered them with pattern papers in shades of pink & red. For the top of the house, I covered the flaps that I cut out previously with pattern paper and stuck them with hot glue.
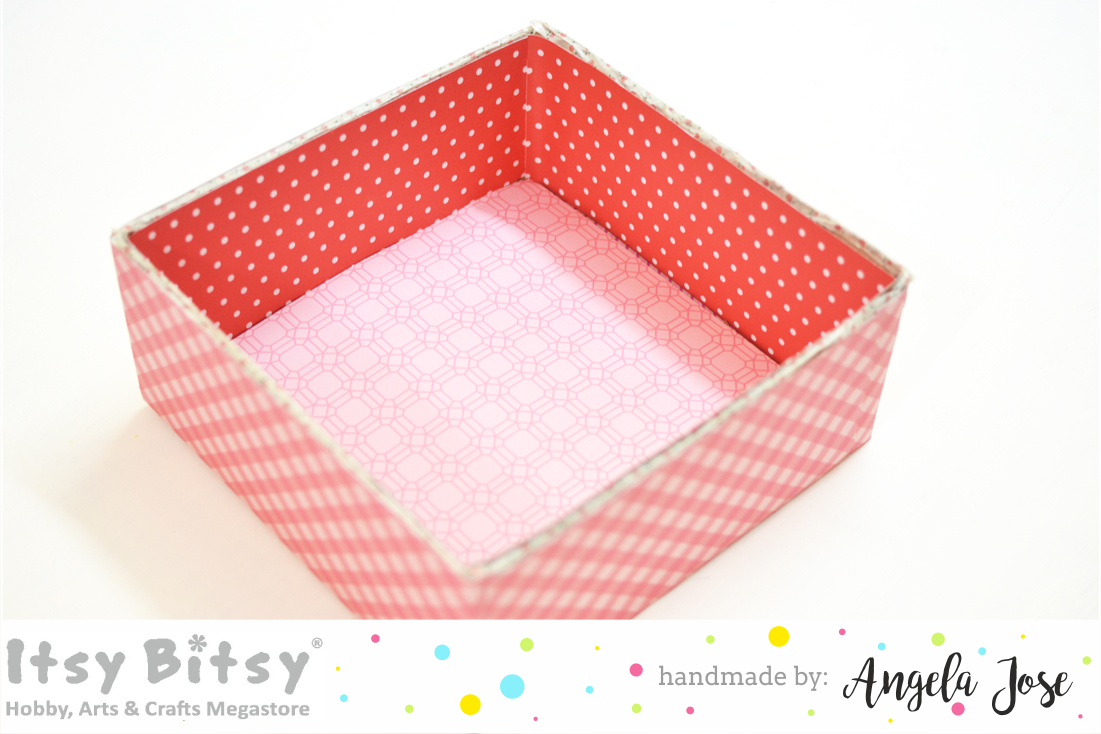
I used these pretty pink laces from Itsybitsy to cover up all the rough and uneven edges and I think it gave a very nice finish to the entire dollhouse.
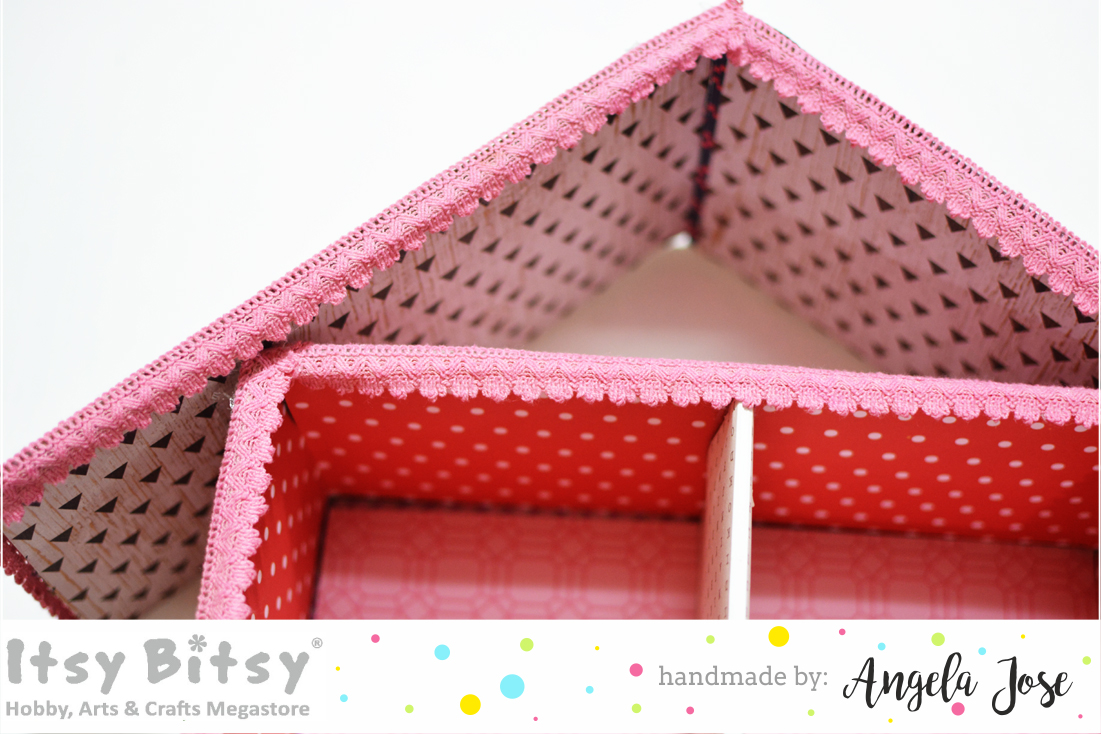
For the partition, again I used two leftover flaps after covering them with pattern paper. I stuck them using hot glue and placed them perpendicular to each other. The number of partitions really depend on the size of box you are using and also on the age of your kid who is going to play with them!
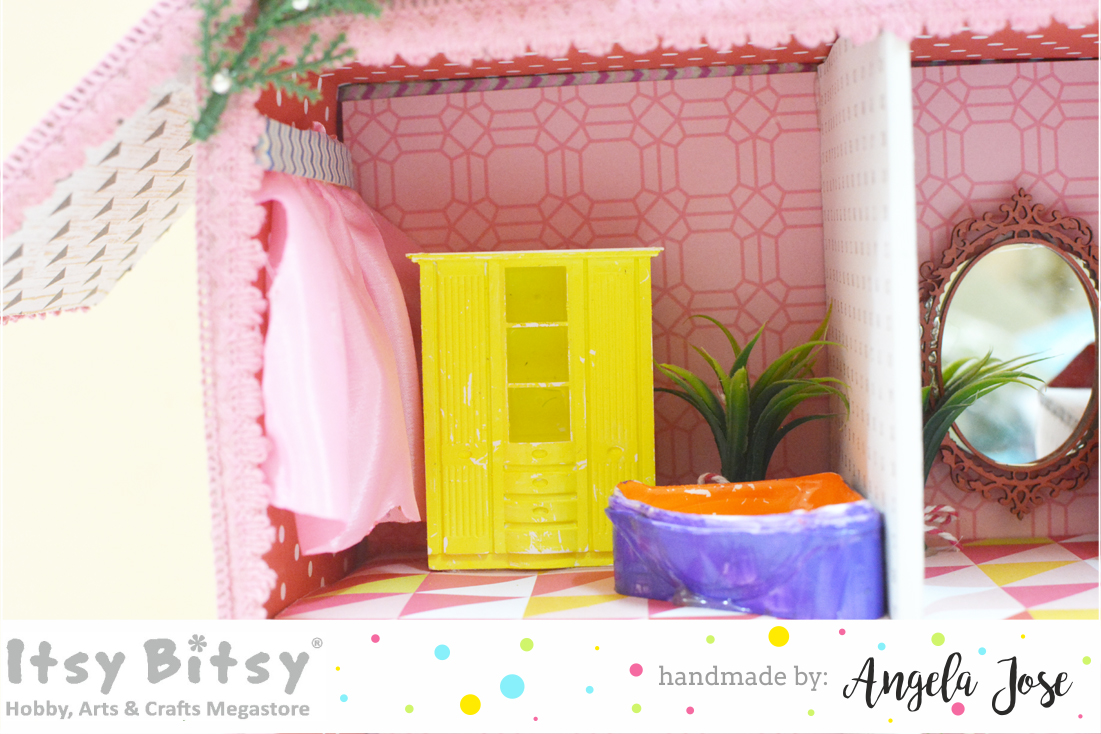
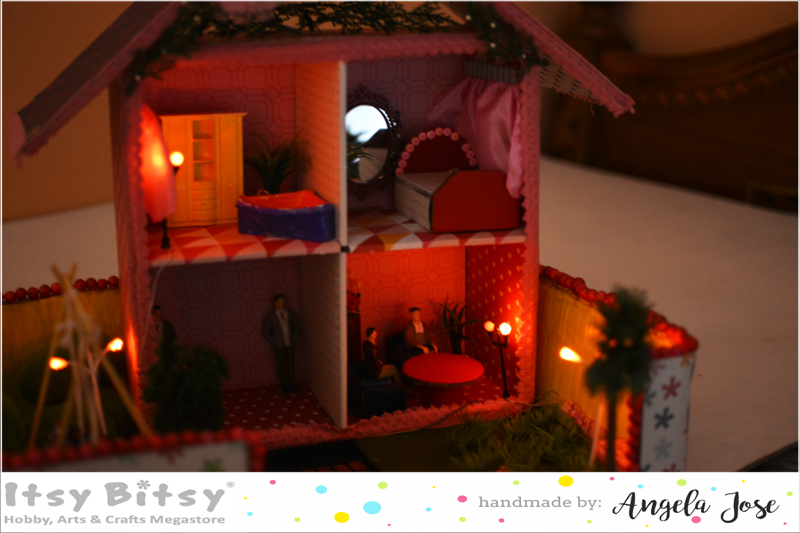
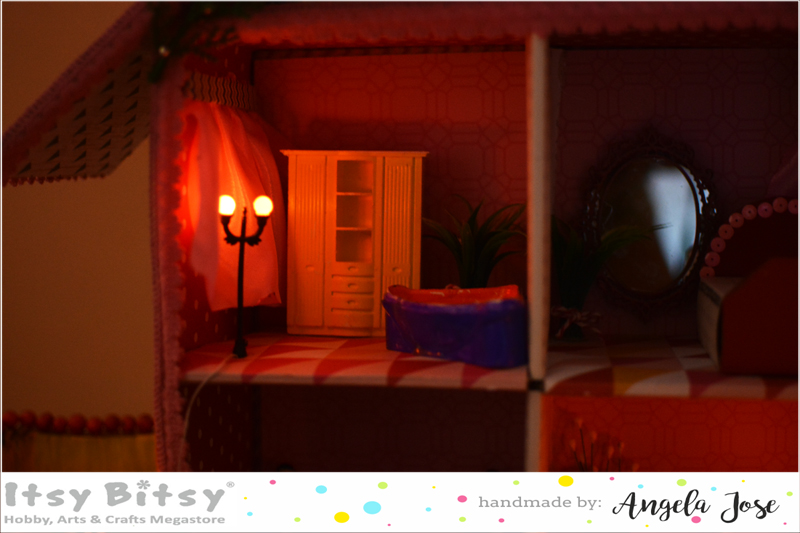
First a look at the bedroom. My most treasured part of this dollhouse is this pretty mirror. I removed the mirror from one of my old compact cases and glued this chipboard frame from Itsybitsy around it after painting it with copper shade.
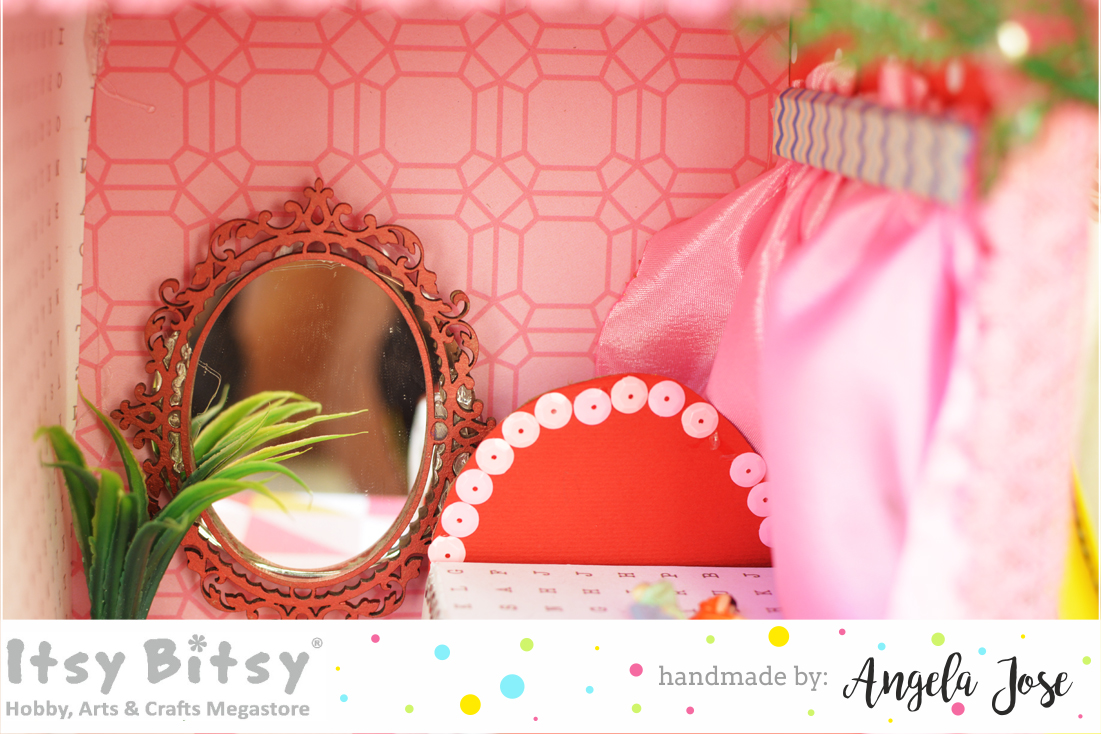
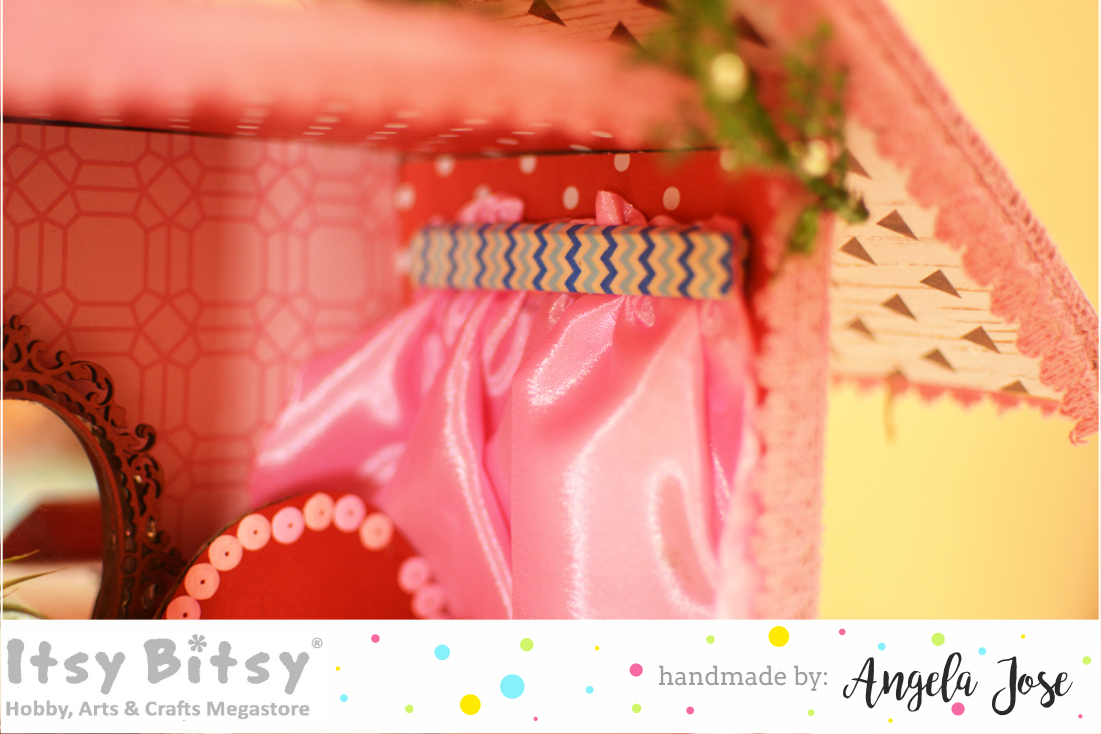
For curtains, I used bits of fabric which I had at home and sandwiched them with silicon glue between two ice cream sticks. I also put a washi tape on the stick for an added detail before sticking them to the wall.
For the bed I made a small cuboid from waste cardboard and covered them with pattern paper. Cut out two semicircles and pasted them on either sides. Not to forget, add some glitter and sequins here and there.
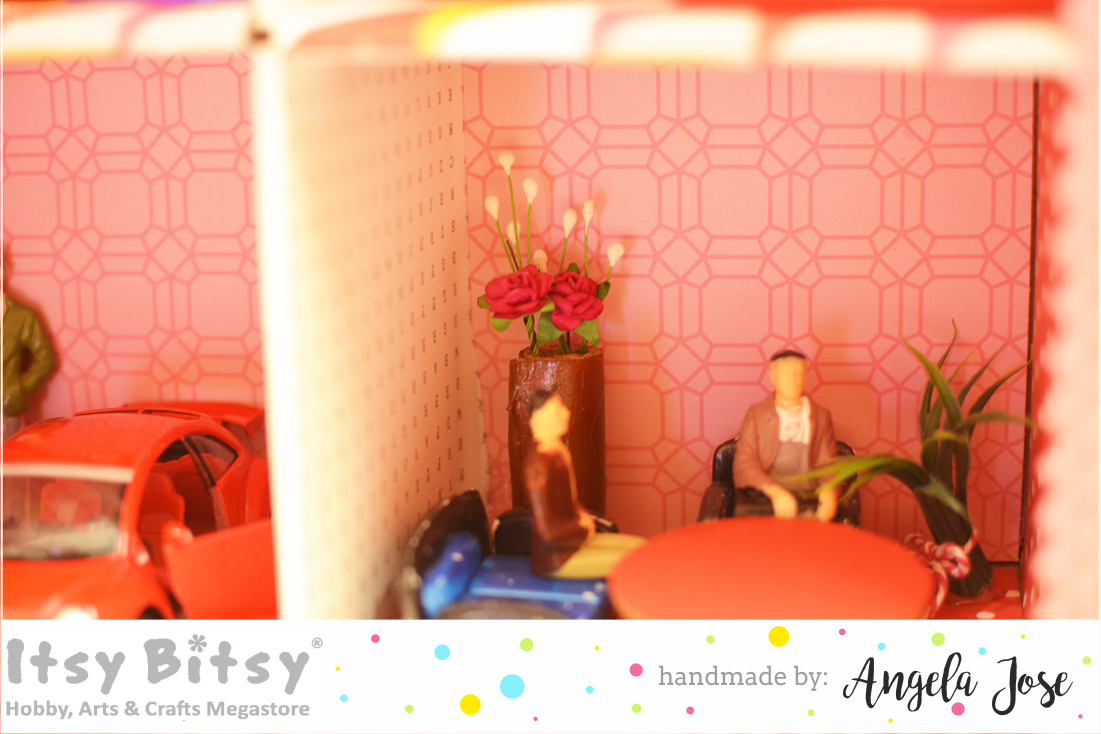
For the living room, the sofa set were miniatures from Itsybitsy and they have lot more to add to your living room. They originally came in white but my daughter chose to paint them blue. The coffee table is handmade by cutting out a circle and fixing it on a roll of paper.
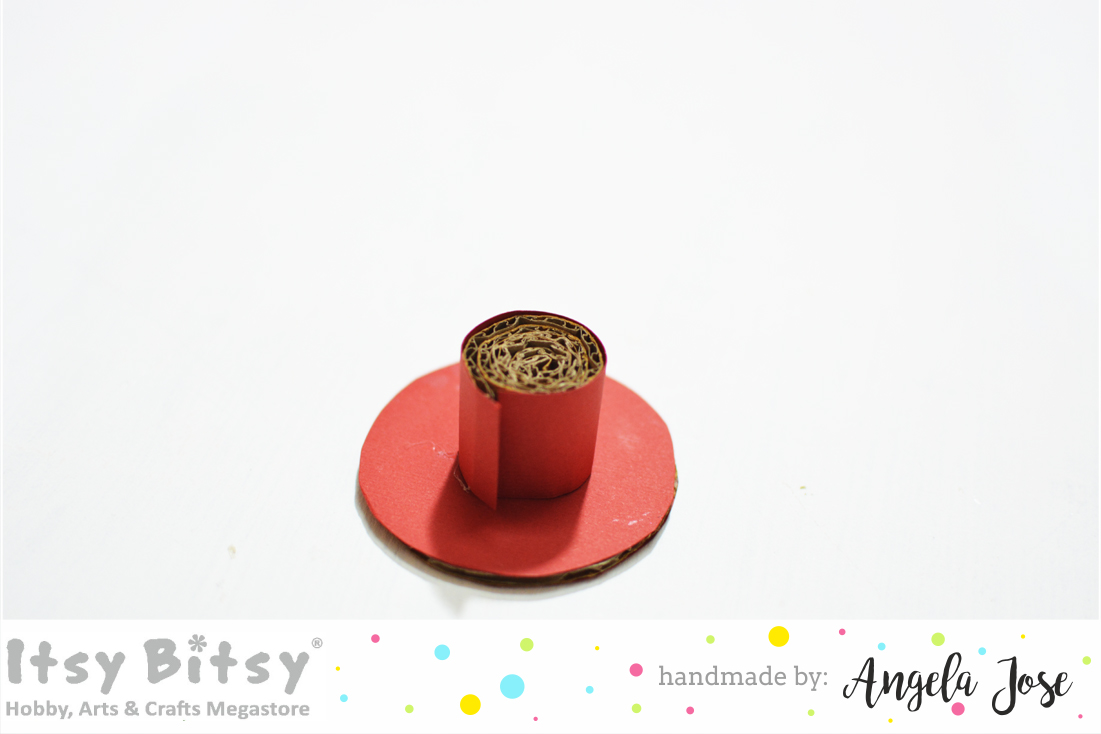
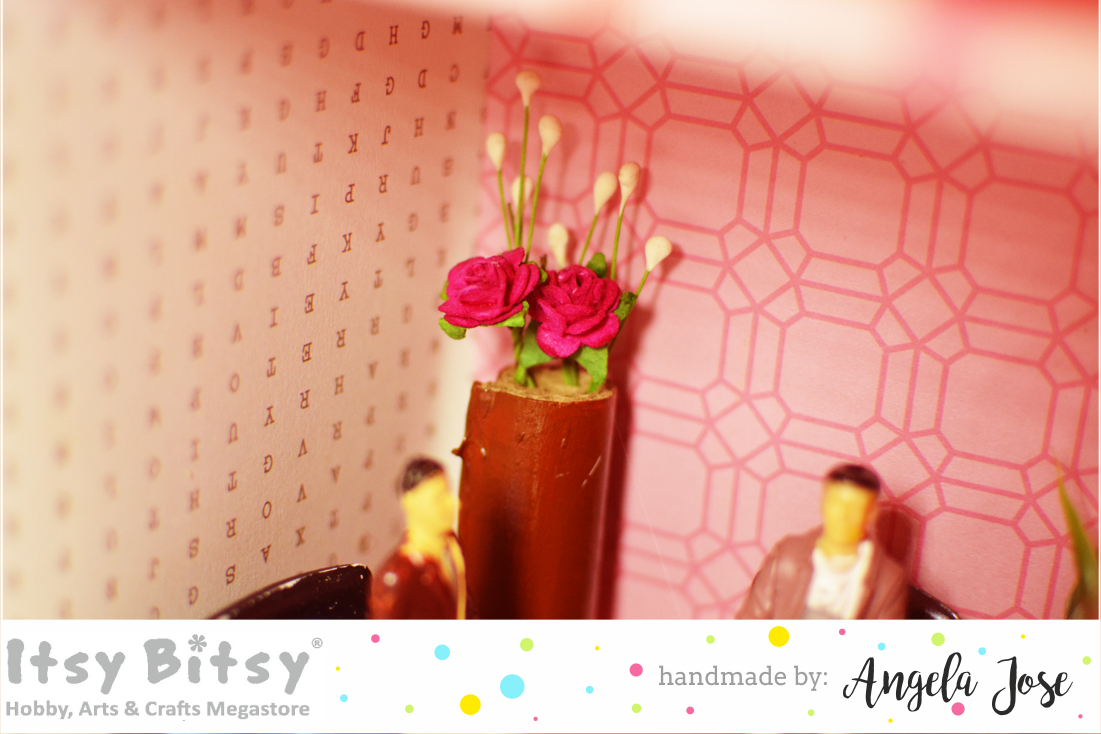
The small flower holder is also handmade by rolling a small sheet of corrugated sheet painted with a shade of brown.
The powder room would’ve been a kitchen had her kitchen set not been bigger than the size of the rooms 🙂 I had this little corner bath tub which my daughter chose to paint purple and orange. Added a wardrobe miniature to fill in the room and also decorated it with curtains.
The room at the bottom was left blank intentionally because I wanted to give my daughter a chance to use her imagination and she parked her cars in them! I asked her if she liked the dollhouse and she said Yes! After playing for a couple of minutes, she came to me and said uncle wants to go to the park! And so I had to create a park too!
I took out another box, this time a little bigger than the one used for the dollhouse and placed the dollhouse to mark the rest of the areas that can be used as park. I painted the base area on either sides with green acrylic paint and for the middle pathway, I used black paint. I also placed bricks chipboard (from Itsybitsy) which were painted brown.

I painted the inner boundary wall with yellow acrylic paint and pasted a colorful pattern paper on the outer wall. The top of the boundary wall was looking shabby after the rough cutting so I used silicon glue to paste red thermocol balls. My daughter was not allowing me to stick them on my own and lend me a helping hand!
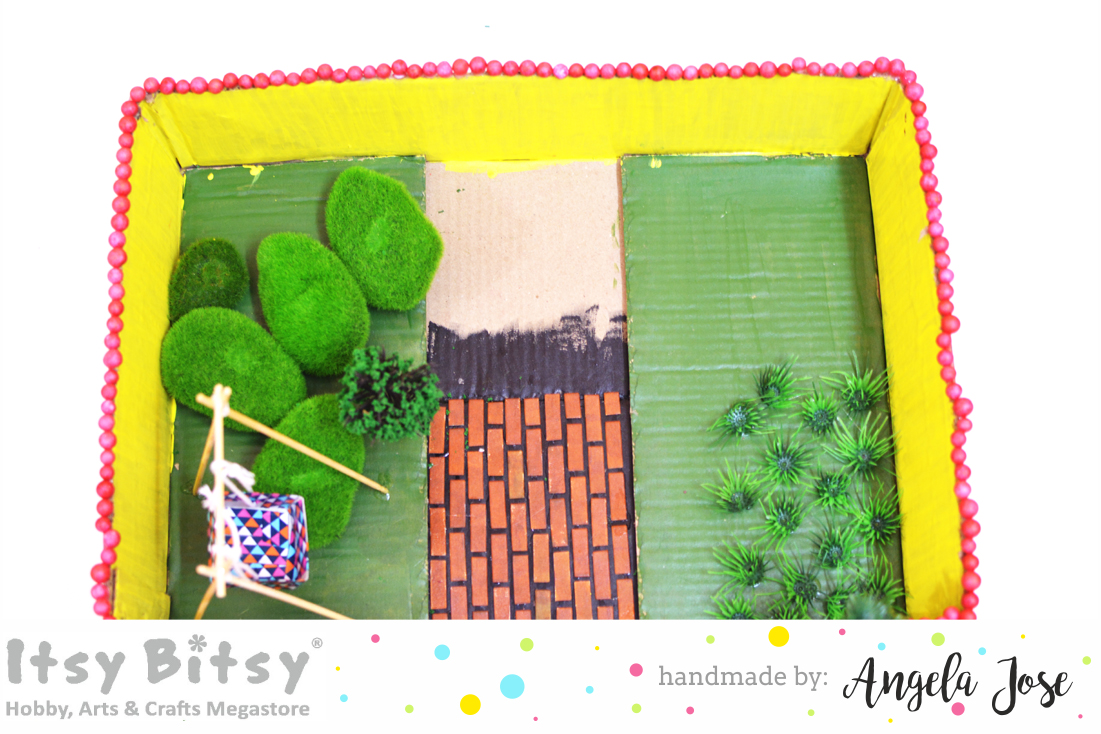
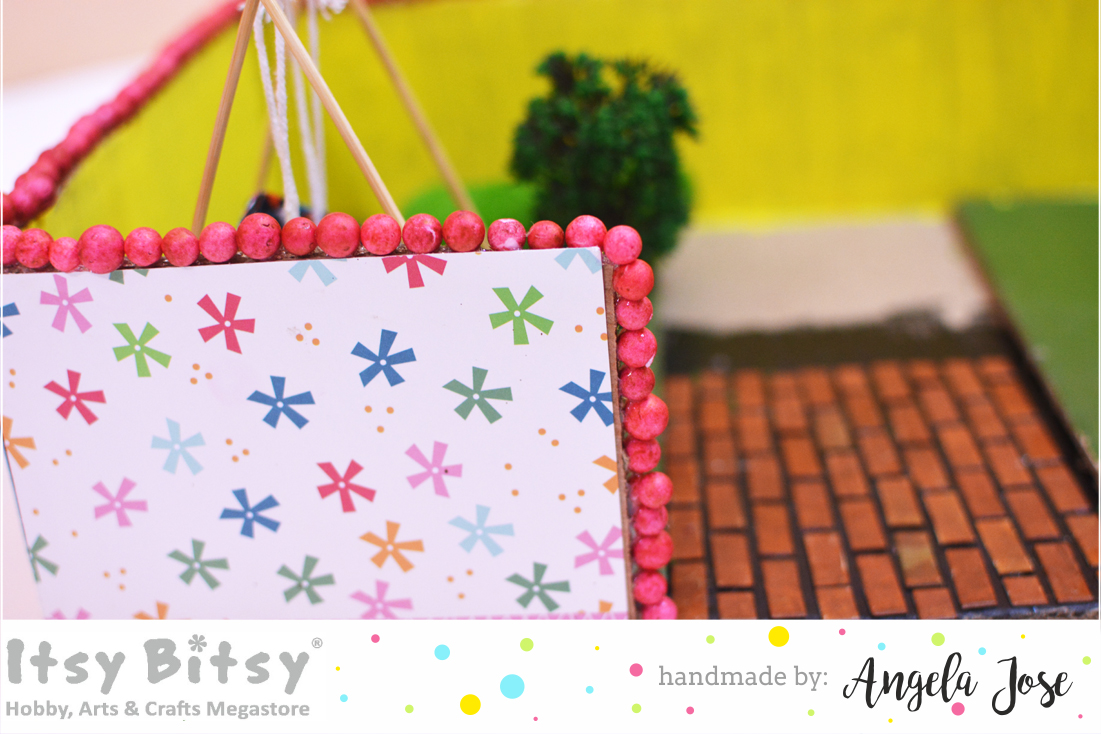
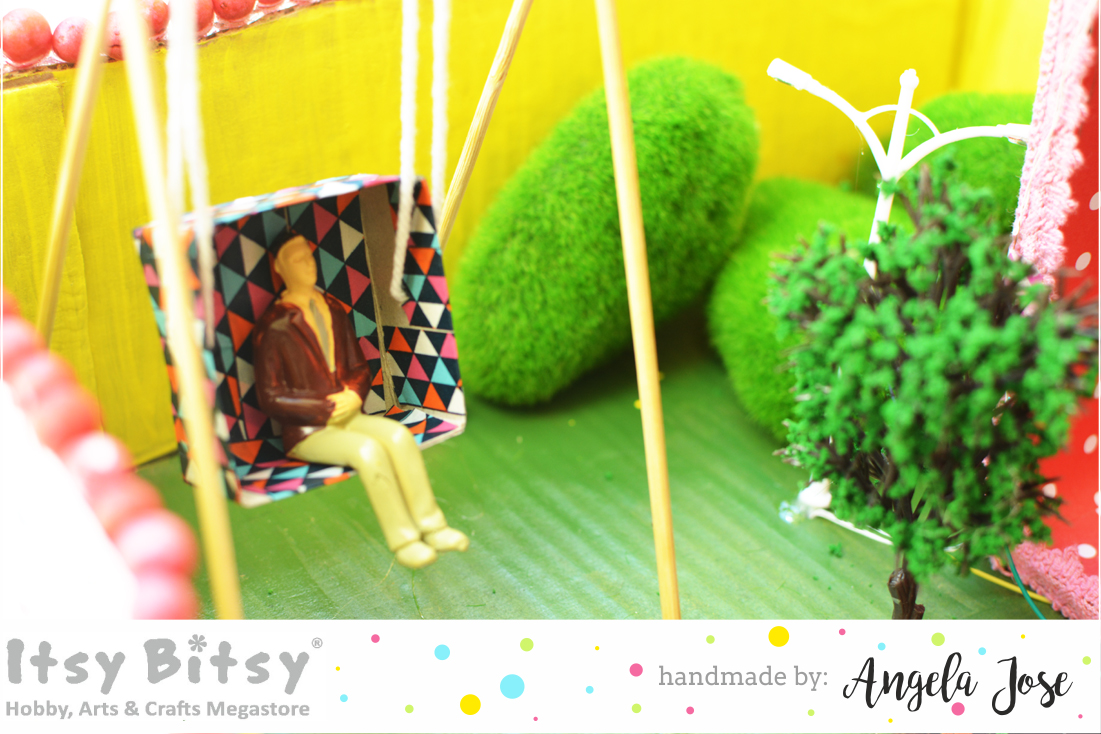
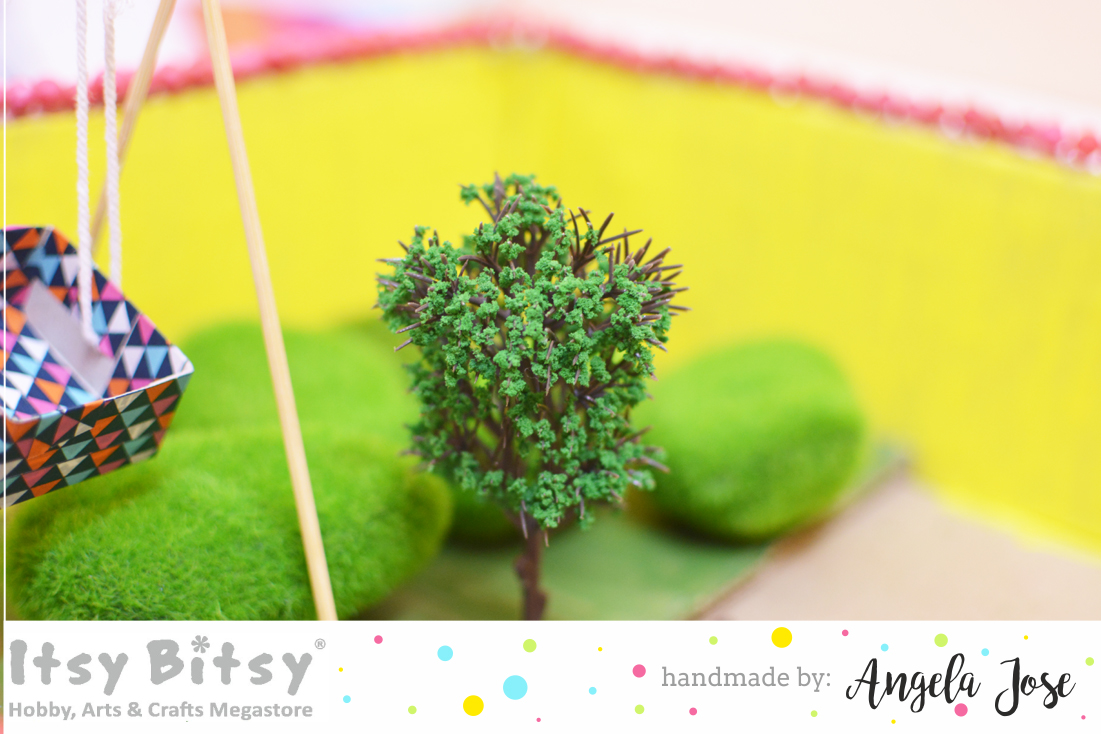
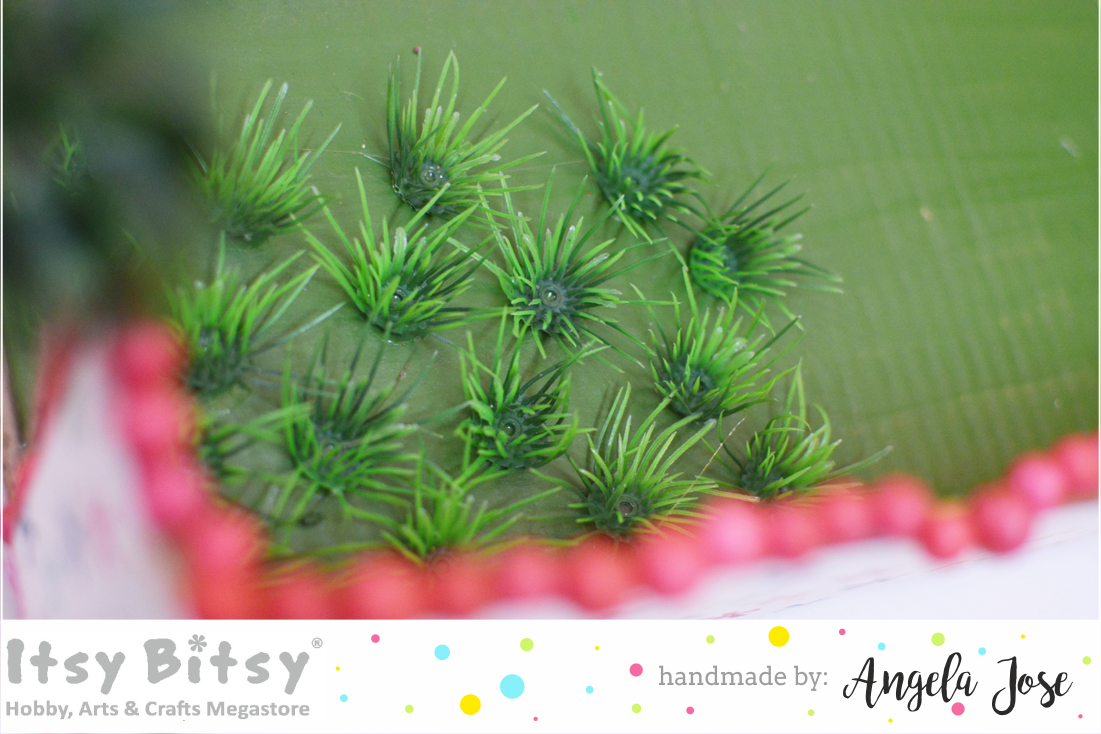
There are quite a lot of plants & tree miniatures available at Itsybitsy. Select whichever you think suits your garden the best. I placed some green moss covered pebbles around the corner and placed a swing beside it. I used skewers from Itsybitsy to make the swing frame and hung a box covered with washi tape as the seater. On the other side of the house, I placed short grasses and a palm tree.
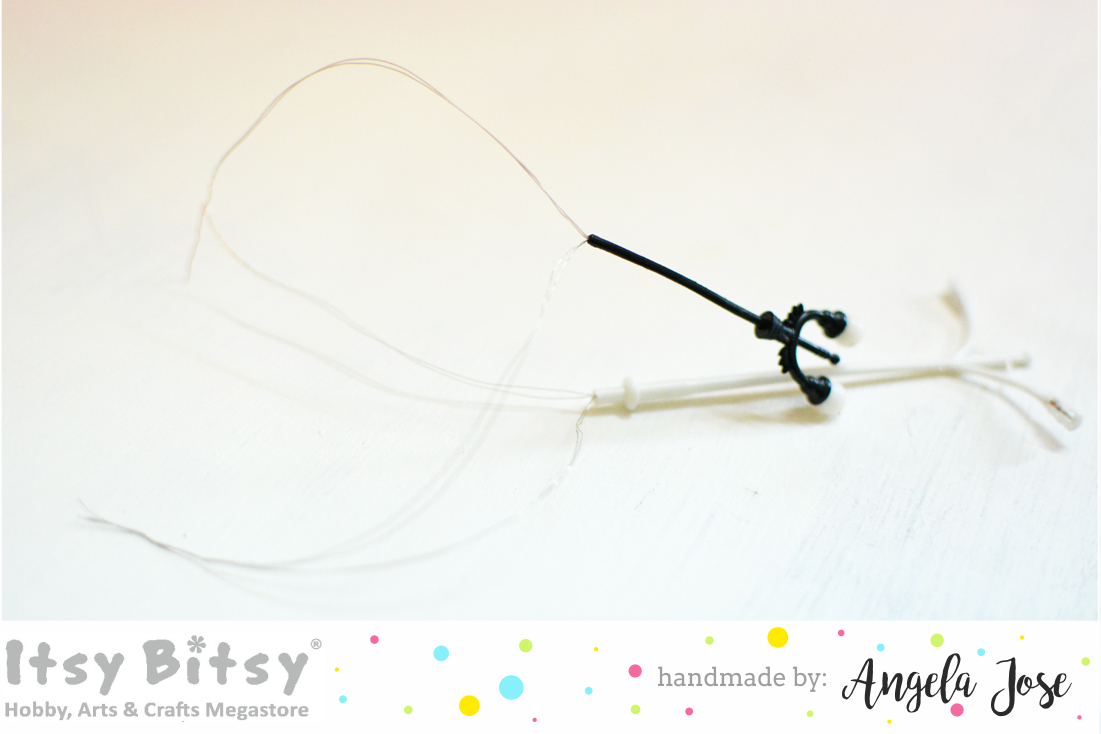
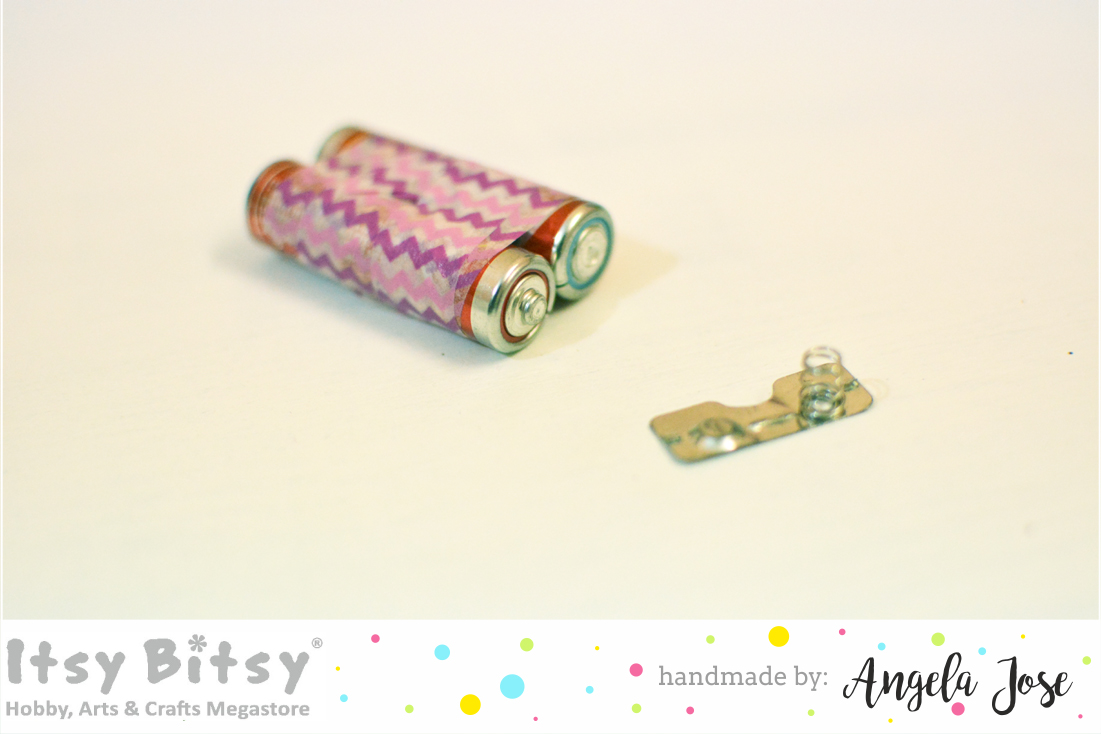
Coming to the lights. I think they are awesome and really difficult to get otherwise. All the lights are twin and mostly street lights, garden lights and their likes. The wire for connection passes through the pole and needs to be connected to a battery source. The lights work well on 4 volts so put two batteries in series and connect the lights. Just a little help on the light connections :
- Each light has two wires – a white one and a silver one , to be connected to negative and positive sides of the battery. The white one is insulated, so just scrape a little using a paper knife and connect the wires to light the bulb.
- Each of the battery has a side with popped metal part which is the positive terminal and a flat side which is the negative terminal. Just place the white wire on one side and silver on the other side to light up each of them. The light might not be bright enough so you need to add another battery by connecting in series ie. connecting positive of one battery to negative of the second battery. If you can get a metal part like this ( I removed one from old battery operated toy), you can connect them side to side.
- For connecting more than one light to the same battery source, parallel all your white wires together and silver wires together. Connect these to the positive and negative terminal of the battery – which wire goes to which side is immaterial.
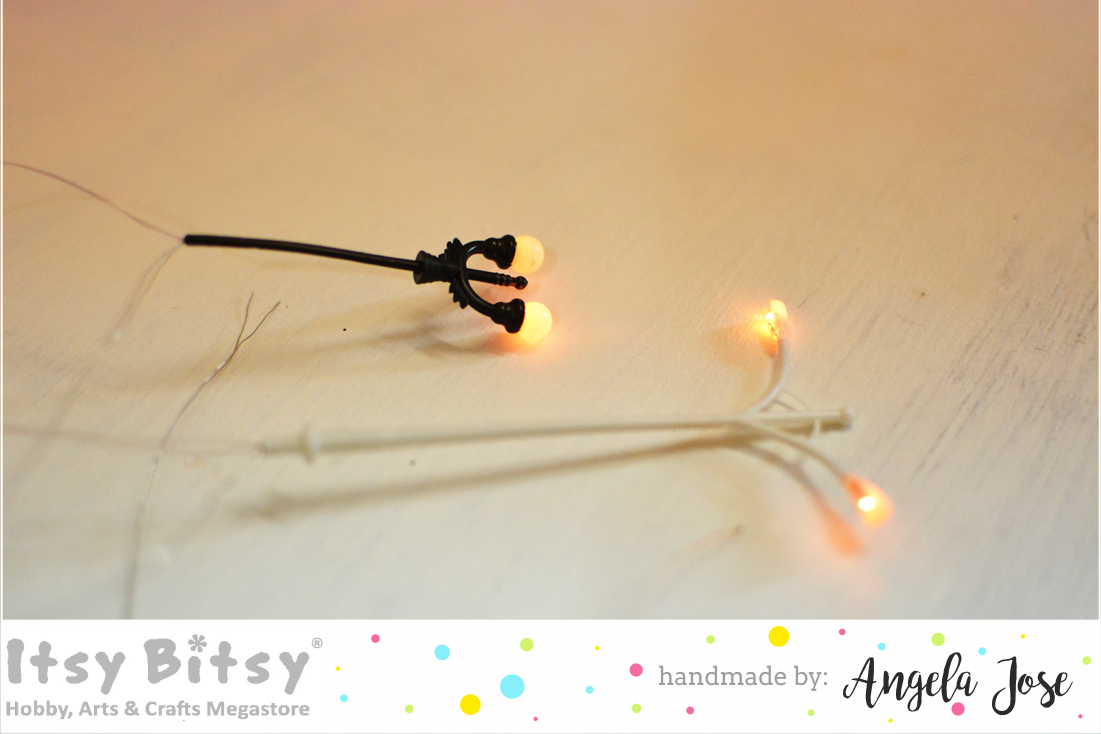
I placed my lights at four locations- 2 street lights outside and 2 garden lights inside the house. Aren’t they pretty ?
Hope you liked this tutorial. I loved making this DIY Dollhouse with my daughter. And I am just hoping I don’t have to come back from office only to rebuild it after her plays! I am sure you too will have a nice time with your kids making this dollhouse. Have a nice day!
Supplies used :


So Cute!!! 🙂
Hey Patricia!Thankyou so much! Glad you liked this dollhouse 🙂
Hi Angela,
That is such a cute dollhouse. I am amazed at the effort and thoughtfulness that went into creating each aspect of it. I came across your blog when searching for Indian DIY craft blogs. Keep up the good work!!
Thankyou so much for the love Julie 🙂